06 · Settings & account
Everything about you and your organization's setup lives here: your profile and how you sign in, what the AI has learned about you, your plan and billing, your teammates and their roles, the security and compliance controls that govern your data, and the connections to your other systems. Settings are grouped into four sections, You, Workspace, Security & compliance, and Connections. Some tabs are visible only to organization owners; each section below says who can see it.
Profile
Where: Settings › You › Profile · /settings/account
Who: everyone
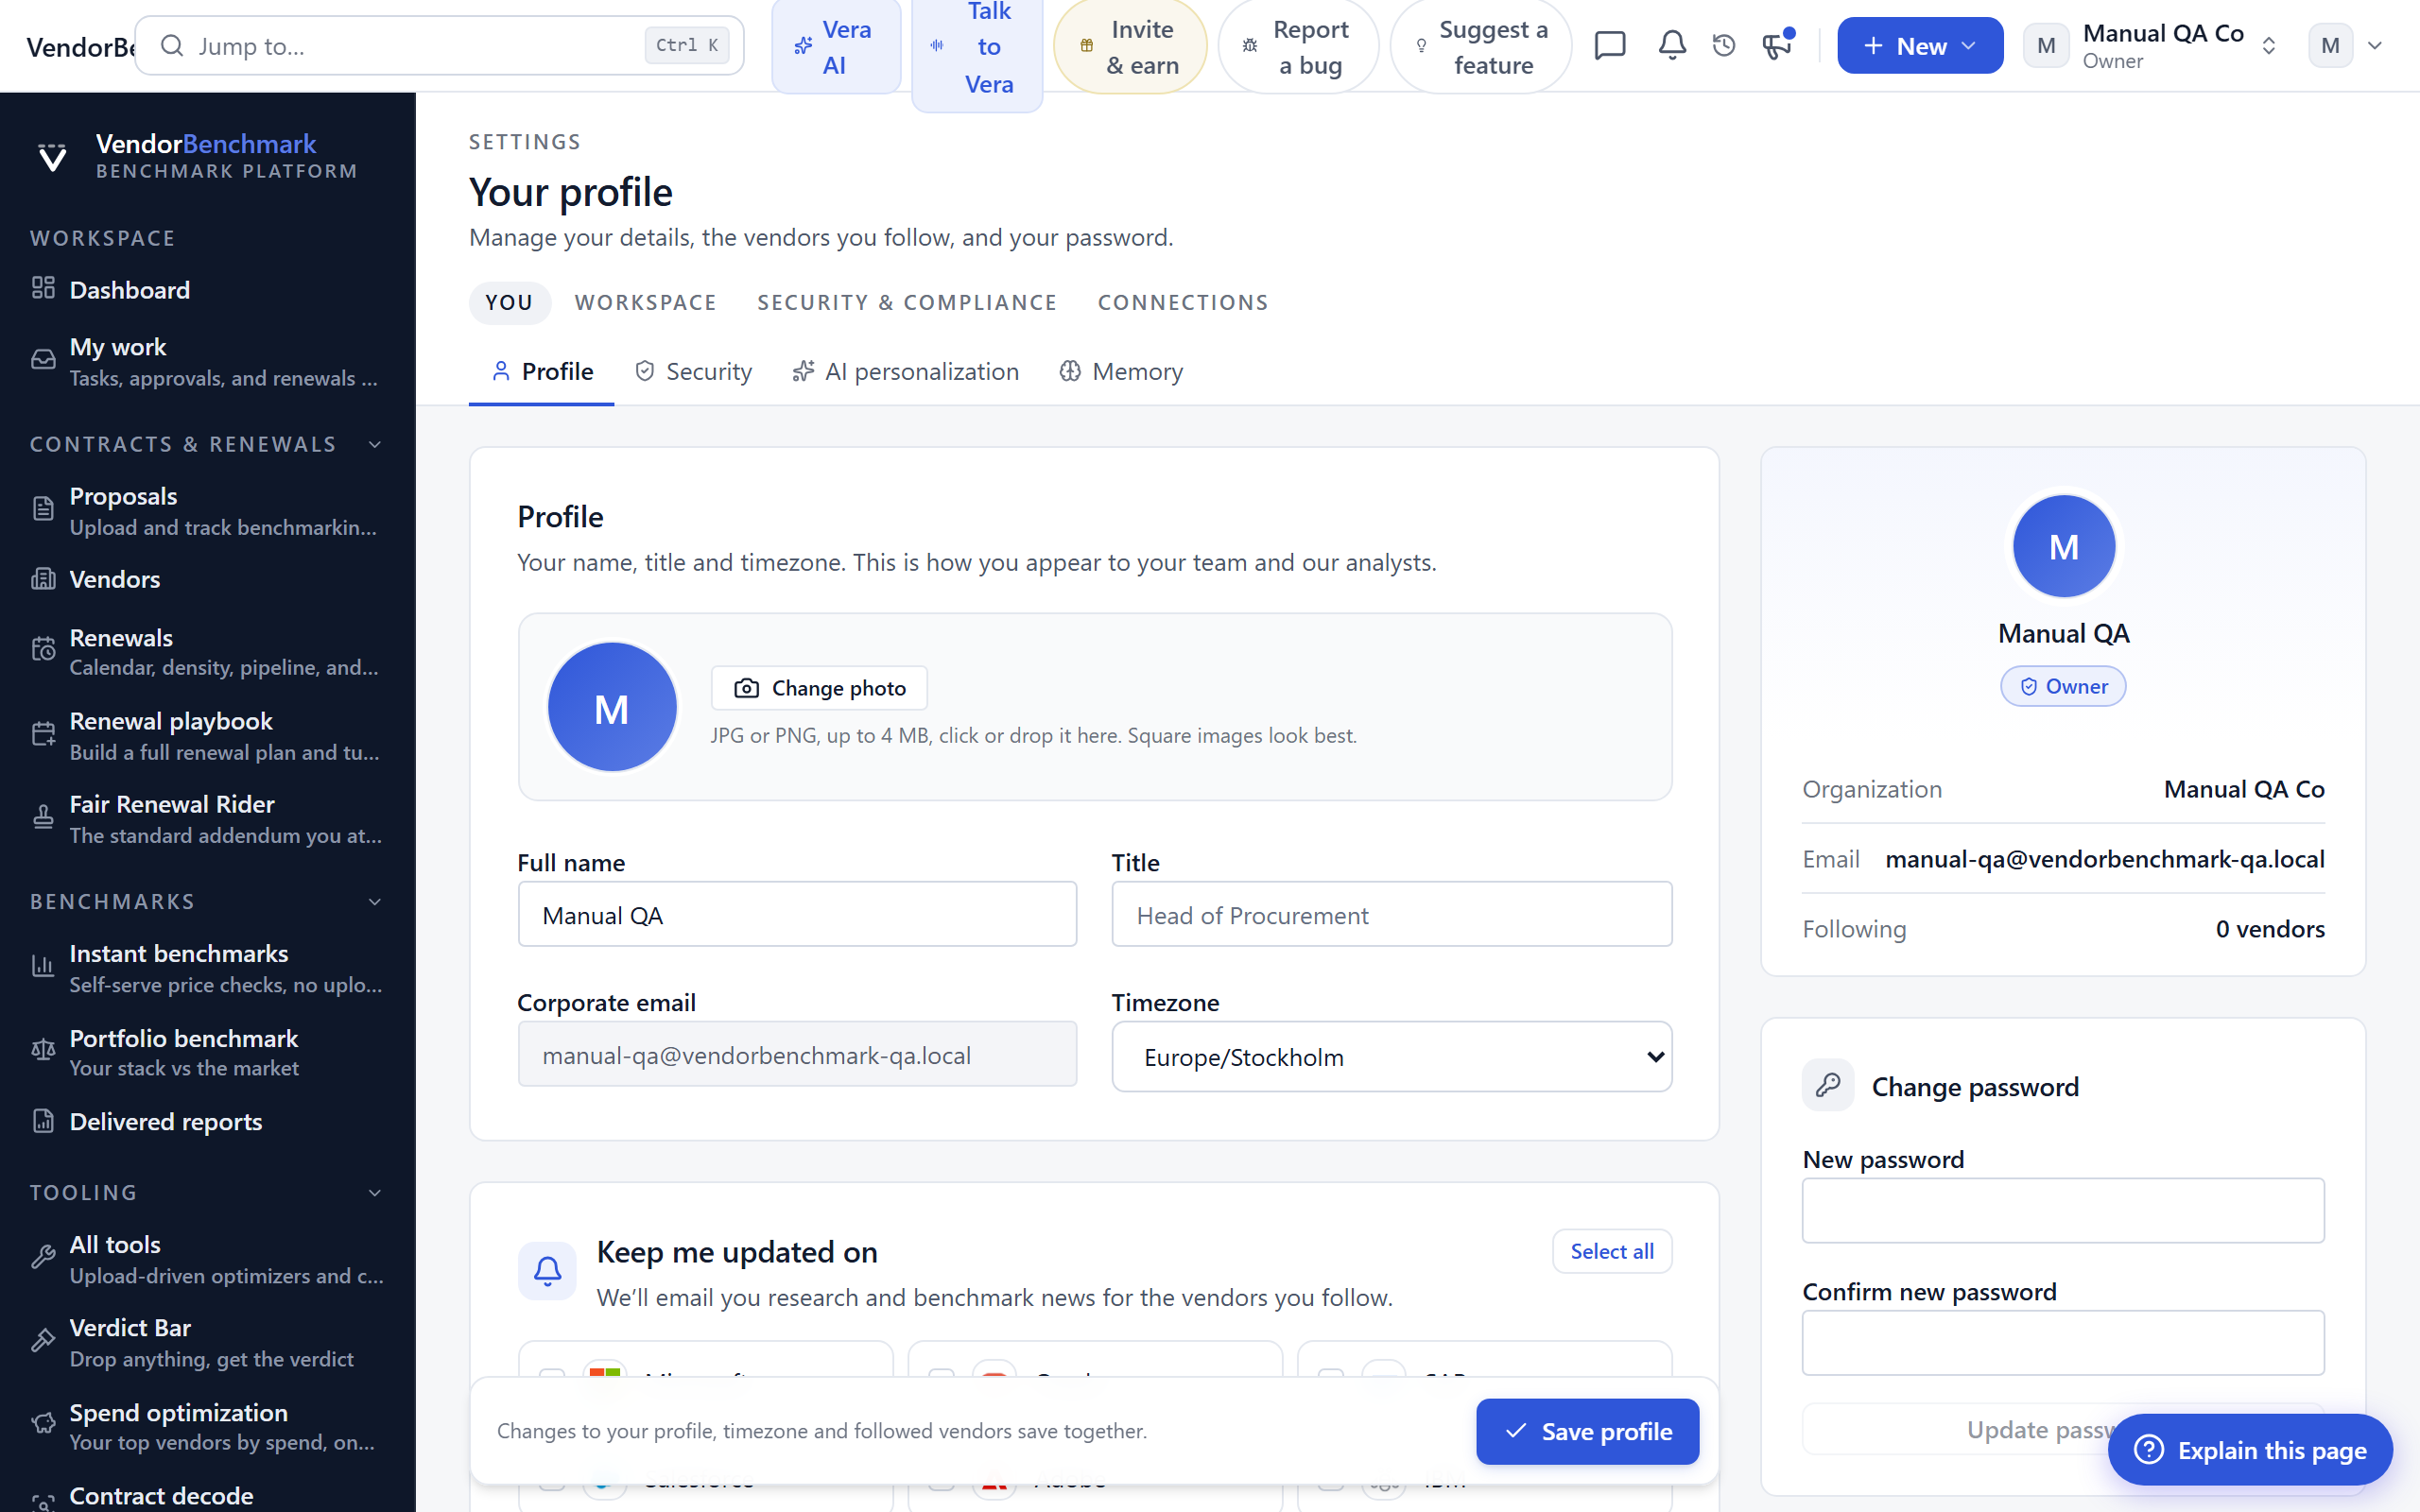
Your personal details: your name, job title, timezone, photo, the vendors you follow, and your password. This is also where you connect your Microsoft account.
On the screen
- Name, title, and timezone — how you appear to teammates and the timezone used for dates and digests.
- Photo — drag an image on or click to upload; used for your avatar across the app.
- Followed vendors — the vendors you want updates about; they drive your weekly report and vendor alerts.
- Newsletter opt-in — turn the product and benchmark newsletter on or off.
- Password — set a new password without leaving the page.
- Microsoft account — connect Microsoft so contract files and calendar data can flow in (when your organization has it configured).
- Invite a colleague — a quick invite card; only owners can actually send invites.
How to use it
- Fill in your name, title, and timezone, then save.
- Add the vendors you care about so your alerts and weekly report are relevant.
- Use Change password to rotate your password whenever you need to.
Security
Where: Settings › You › Security · /settings/security
Who: everyone
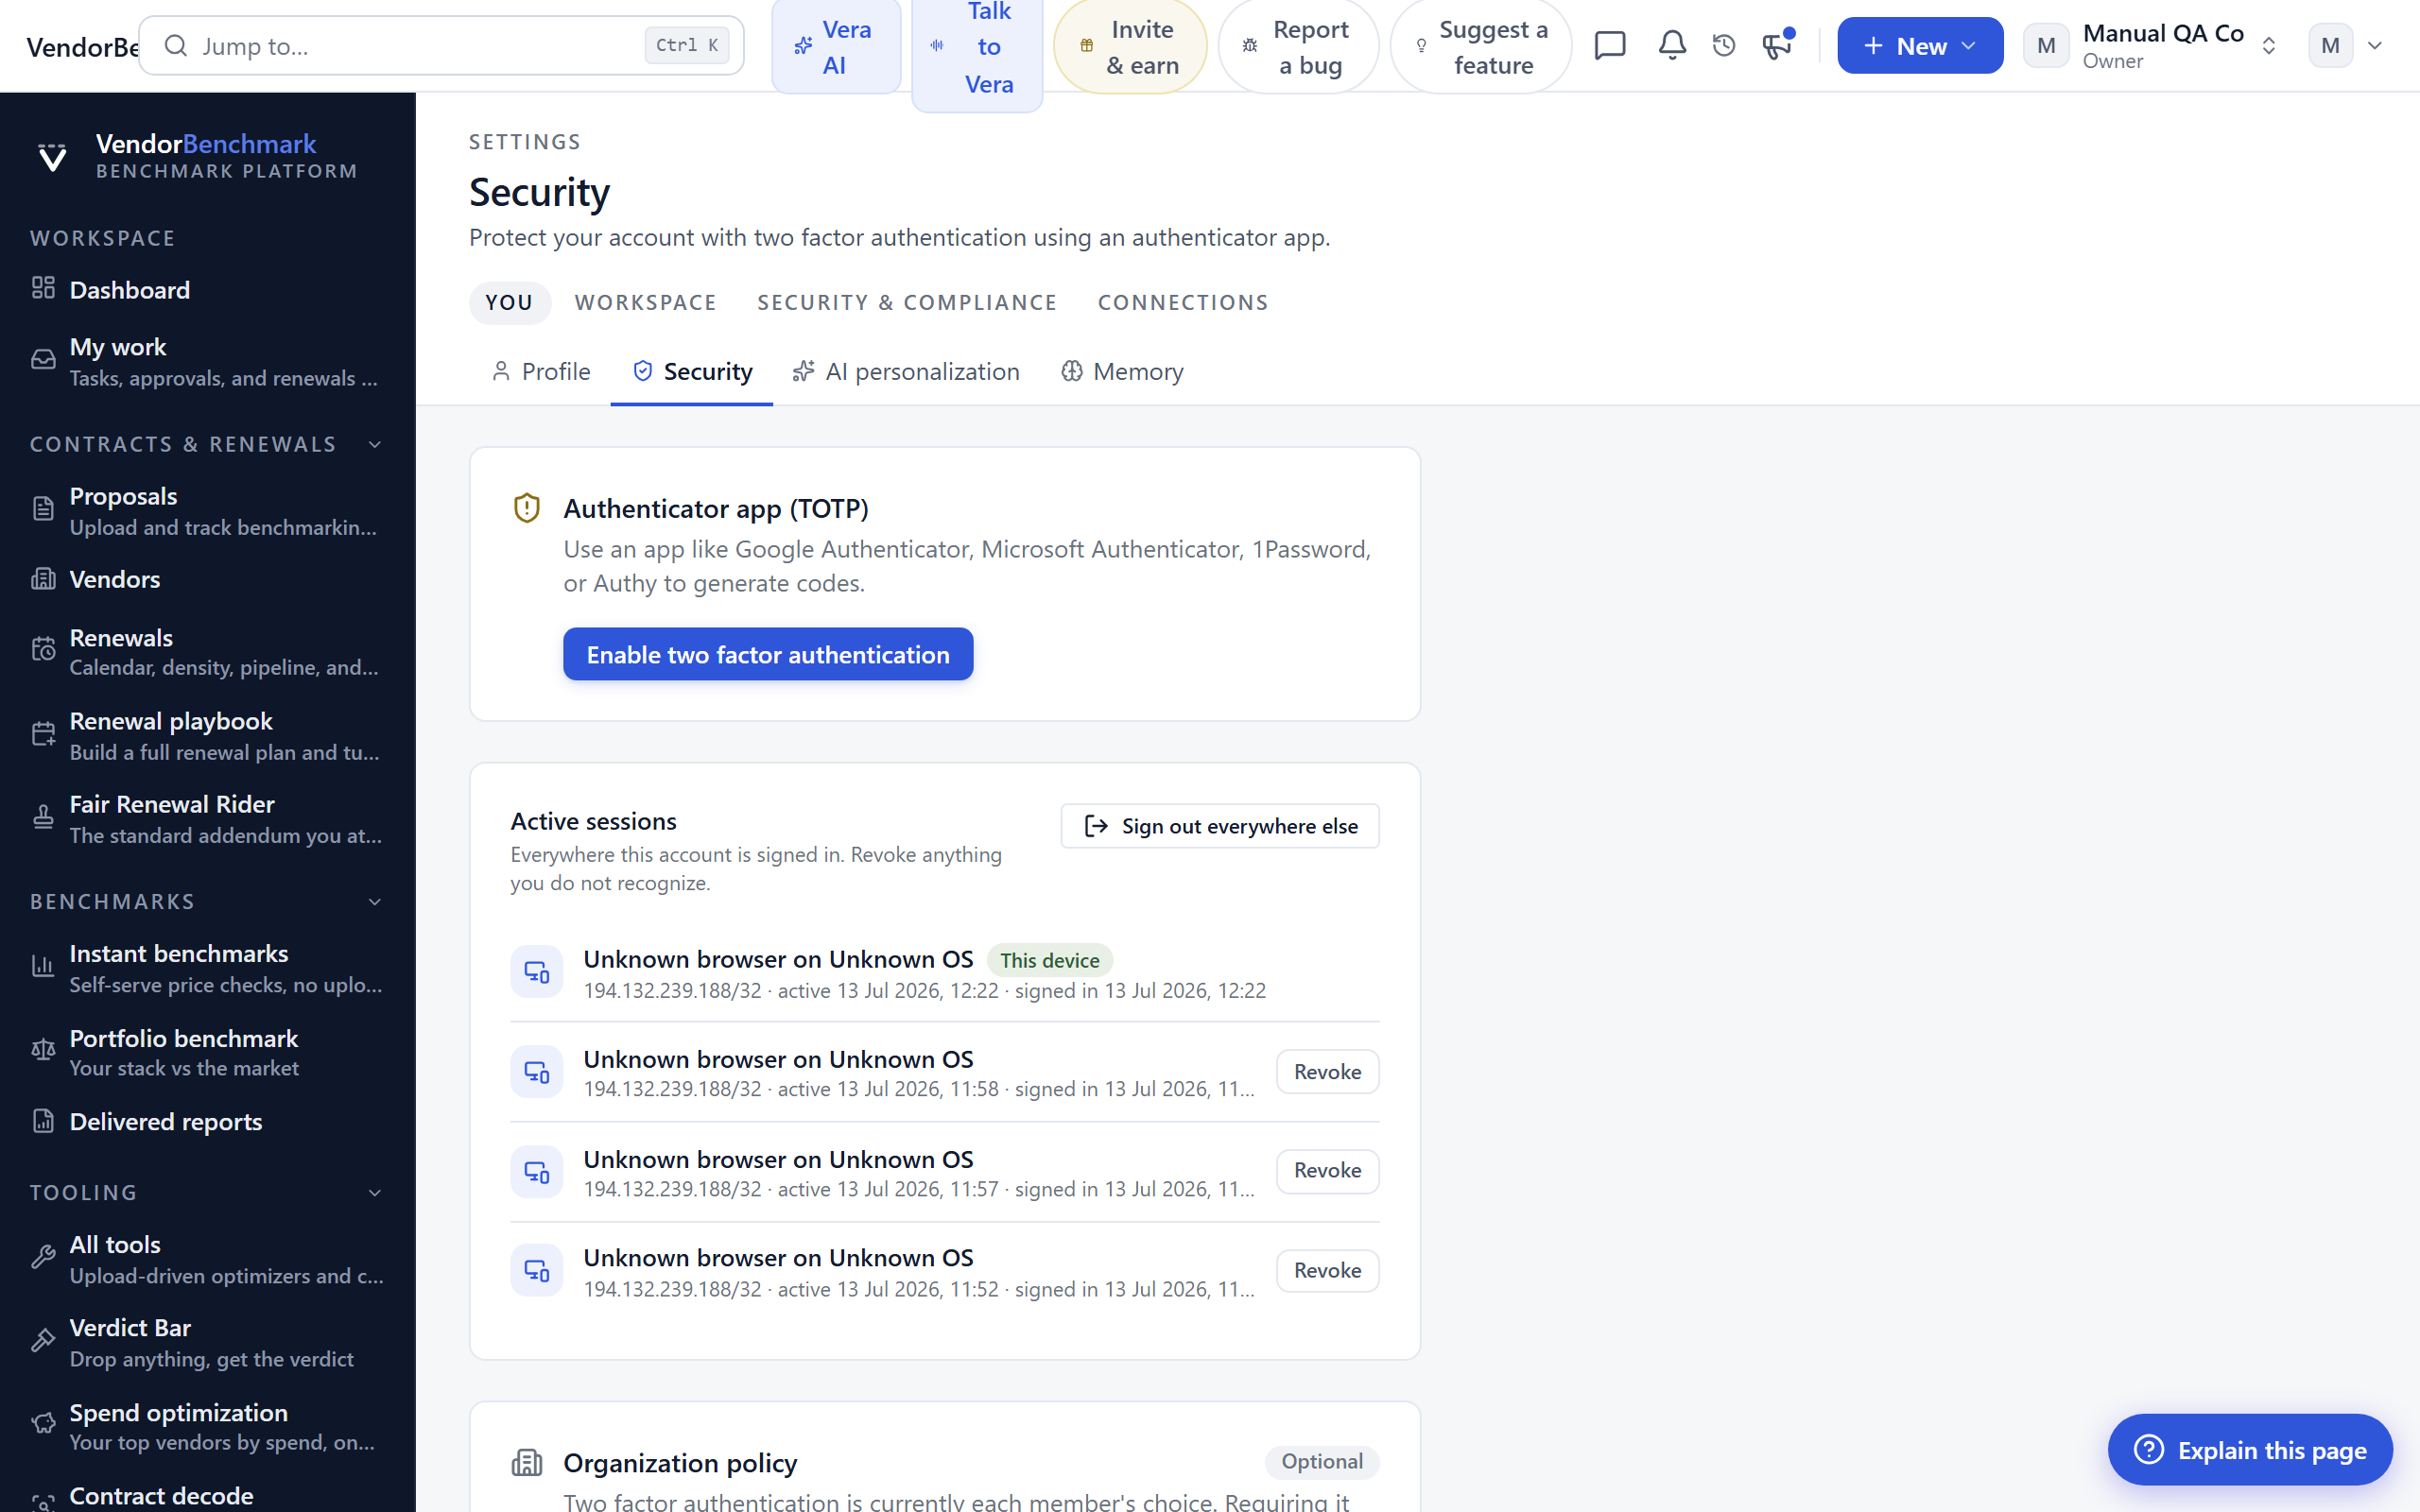
Protect your account with two-factor authentication and see the devices where you are signed in. Owners also set the organization-wide two-factor policy here.
On the screen
- Two-factor authentication — register an authenticator app and turn on the rotating six-digit code required at sign-in.
- Backup codes — one-time recovery codes to use if you lose your authenticator; the count remaining is shown.
- Active sessions — the sessions signed in to your account, with the option to sign out everywhere else.
- Organization policy (owners) — require two-factor for every member of the organization.
How to use it
- Open your authenticator app (Google Authenticator, 1Password, Authy, and the like) and scan the code shown.
- Enter the six-digit code to confirm, then save your backup codes somewhere safe.
- Review active sessions and sign out any you do not recognize.
Tips
- Turning on two-factor is the single highest-value thing you can do for your account. If your organization requires it, you will be held here until you set it up.
Related: Security Center · Two-factor authentication
AI personalization
Where: Settings › You › AI personalization · /settings/ai
Who: everyone
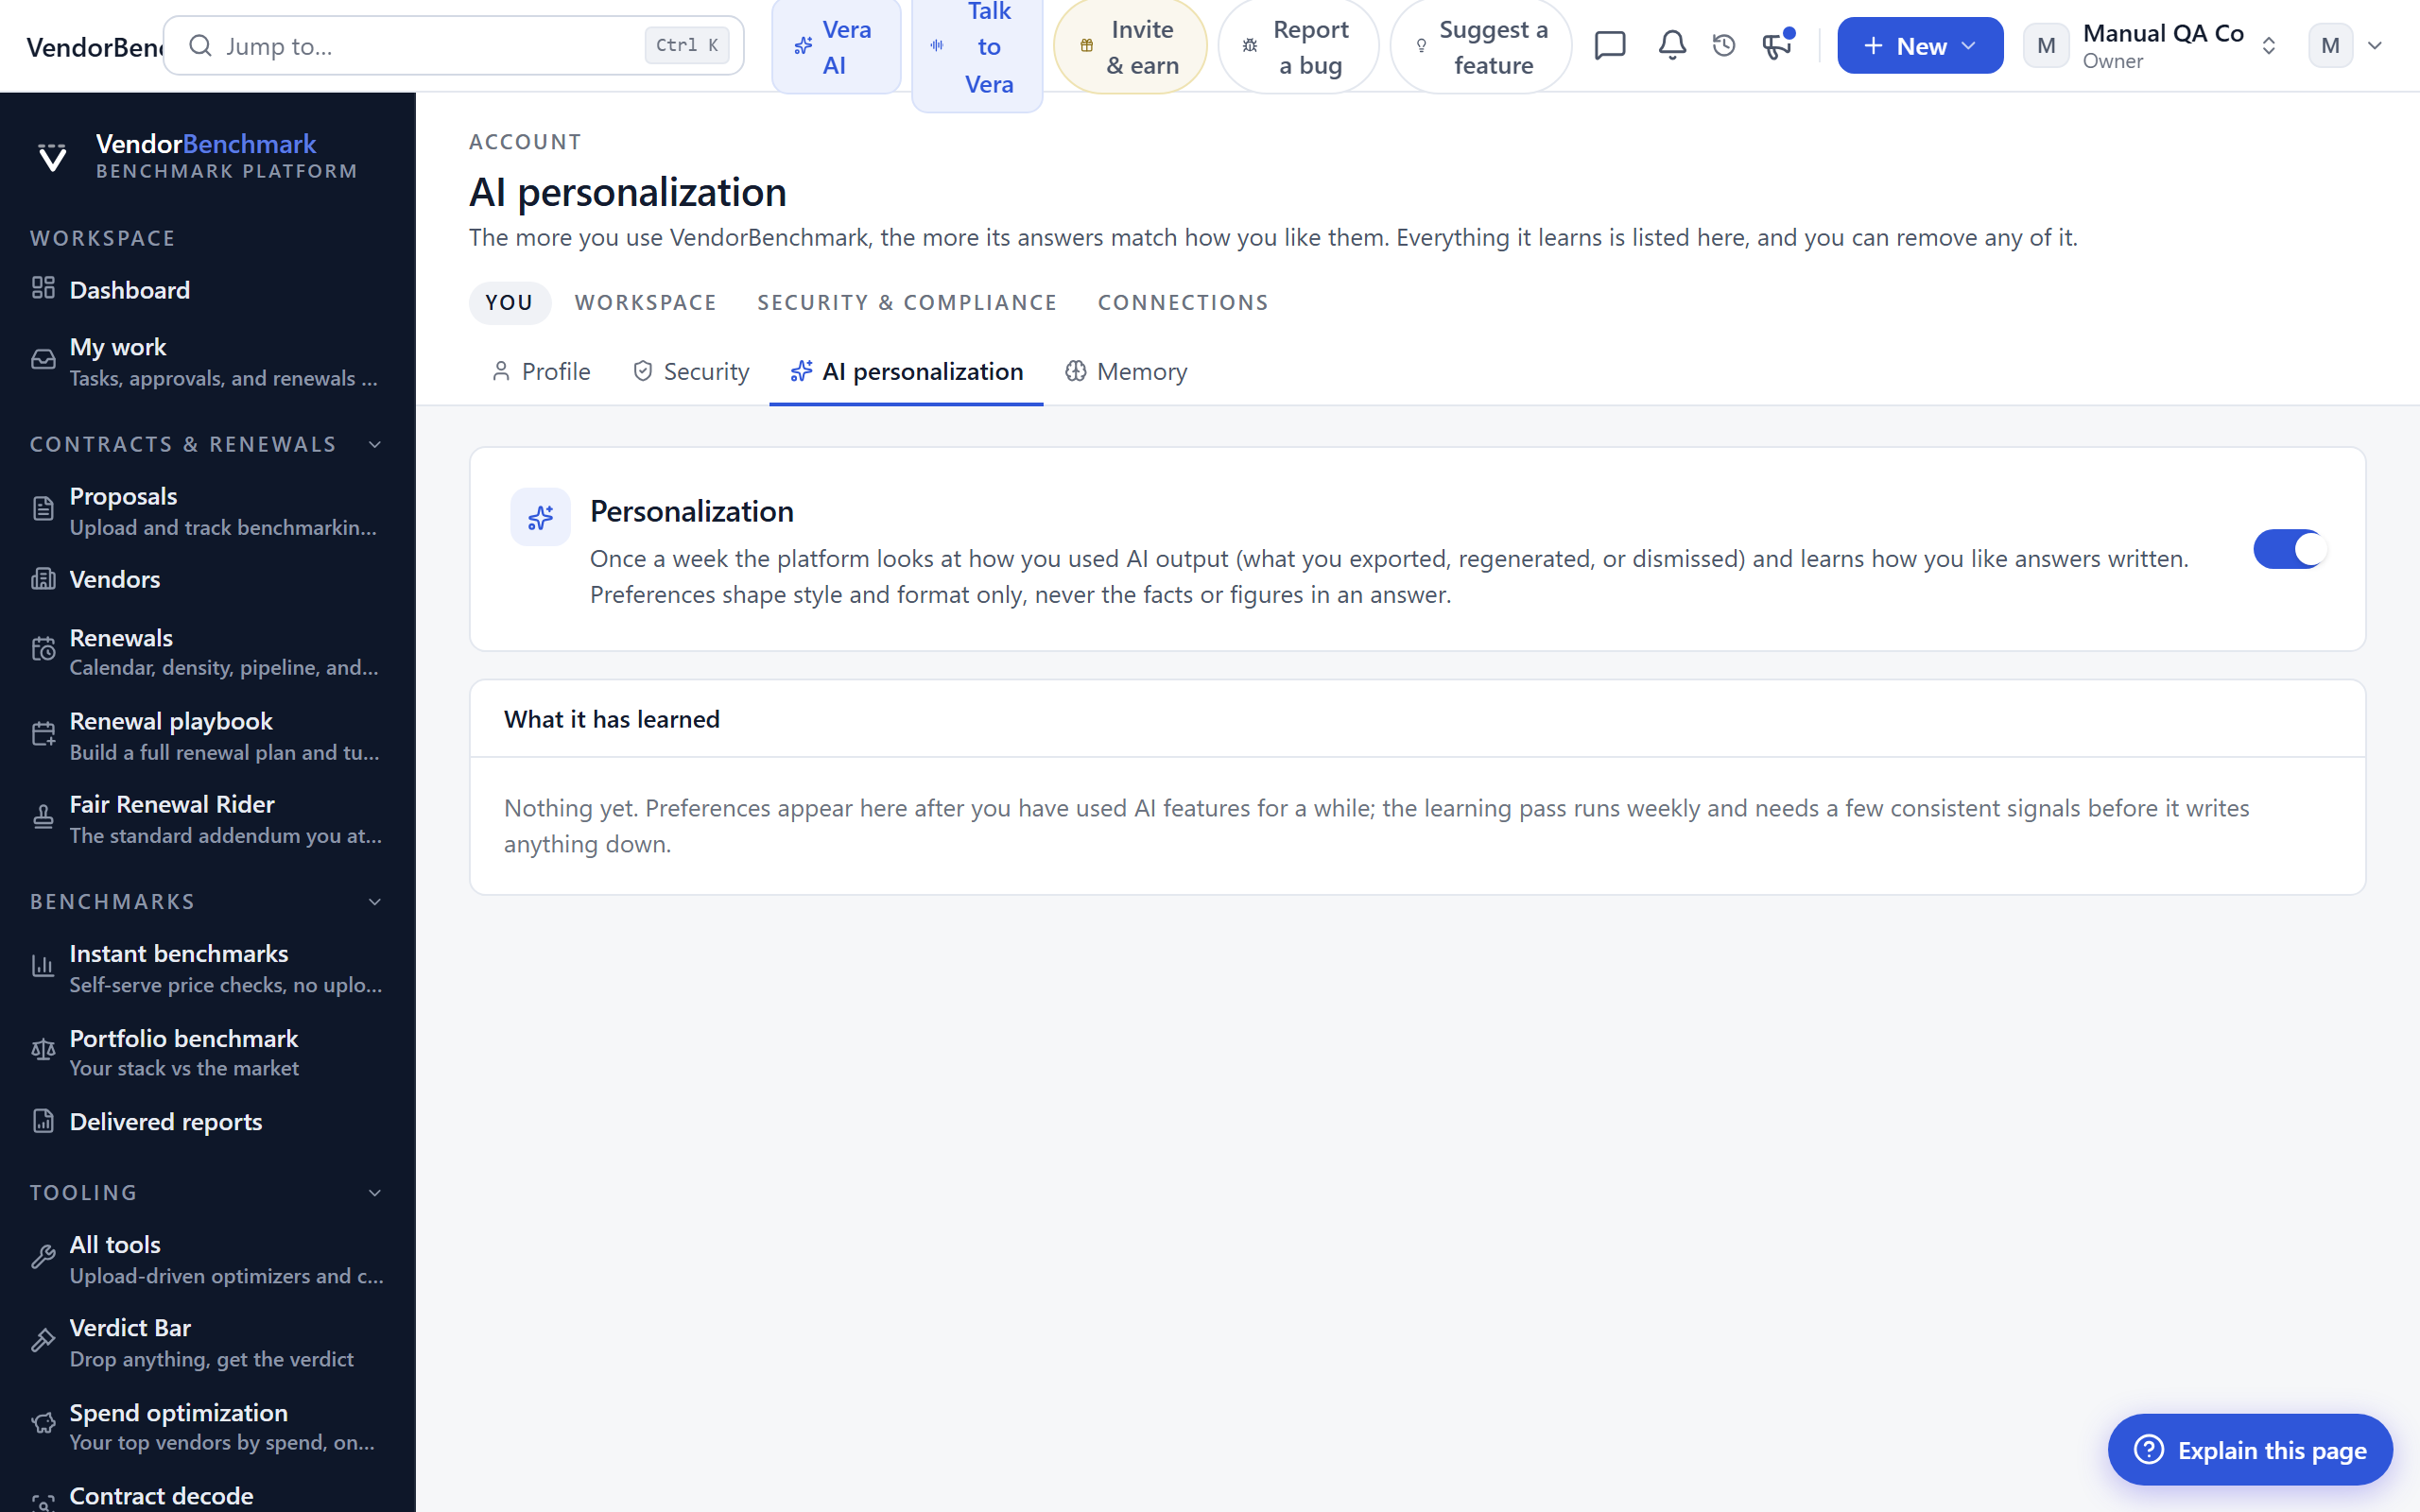
What the platform has learned about how you like output, in plain language and fully under your control. The more you use VendorBenchmark, the more its answers match your preferences.
On the screen
- Learned preferences — each thing the AI has picked up about how you like answers, newest first.
- Remove — delete any single preference; it stops shaping your answers immediately.
How to use it
- Review the list to see what the AI has inferred.
- Remove anything that is wrong or that you would rather it not use.
Tips
- This list is private to you. Your organization's shared negotiation memory is separate, on the Memory tab.
Memory
Where: Settings › You › Memory · /settings/memory
Who: everyone
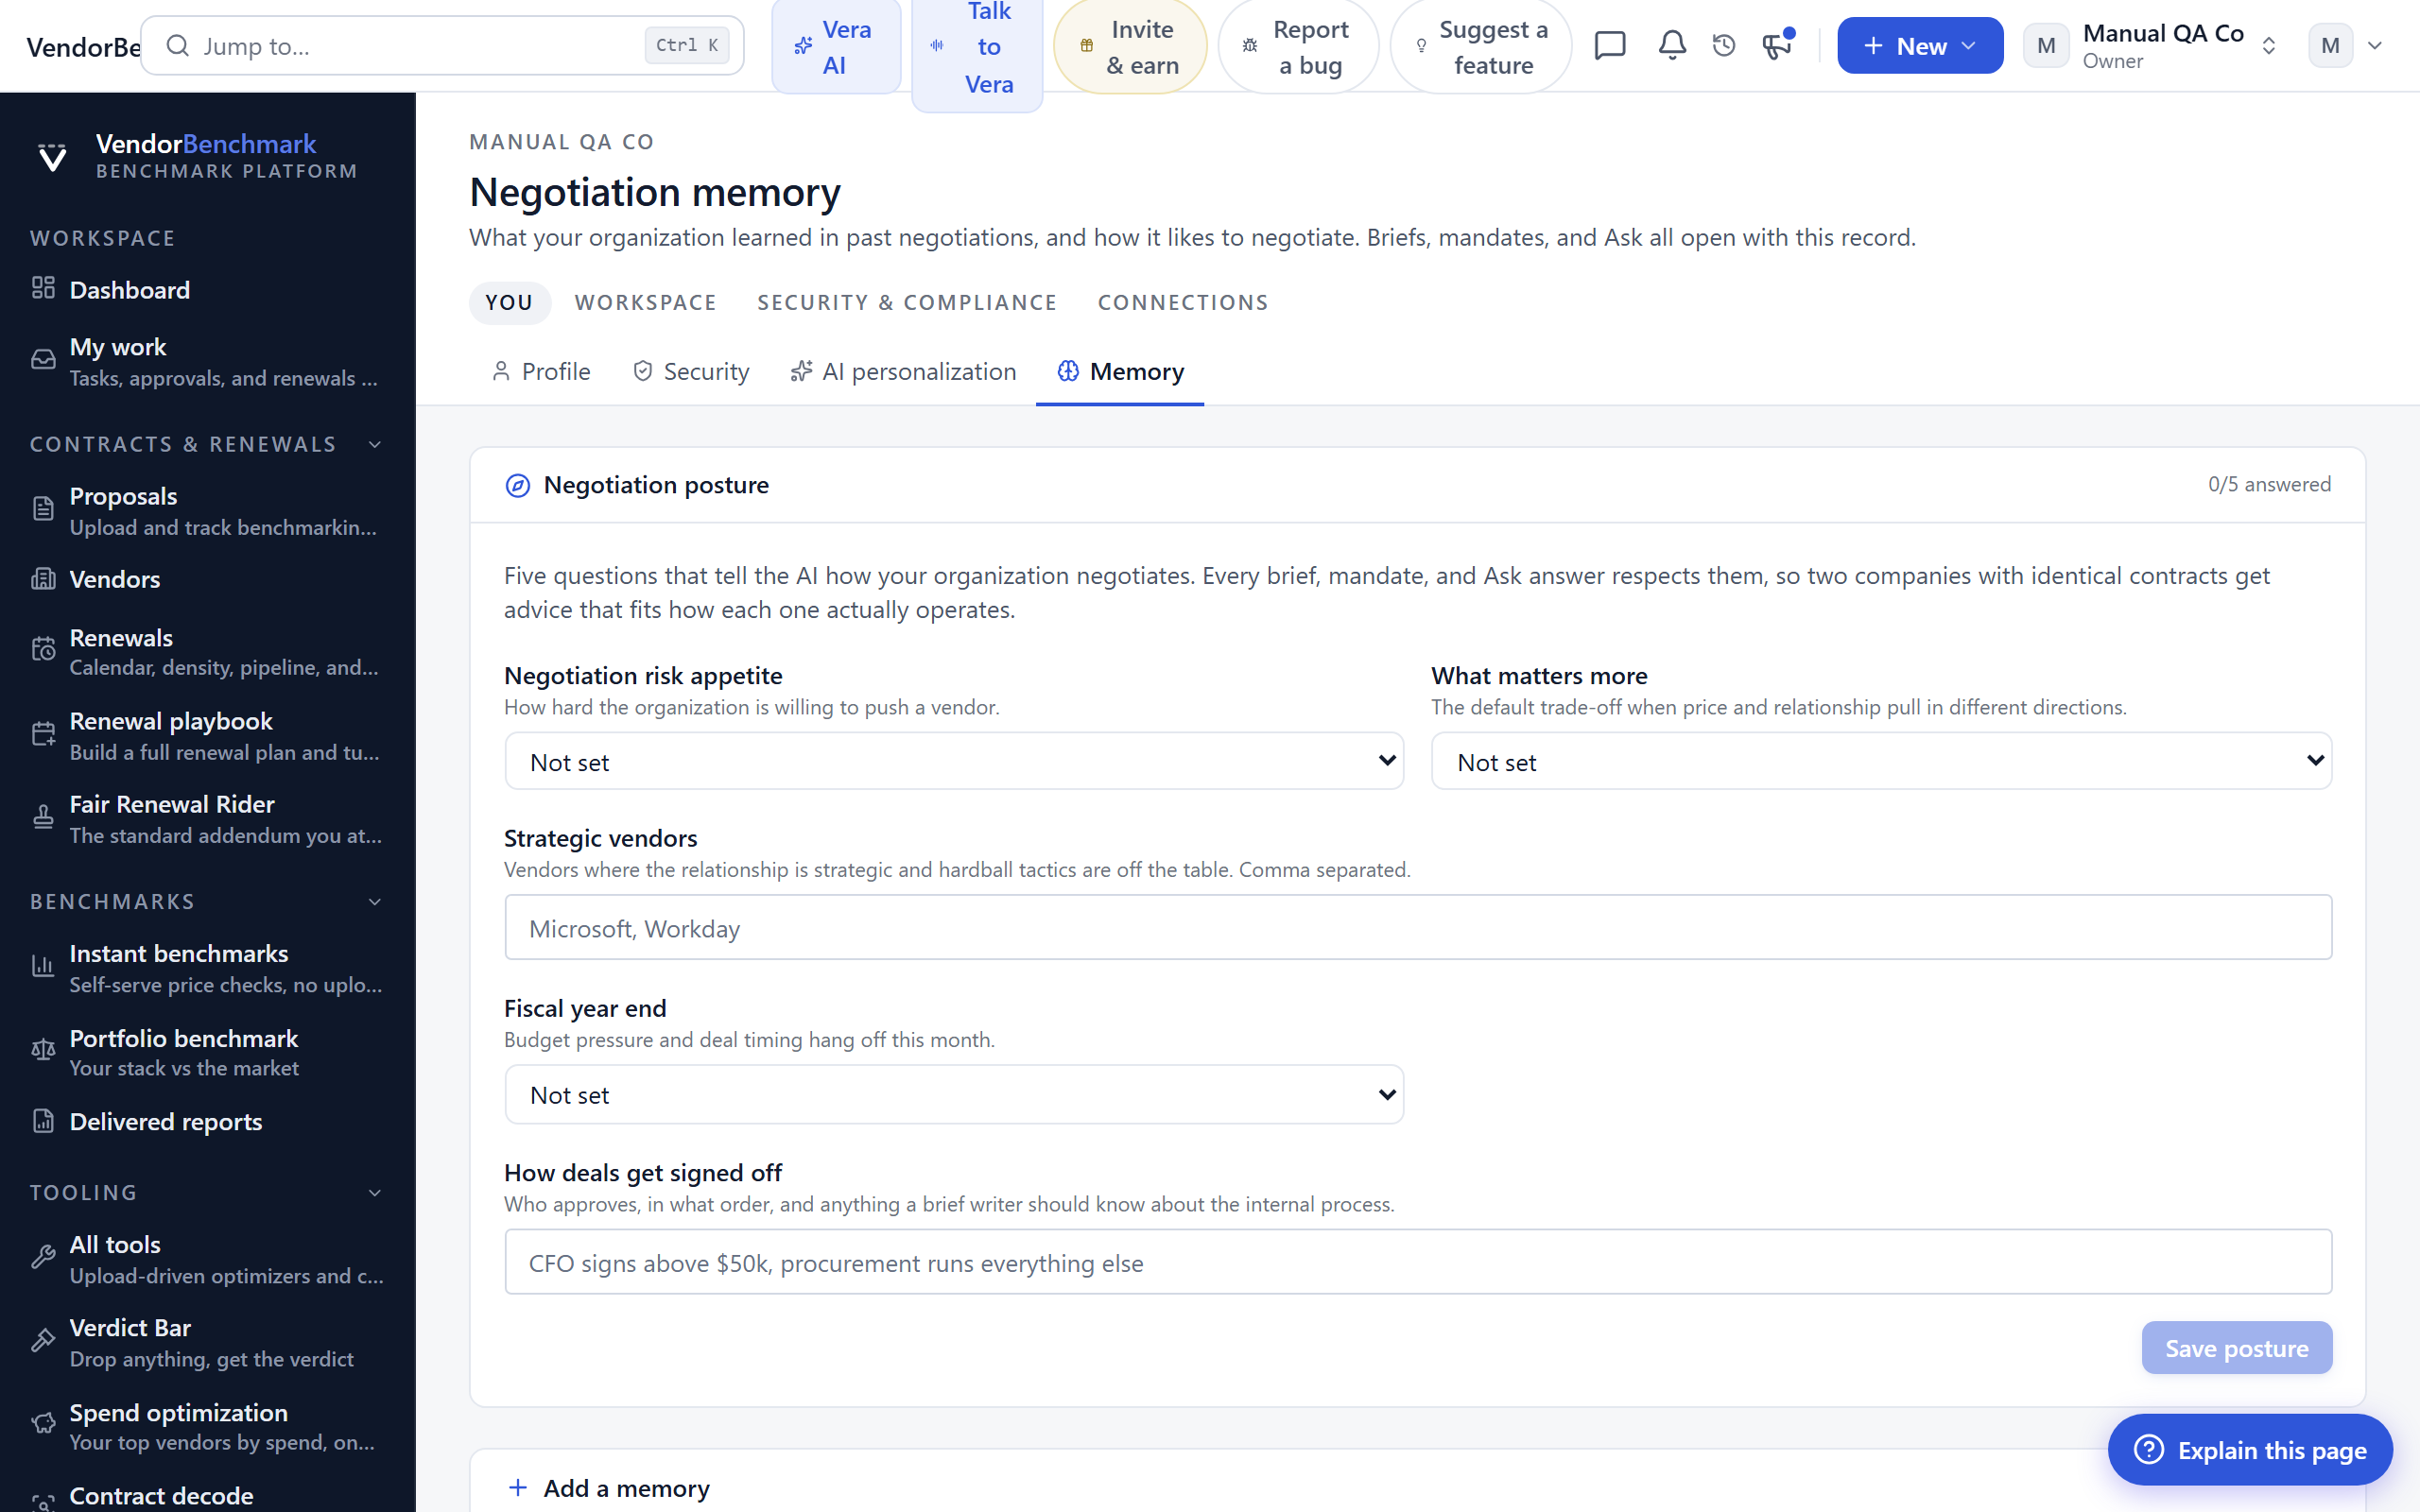
What your organization learned in past negotiations and how it likes to negotiate. Briefs, mandates, and Ask all open with this record, so it is worth keeping current.
On the screen
- Negotiation posture — your organization's stance and preferences, editable by owners.
- Remembered facts — the individual things learned across past negotiations, each of which you can edit or remove.
How to use it
- Check the posture reflects how your organization actually negotiates.
- Prune or correct any remembered fact that is out of date.
Related: AI personalization
Billing
Where: Settings › Workspace › Billing · /settings/billing
Who: everyone (only owners can change the plan or pay)
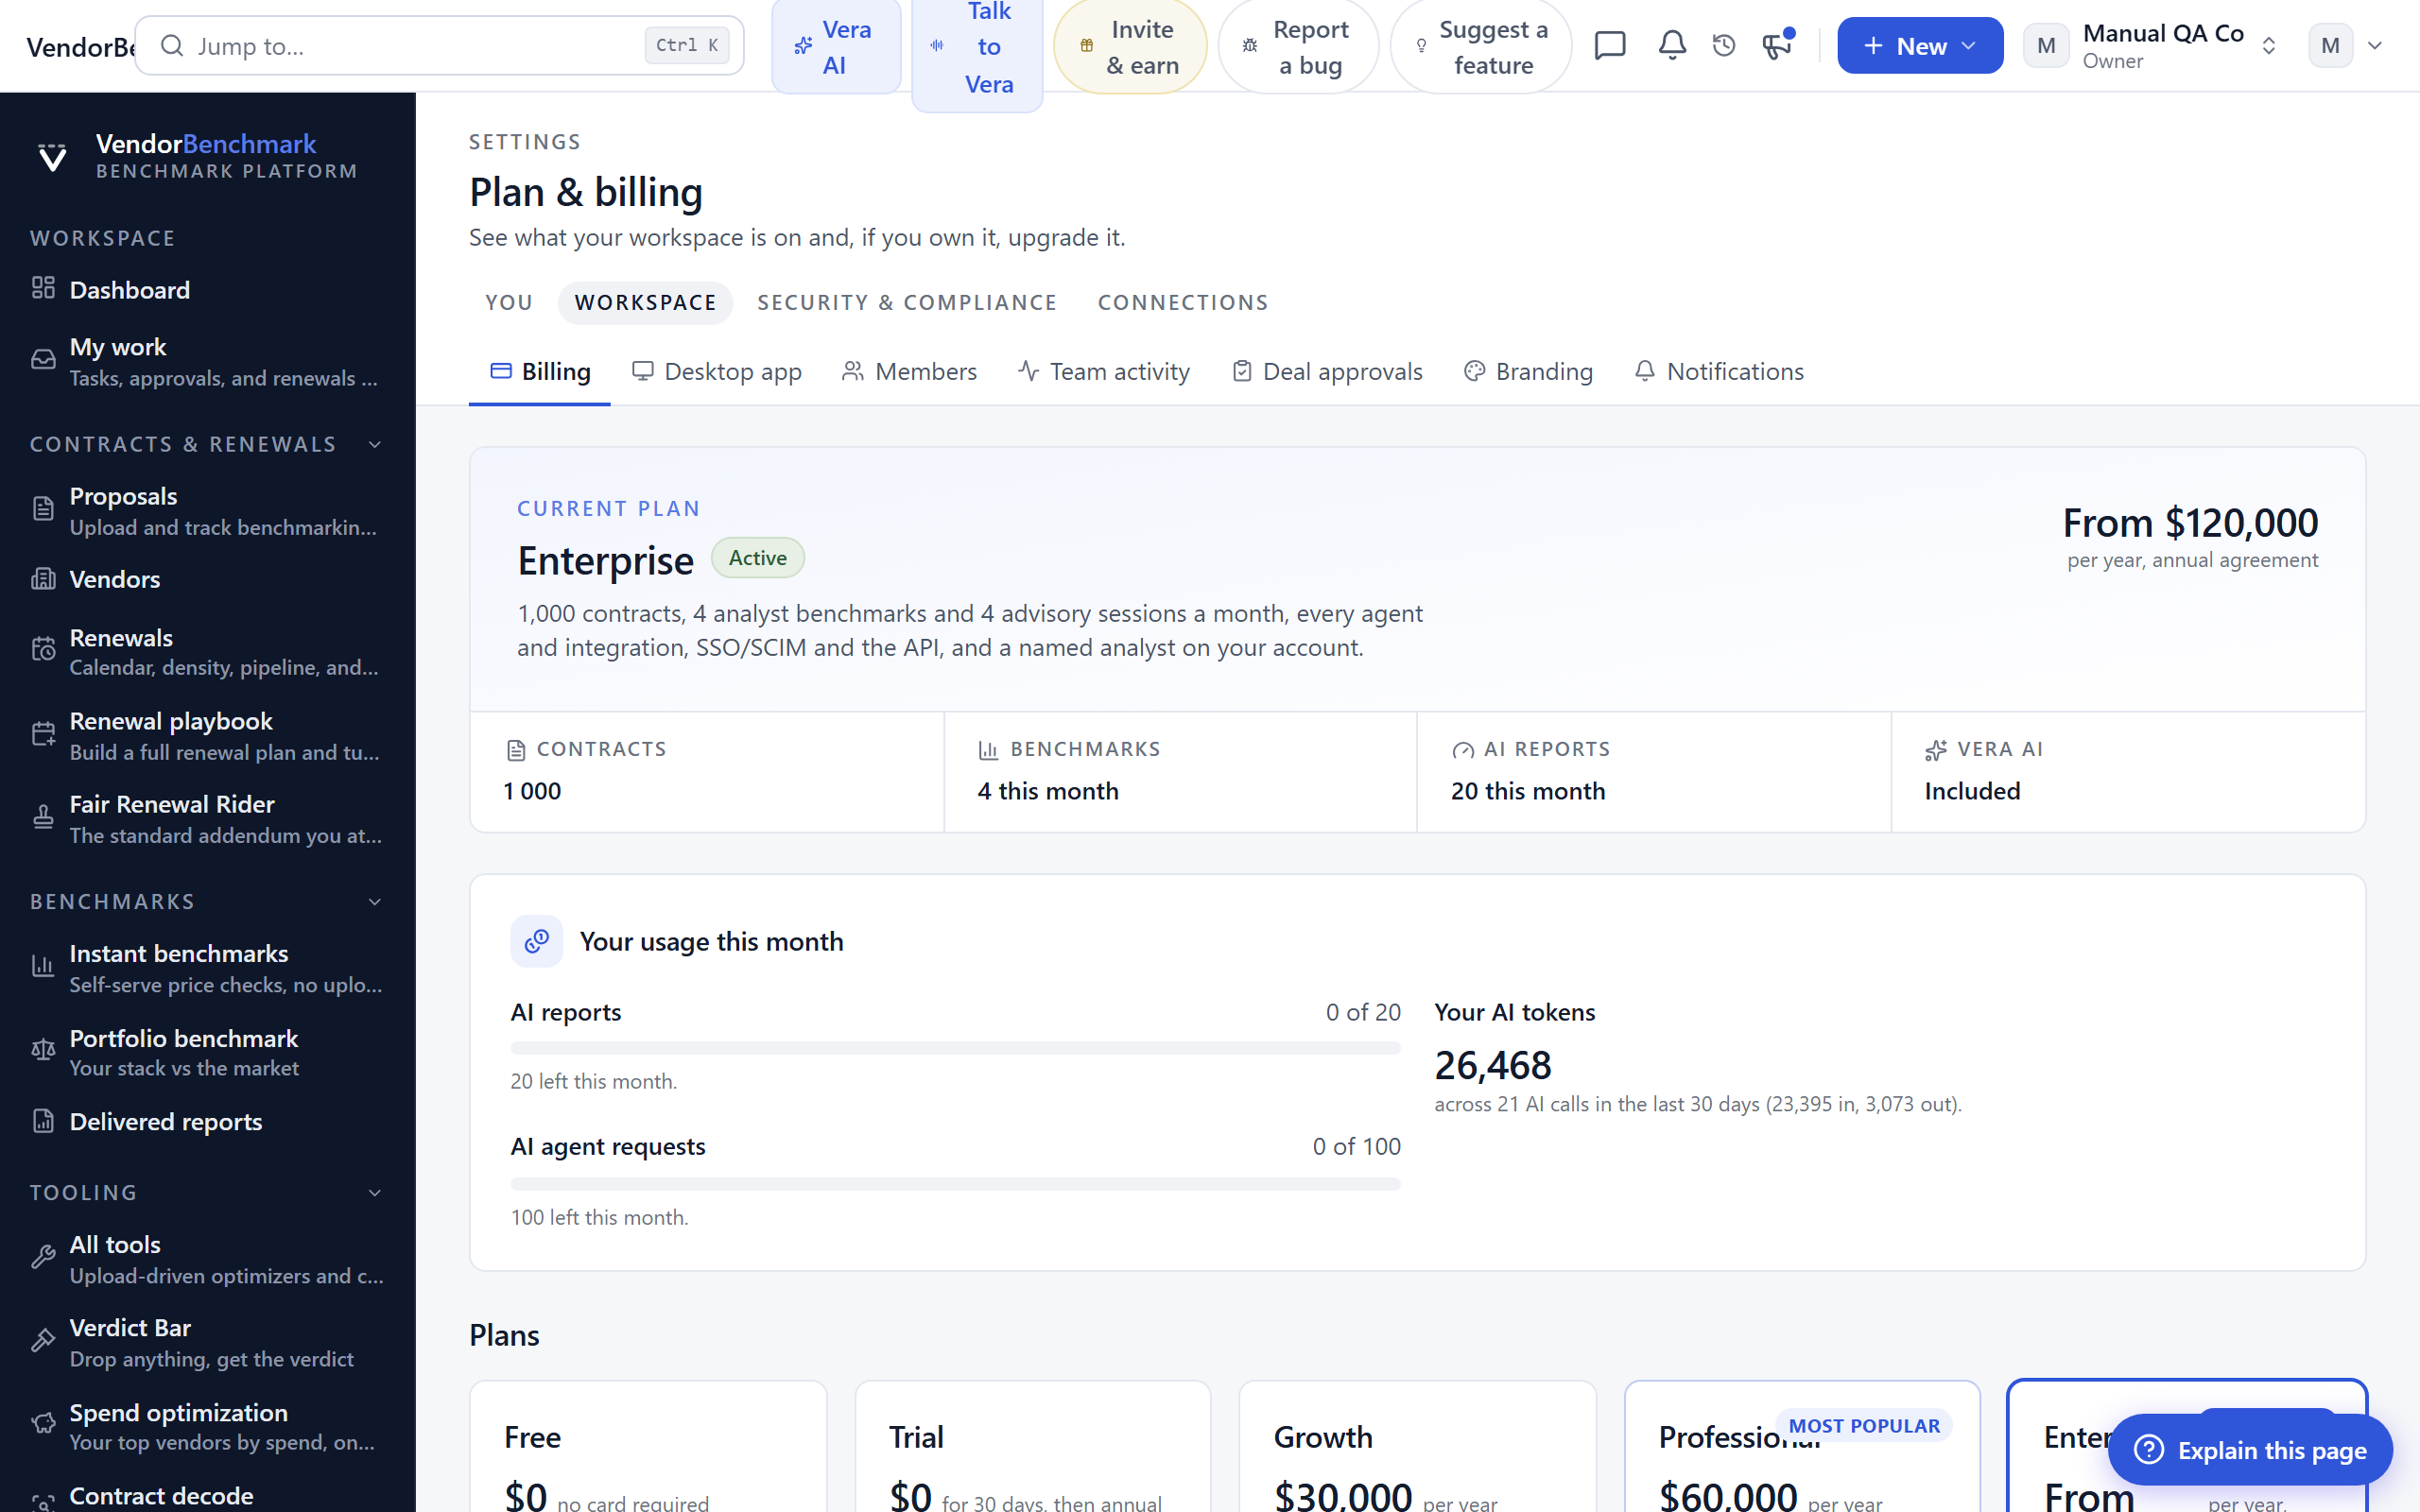
See what plan your workspace is on, how much of your allowance you have used, your benchmark credits, and, if you own the organization, upgrade.
On the screen
- Current plan — your plan, its status, and price, with contract, benchmark, AI, and Vera allowances at a glance.
- Usage this period — how many AI reports and agent requests you have used against your cap, plus your personal AI token usage over the last window.
- AI allowance meter — on seat-priced plans, the percent of your monthly allowance used and roughly how many runs are left; the allowance is yours alone, not pooled.
- Plans — the sellable plans side by side, with the option to upgrade.
- Manage billing — owners with a billing account can open the Stripe portal to update payment details.
How to use it
- Check where you sit against your allowance for the period.
- If you own the organization and need more, pick a plan and upgrade; payments are handled securely by Stripe.
- Not an owner? Ask an owner to upgrade, or message the team.
Related: Members
Desktop app
Where: Settings › Workspace › Desktop app · /settings/desktop-app
Who: everyone
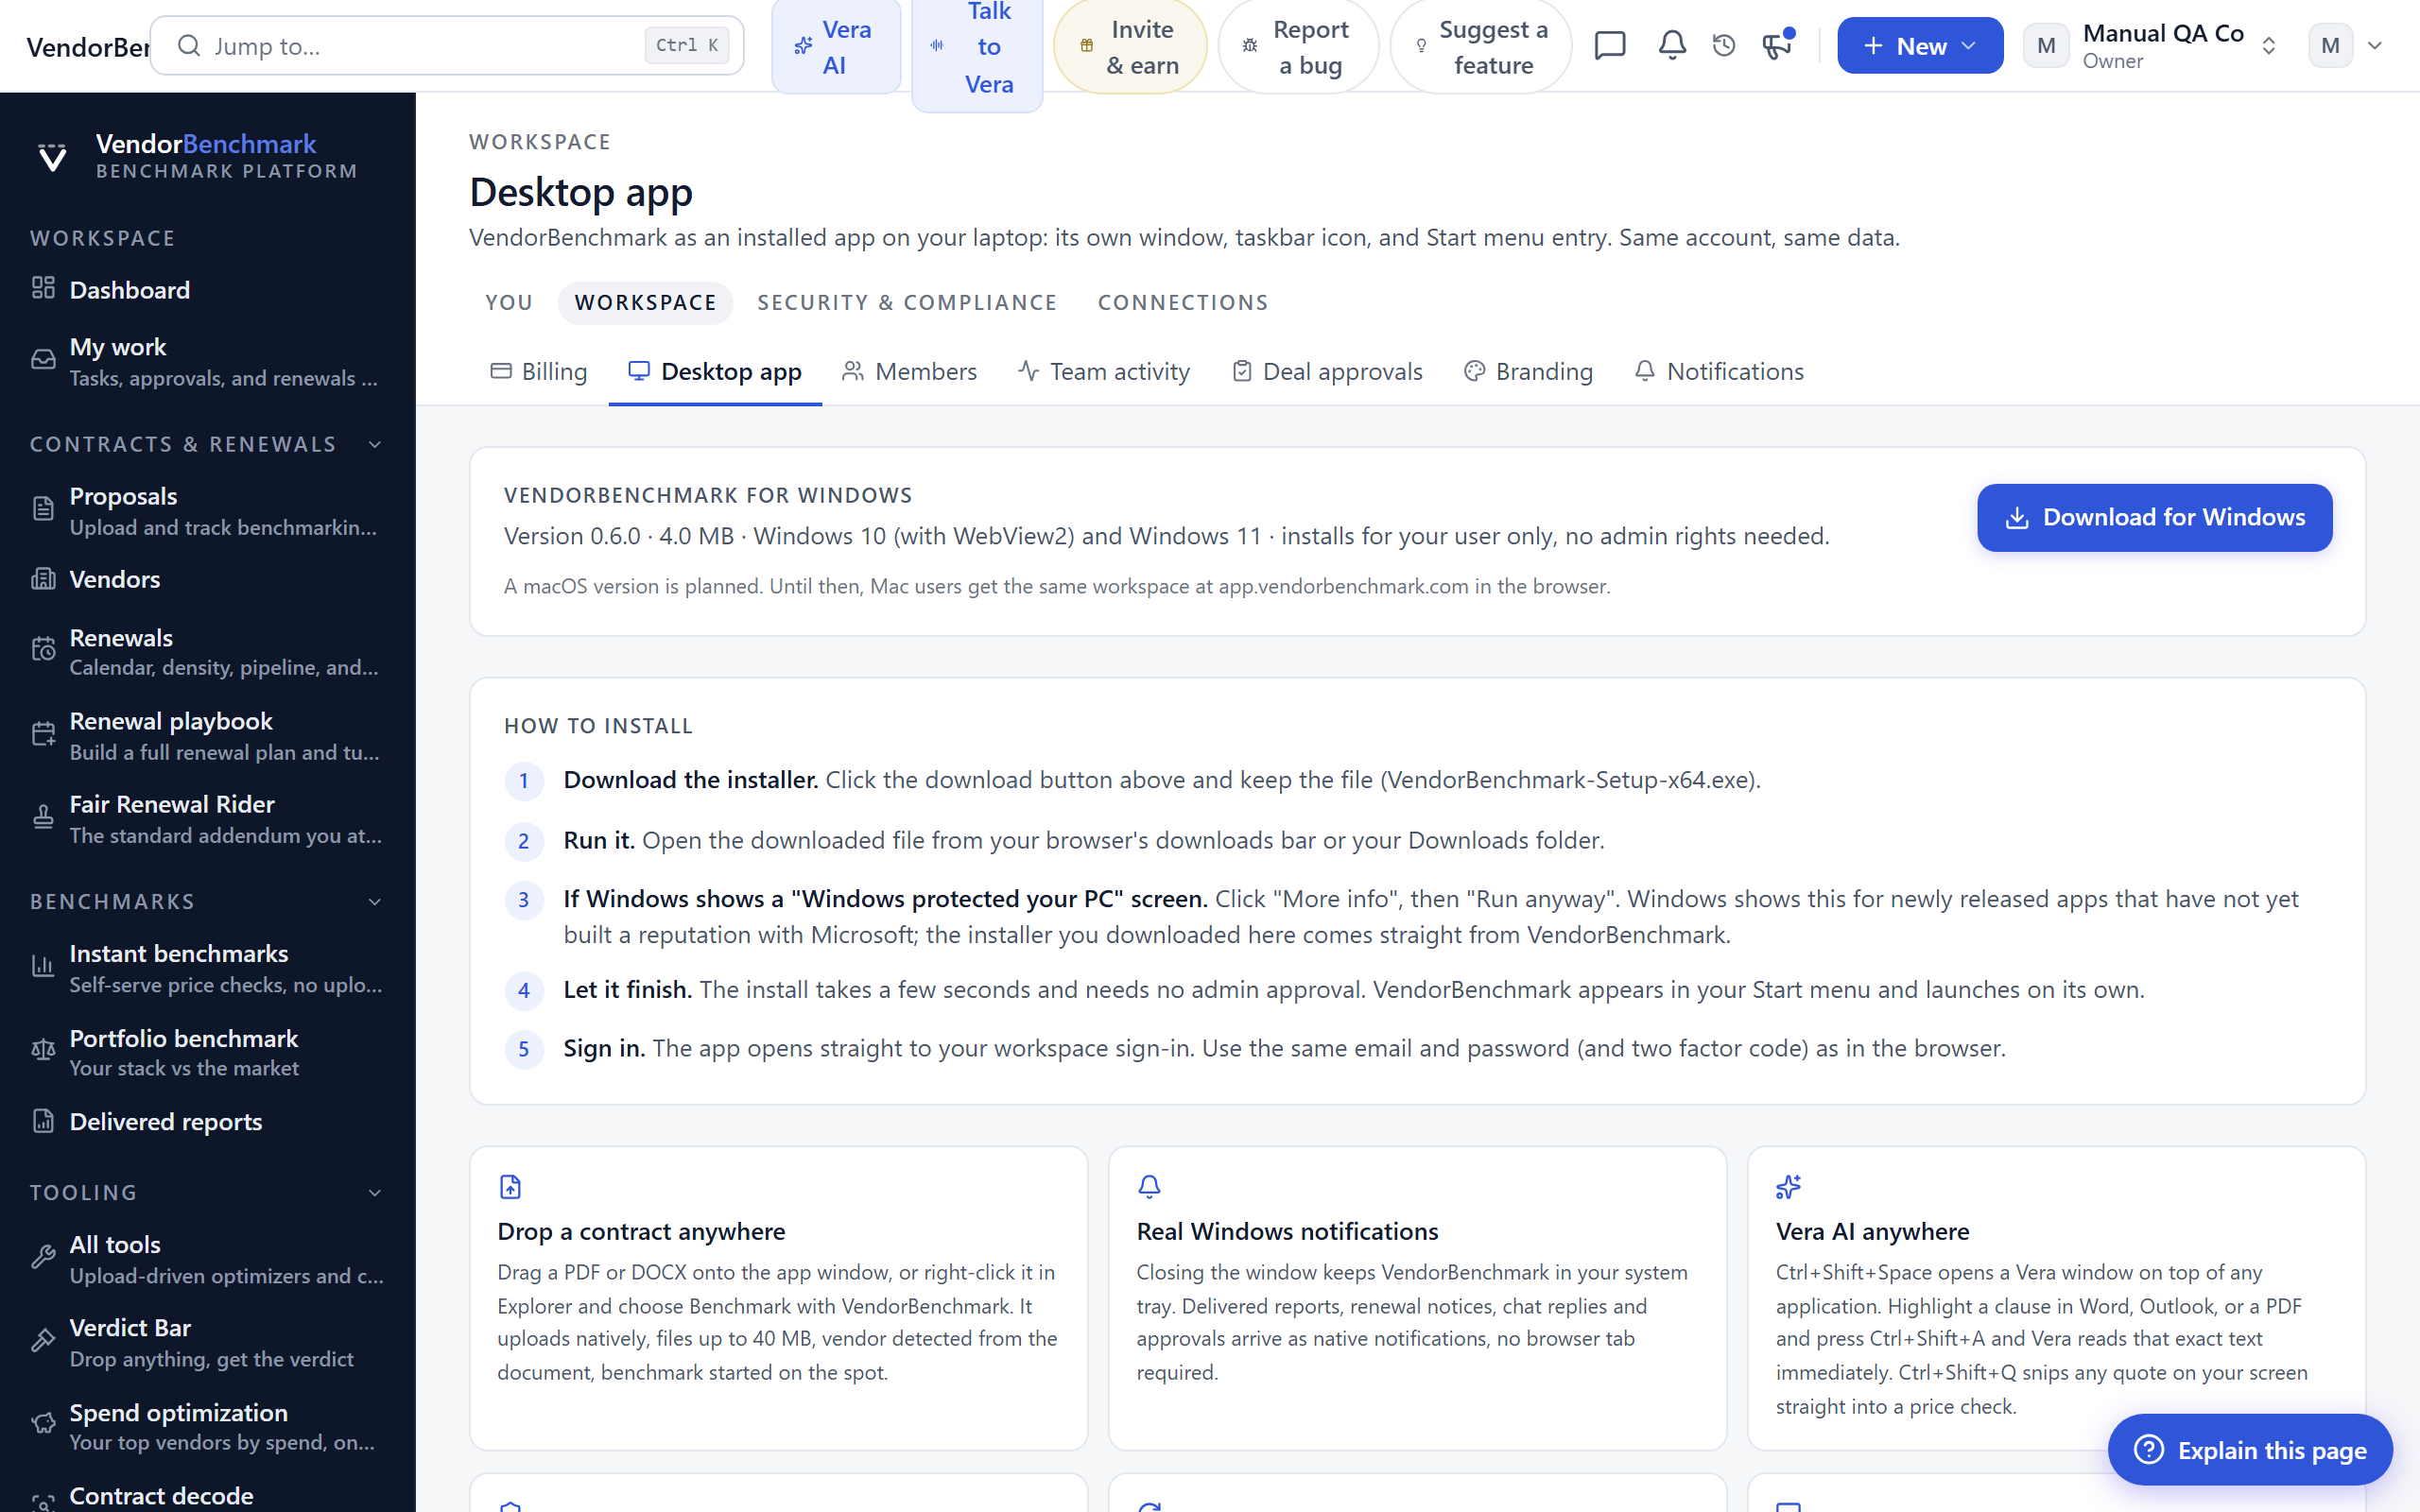
Install VendorBenchmark as its own app on your Windows laptop: its own window, taskbar icon, and Start menu entry, on the same account and data as the browser.
On the screen
- Download for Windows — the installer, with version and size shown; it installs for your user only, no admin rights needed.
- How to install — the numbered steps, including what to do if Windows shows a "Windows protected your PC" screen.
- What you get — drop a contract onto the window or from Explorer, native Windows notifications, Vera on top of any app, Windows Hello lock, and automatic updates.
- Removing it — uninstall any time from Windows Settings; your account and data are untouched.
How to use it
- Click Download for Windows and run the downloaded installer.
- If Windows warns about a new app, choose More info, then Run anyway.
- Sign in with the same email, password, and two-factor code you use in the browser.
Tips
- A macOS version is planned. Until then, Mac users get the same workspace in the browser.
Members
Where: Settings › Workspace › Members · /settings/members
Who: org owners only
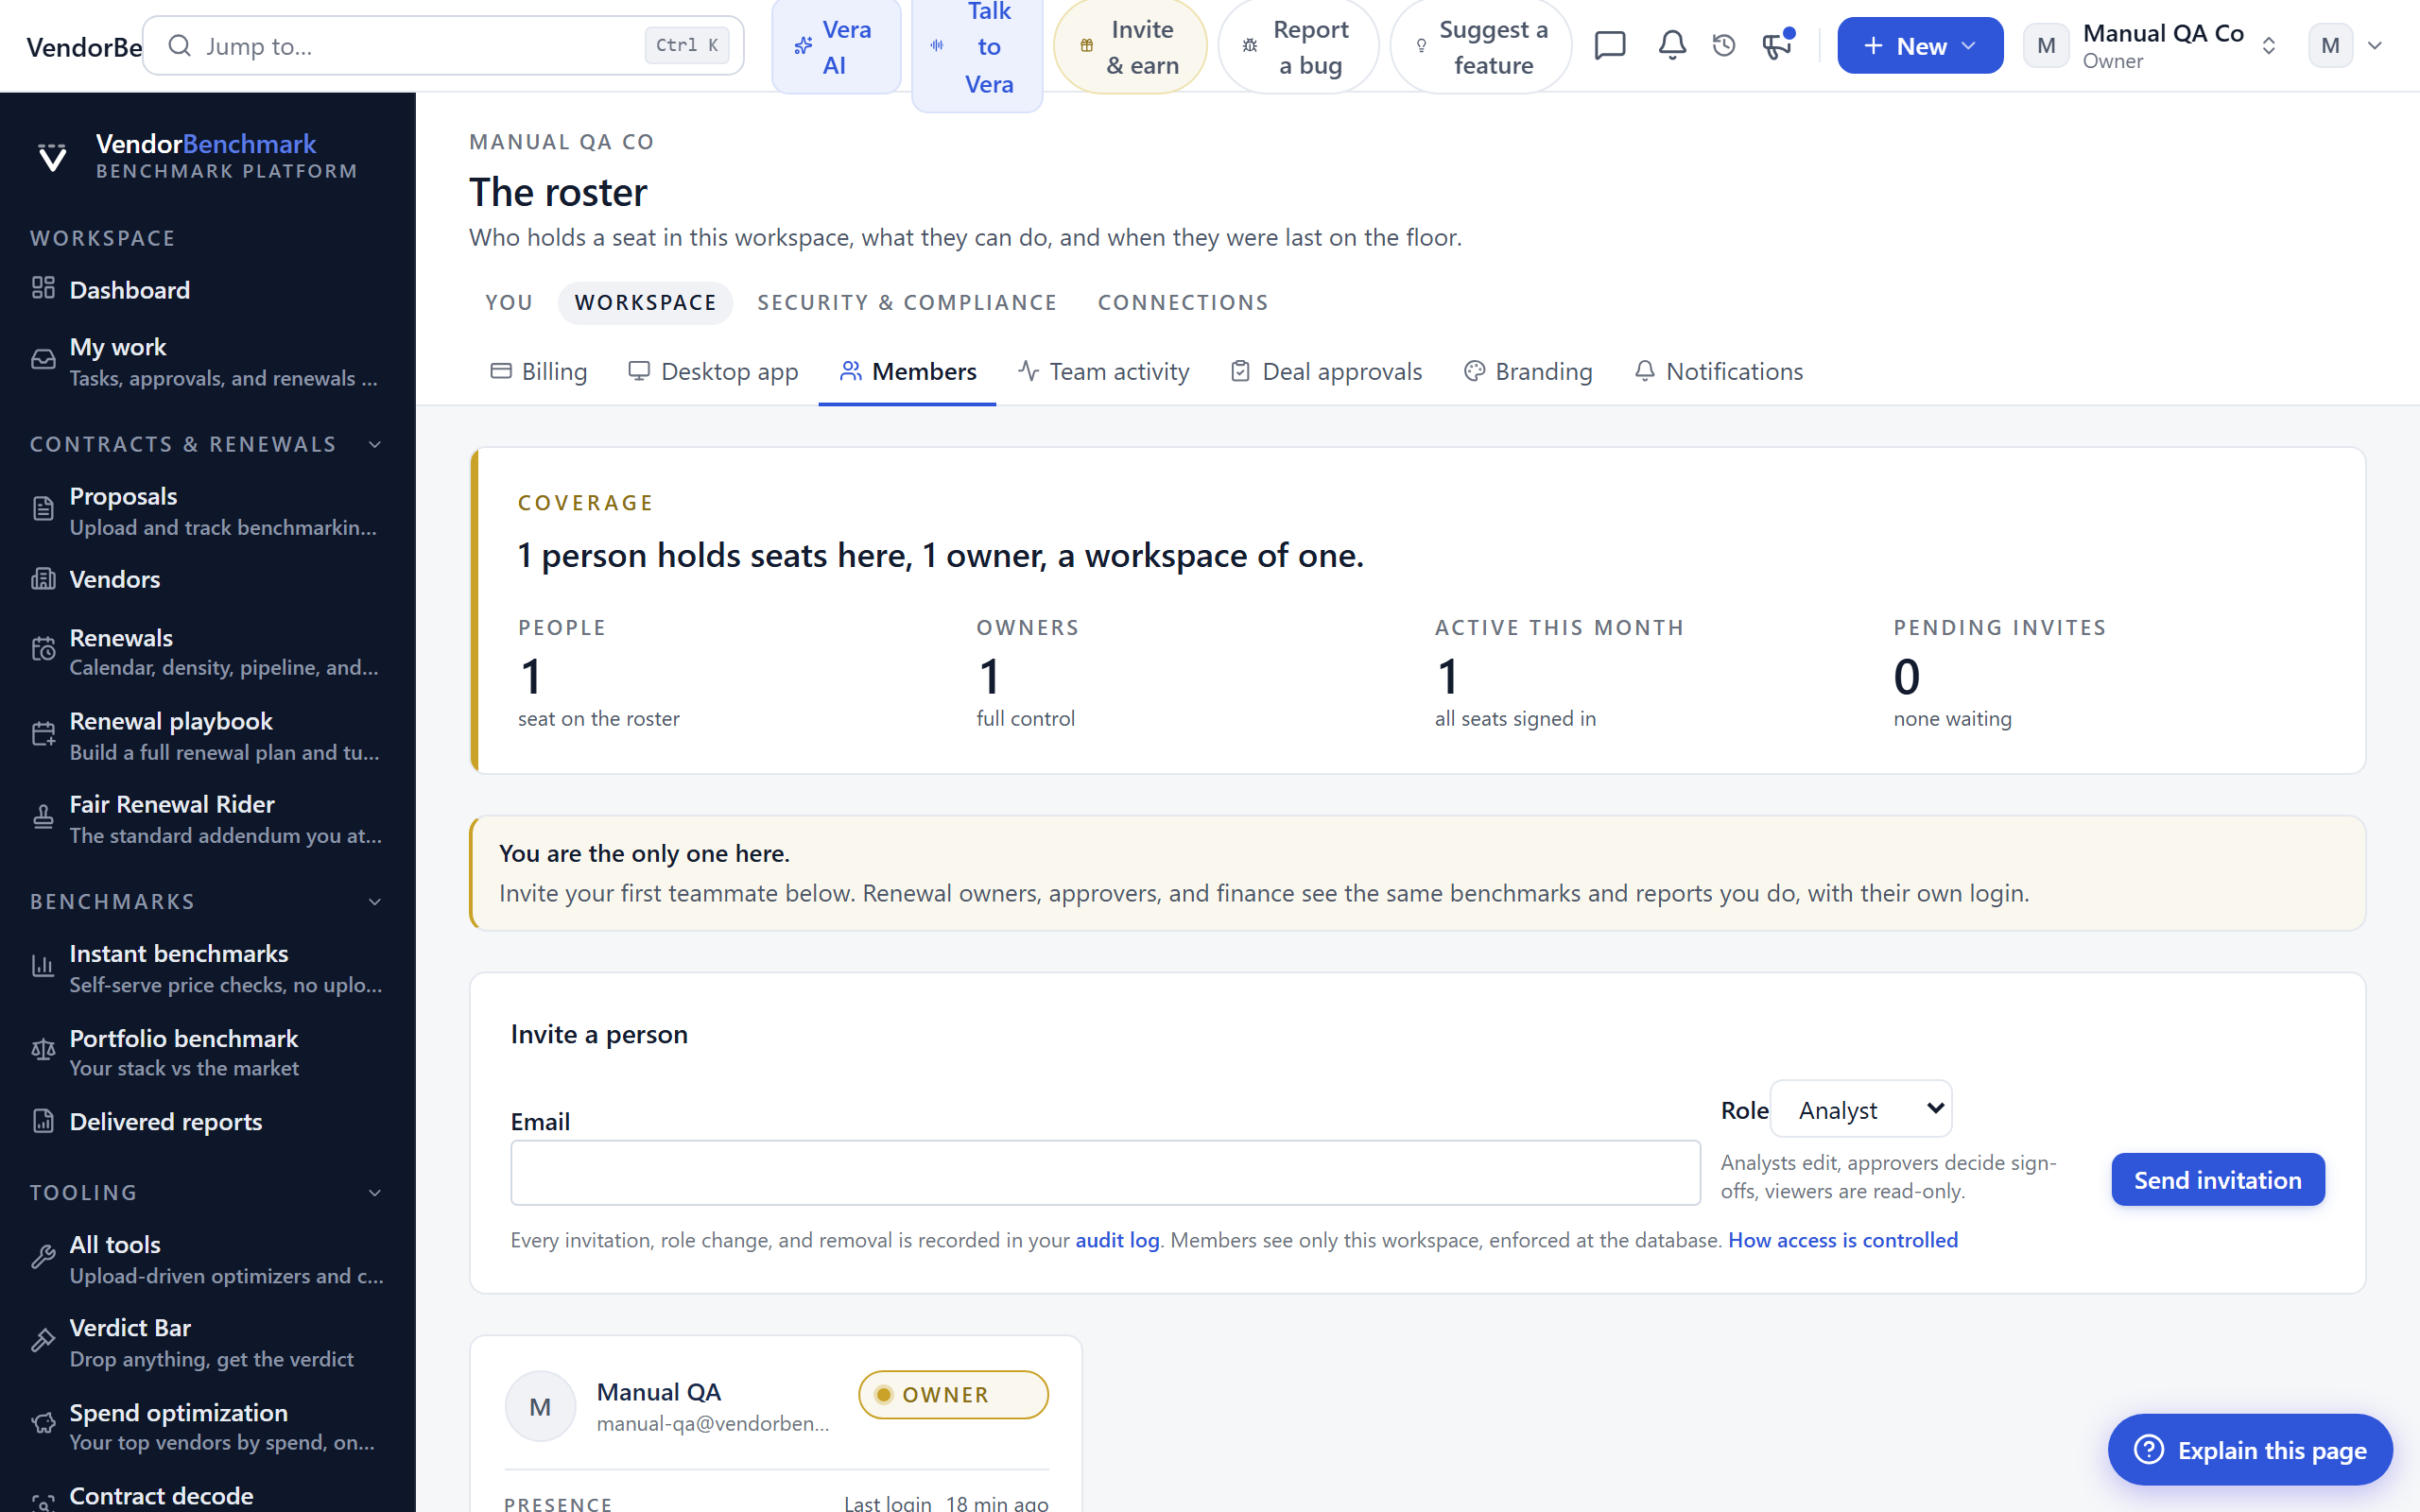
Invite teammates, set their role, and manage everyone in your organization. Owners also see pending invitations and any join requests waiting for them.
On the screen
- Member list — everyone in the organization with their role, last sign-in, and recent activity trail.
- Invite — send an email invitation and set the new person's role.
- Pending invitations — invites not yet accepted, with a delivery status when an email bounced or was delayed.
- Roles — change a member's role or block a member from the workspace.
- Join requests and domain capture — approve people who asked to join, and optionally let anyone on your email domain join automatically.
How to use it
- Click Invite, enter the person's email, choose their role, and send.
- Watch pending invitations for delivery problems and resend if needed.
- Adjust roles as responsibilities change; block anyone who should no longer have access.
Tips
- If an invite shows as bounced, check the address; the person never received the email.
Related: Team activity · Deal approvals
Team activity
Where: Settings › Workspace › Team activity · /settings/activity
Who: org owners only
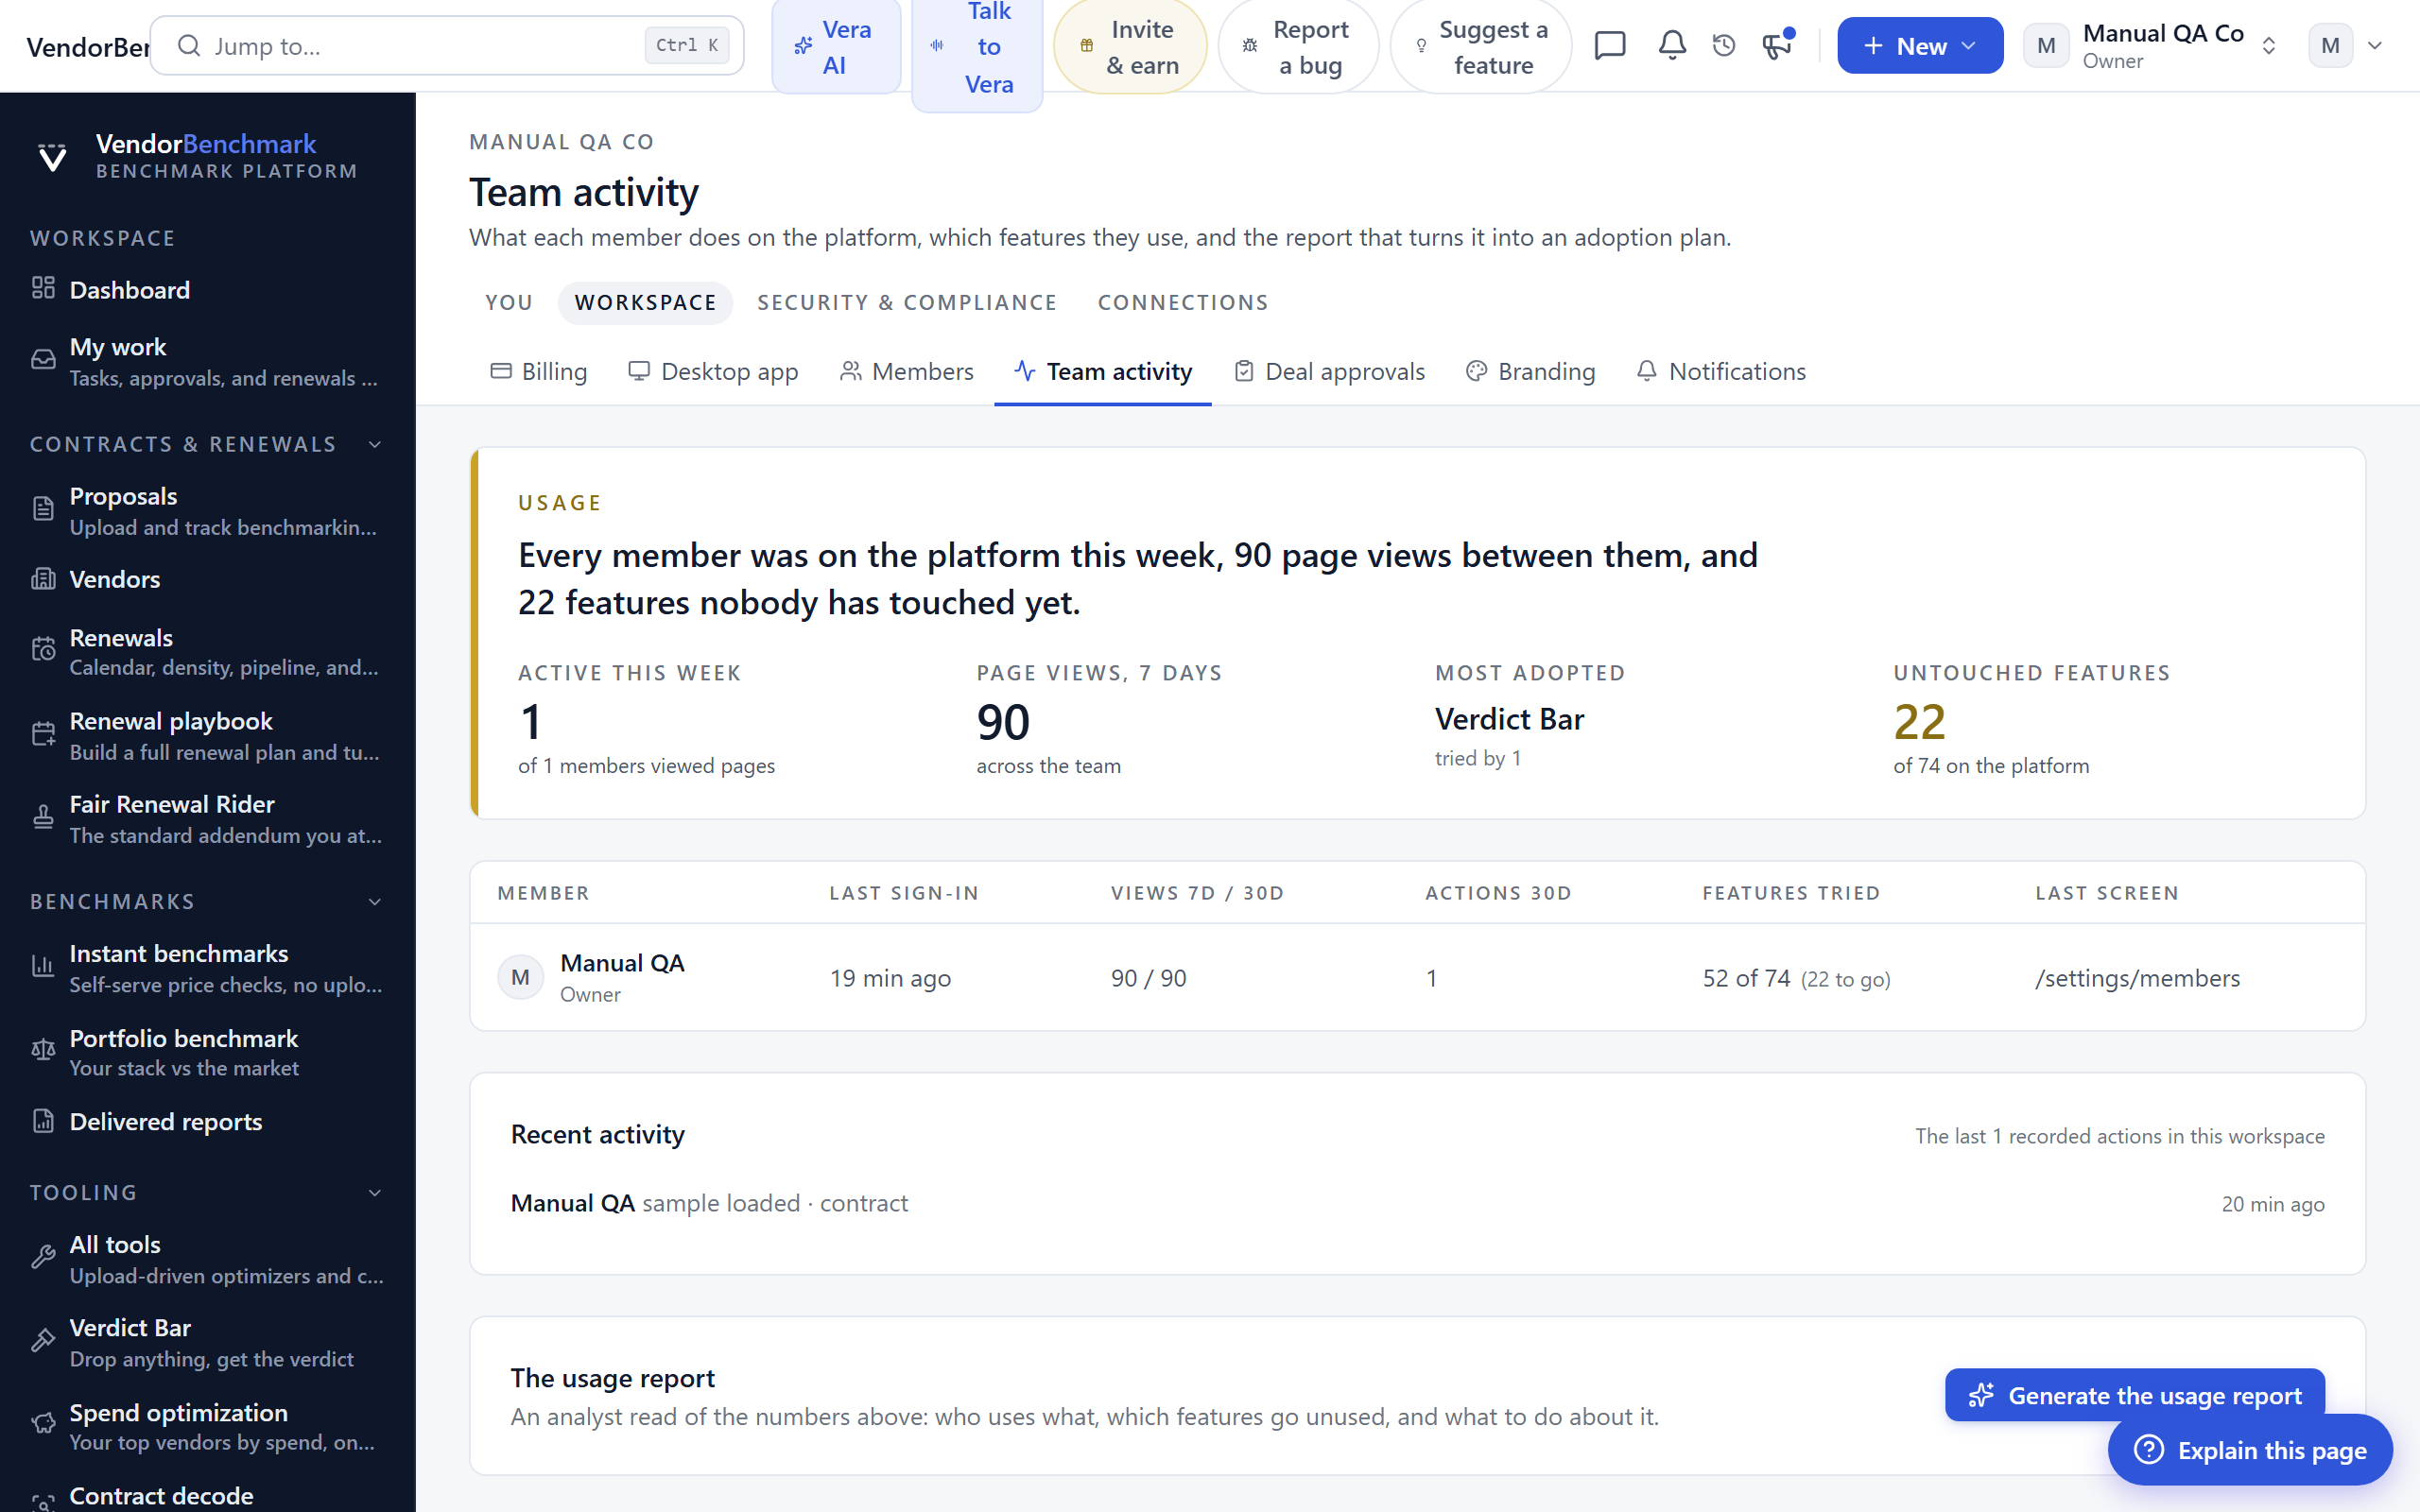
What each member actually does on the platform, which features they use, and an on-demand report that turns the numbers into an adoption plan.
On the screen
- Usage verdict — how alive the workspace is this week: active members, page views, most-adopted feature, and features nobody has touched.
- Per-member table — each member's last sign-in, page views over 7 and 30 days, recorded actions, features tried, and last screen.
- Recent activity — the last recorded actions across the workspace, named, newest first.
- The usage report — an analyst read of the numbers that you can generate on demand.
How to use it
- Scan the verdict to gauge overall adoption.
- Use the per-member table to spot who has not started and which features go unused.
- Generate the usage report when you want a written adoption plan to act on.
Deal approvals
Where: Settings › Workspace › Deal approvals · /settings/approvals
Who: org owners only
An optional sign-off chain: up to ten approvers who must clear a deal before it is signed. Off by default; turn it on when your organization needs a documented approval step.
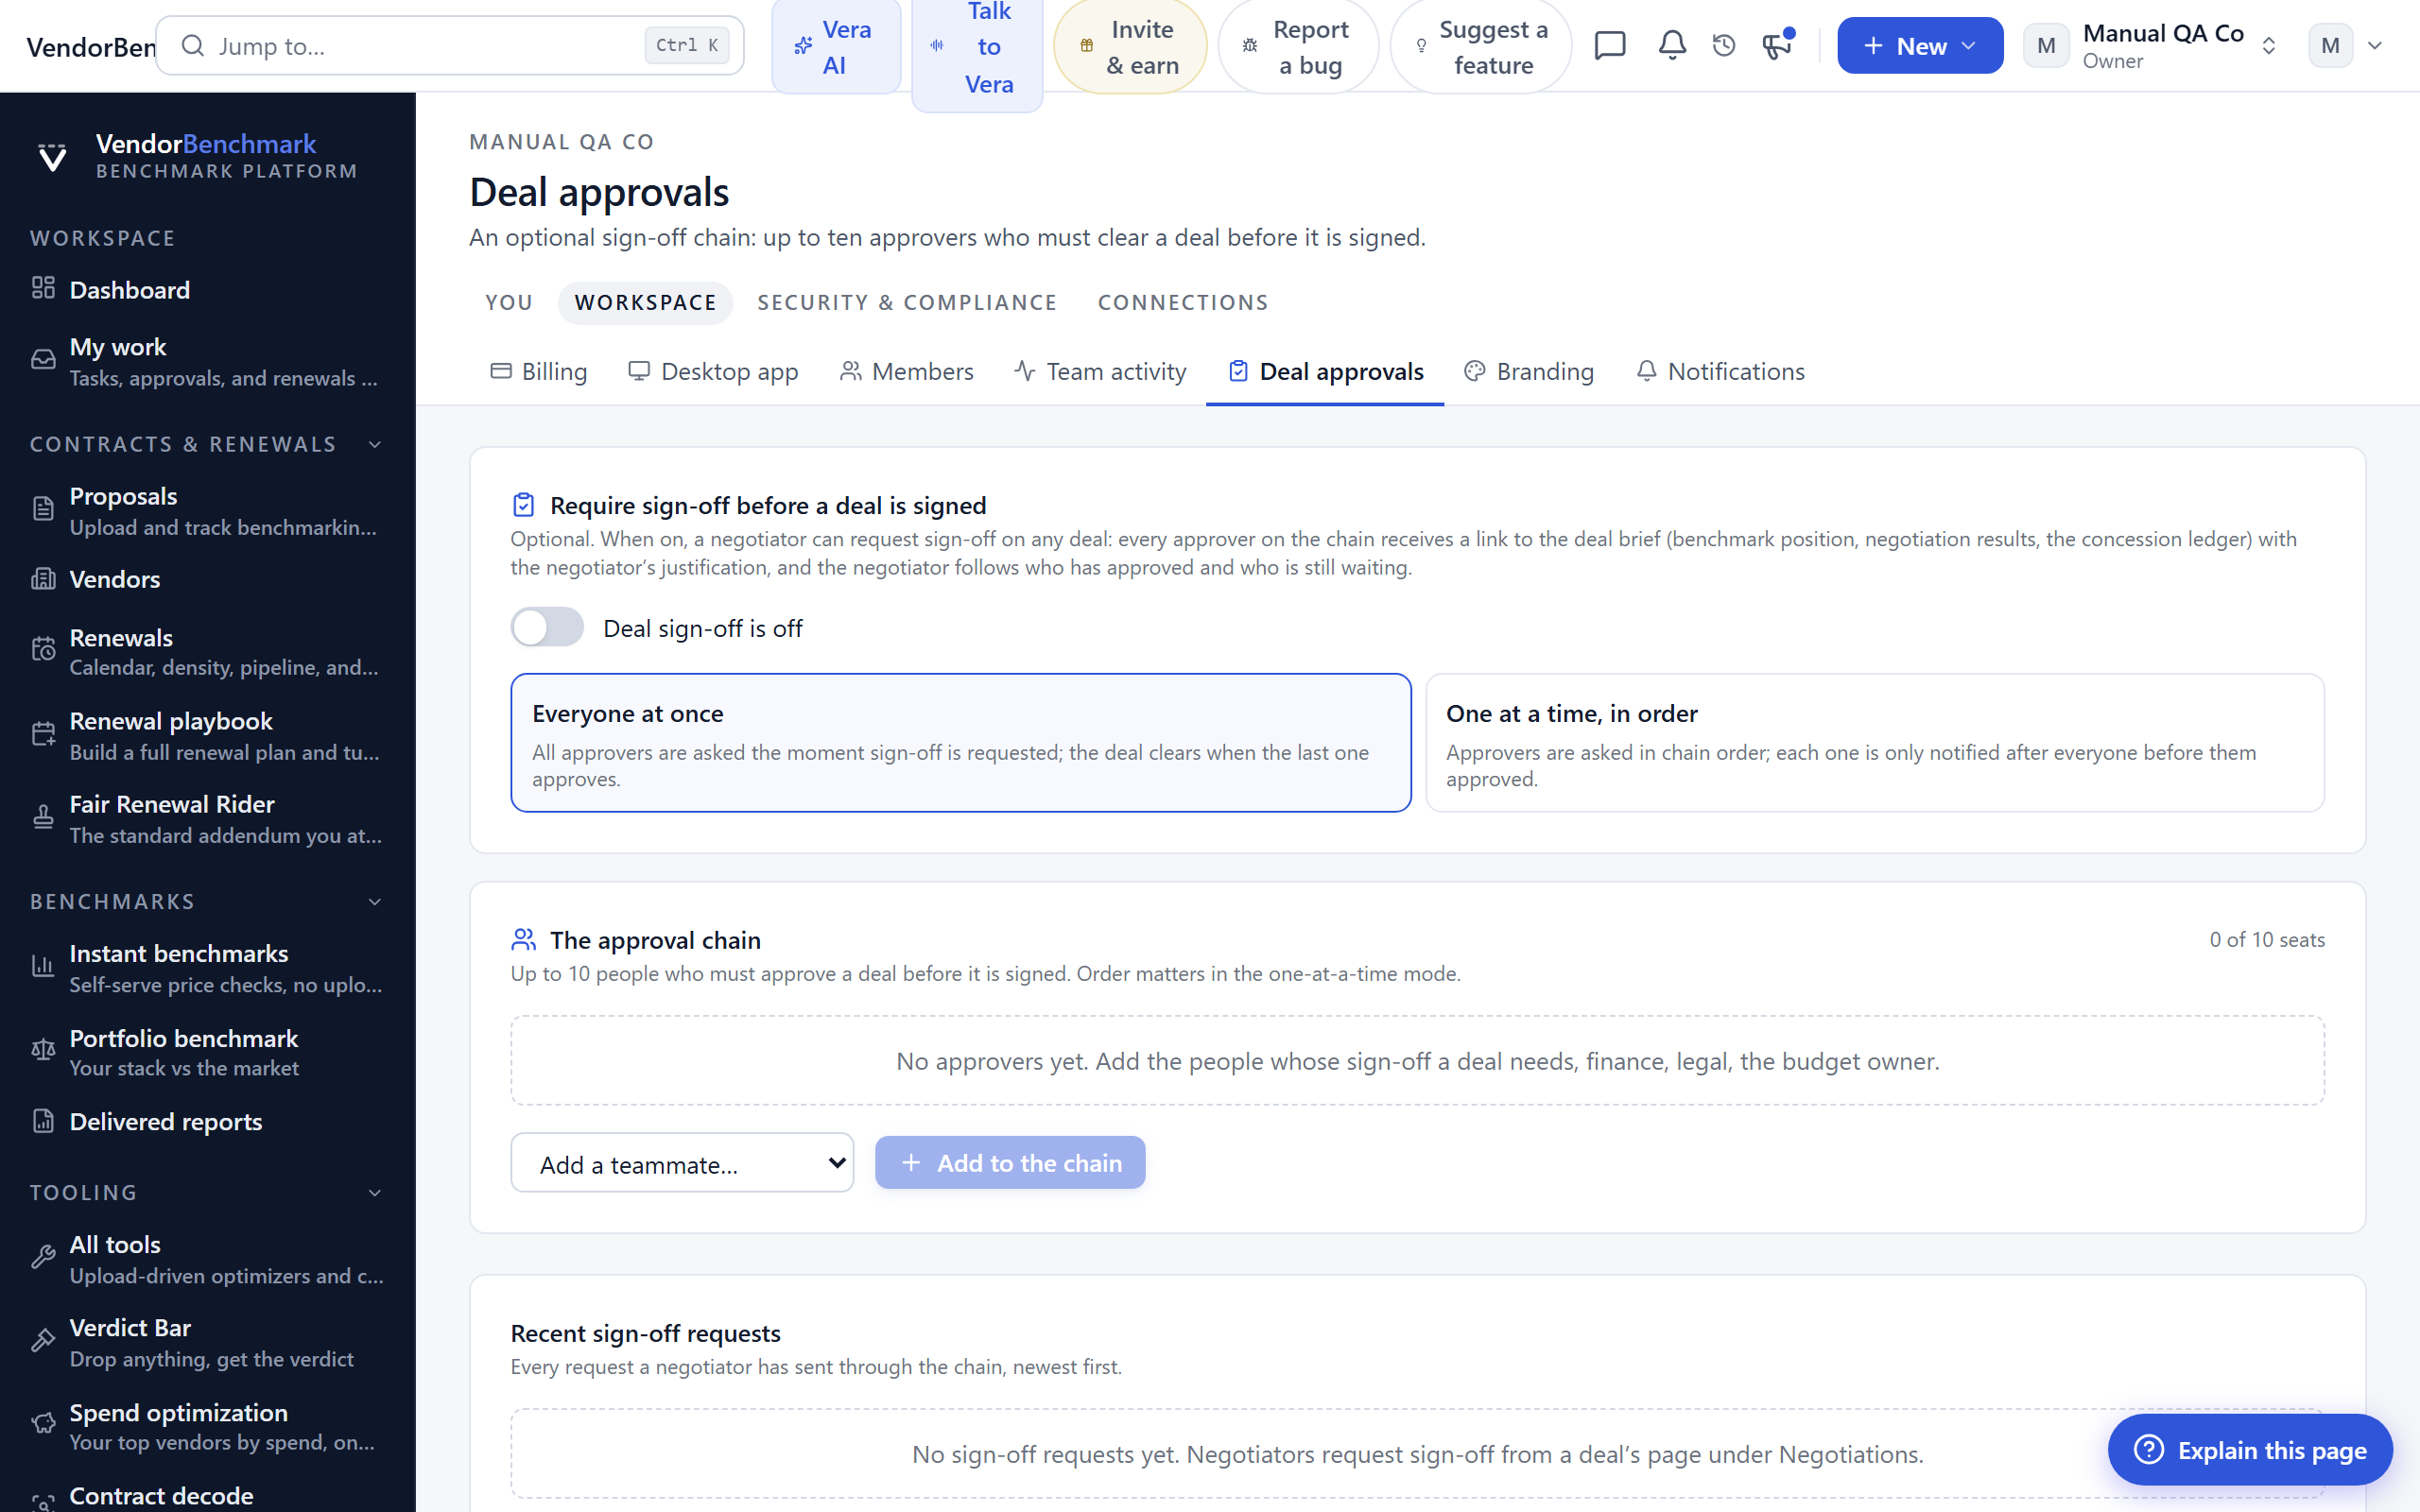
On the screen
- Enable and mode — turn the chain on and choose how sign-off works.
- Approvers — add up to ten people from your organization as the required approvers.
- Recent sign-off requests — every request negotiators have sent through the chain, with how many approvers have cleared it.
How to use it
- Turn on deal approvals and pick your approvers.
- Negotiators request sign-off from a deal's page under Negotiations; approvers vote from their queue.
- Track progress in the recent requests list.
Related: Approvals
Branding
Where: Settings › Workspace › Branding · /settings/branding
Who: org owners only
Put your organization's logo on exported benchmark reports, both PDF and PowerPoint.
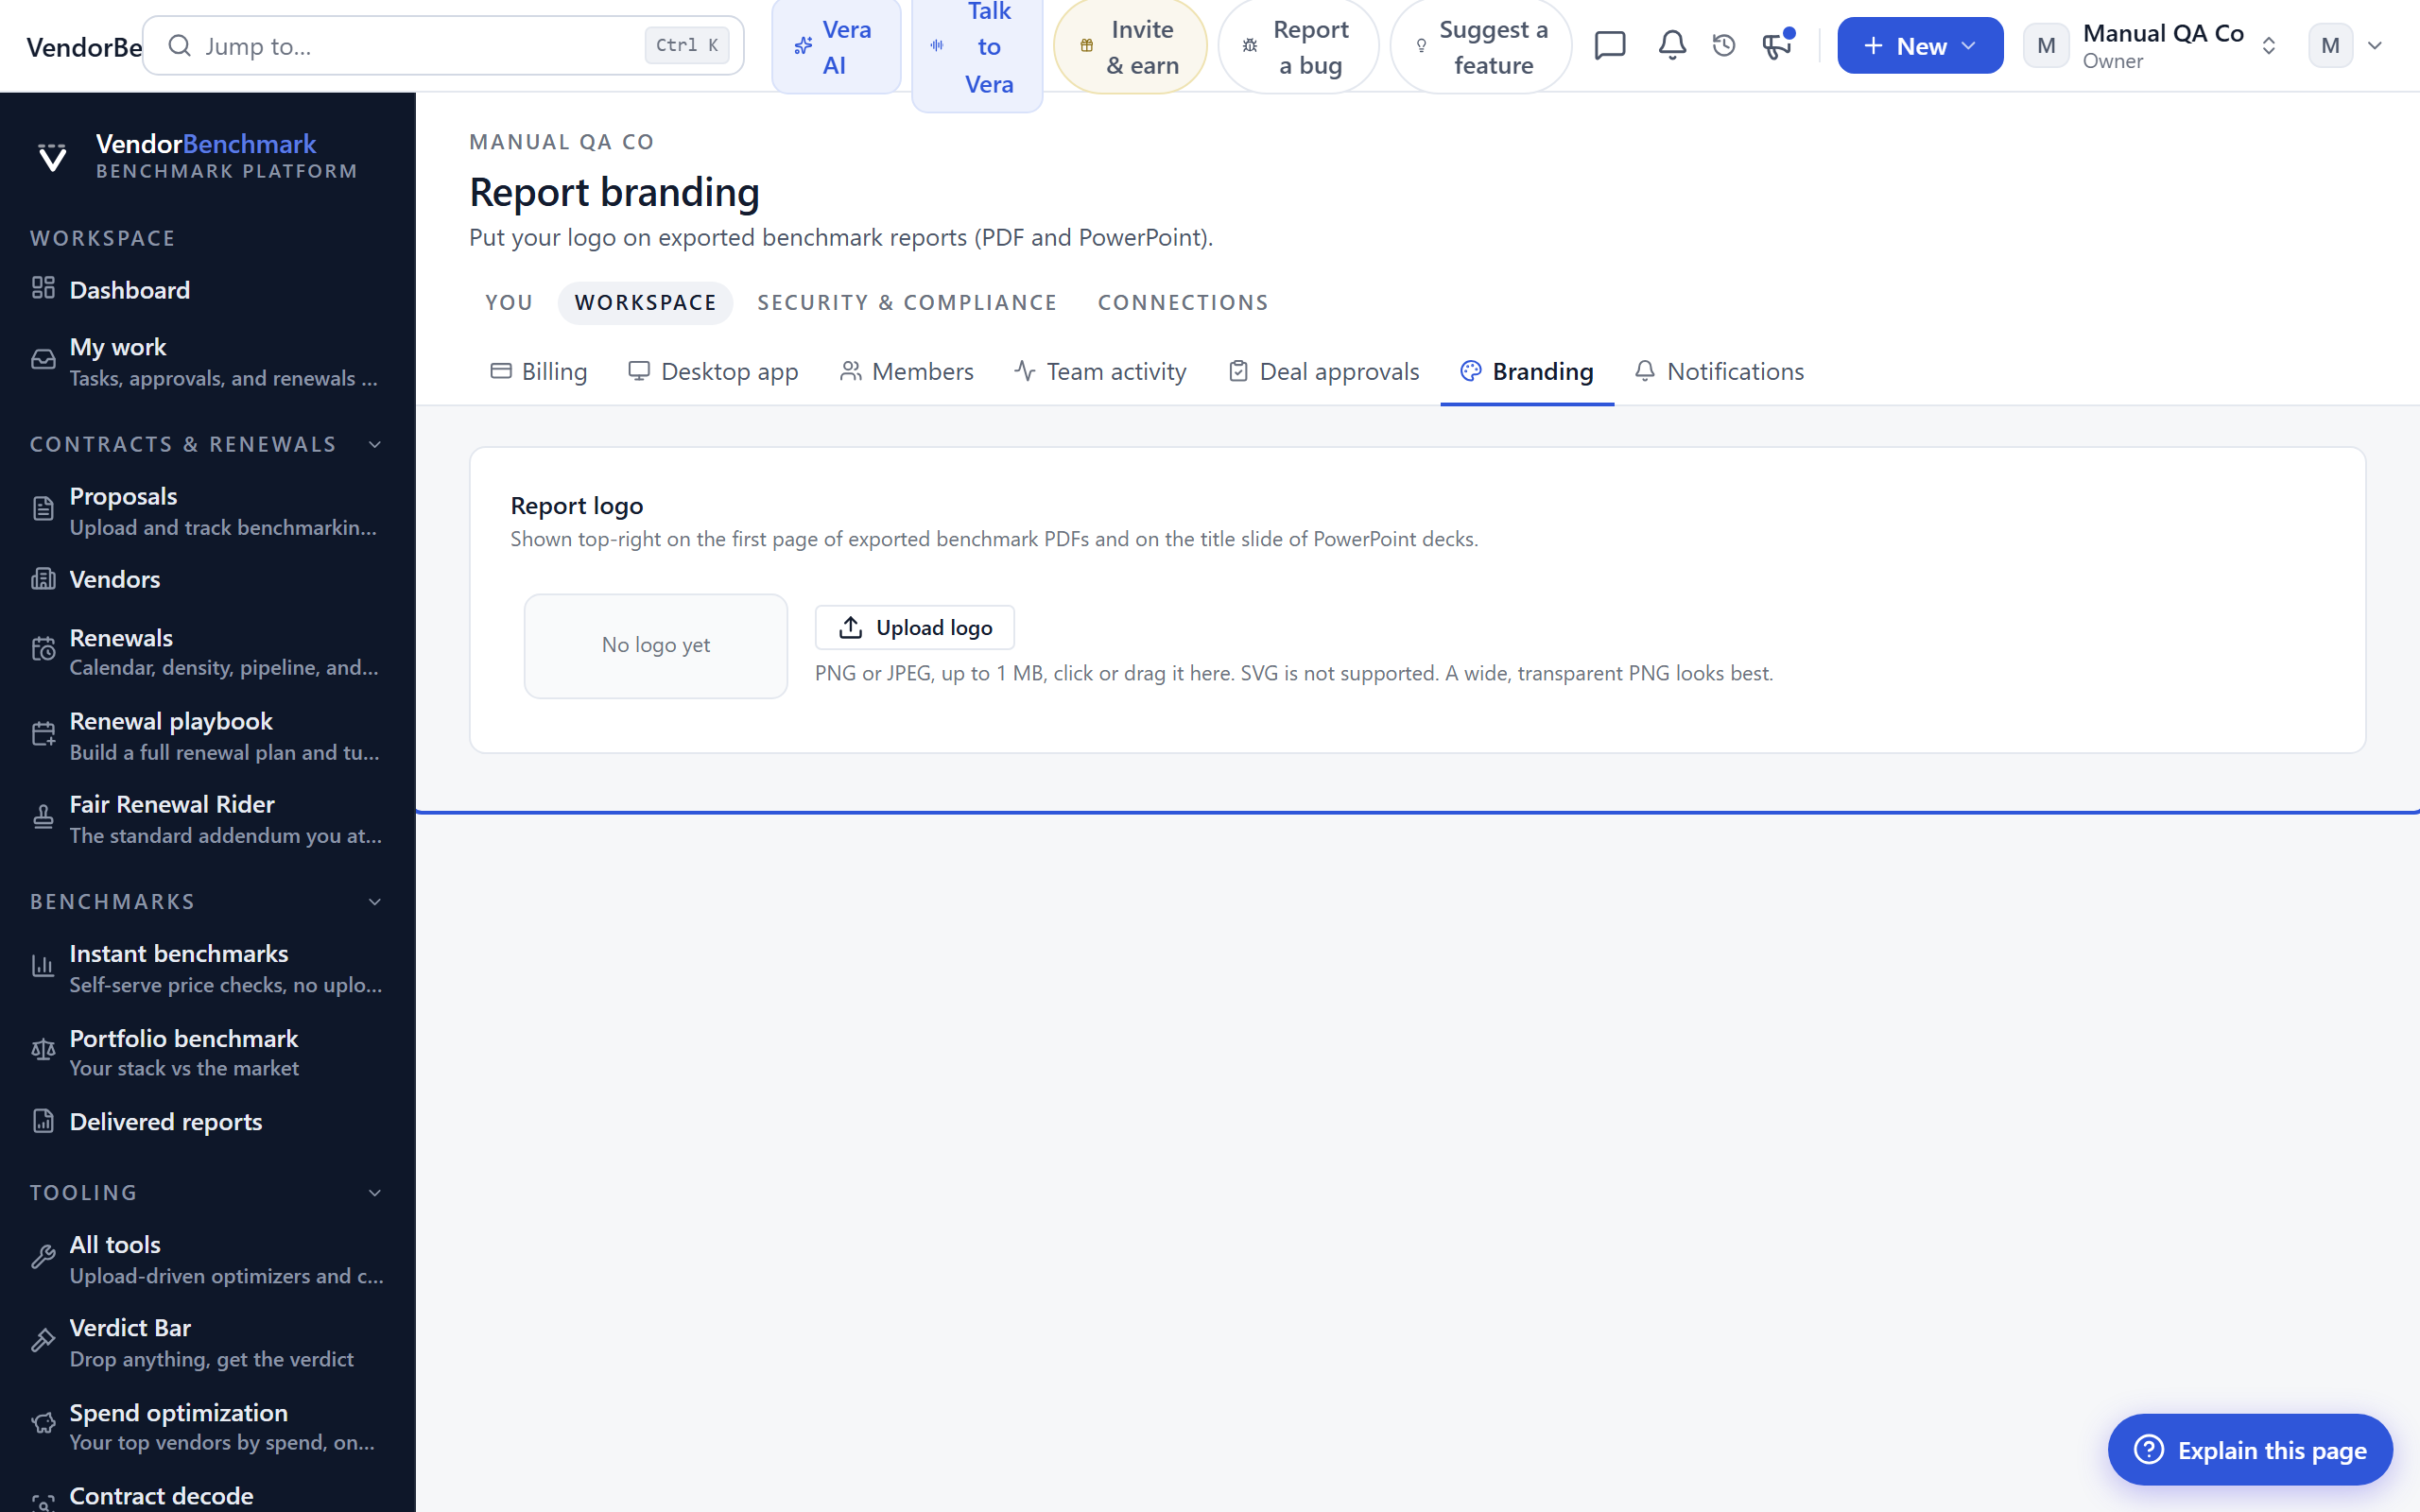
On the screen
- Logo upload — upload your logo; a preview shows how it will appear.
How to use it
- Upload a logo image.
- Export a report to see it applied to the PDF and PowerPoint.
Notifications
Where: Settings › Workspace › Notifications · /settings/notifications
Who: everyone (owners get the extra alert and webhook controls)
Tune which alerts reach you and on which channel. Owners can also post alerts to Slack or Teams and set the AI copilot's alert rules.
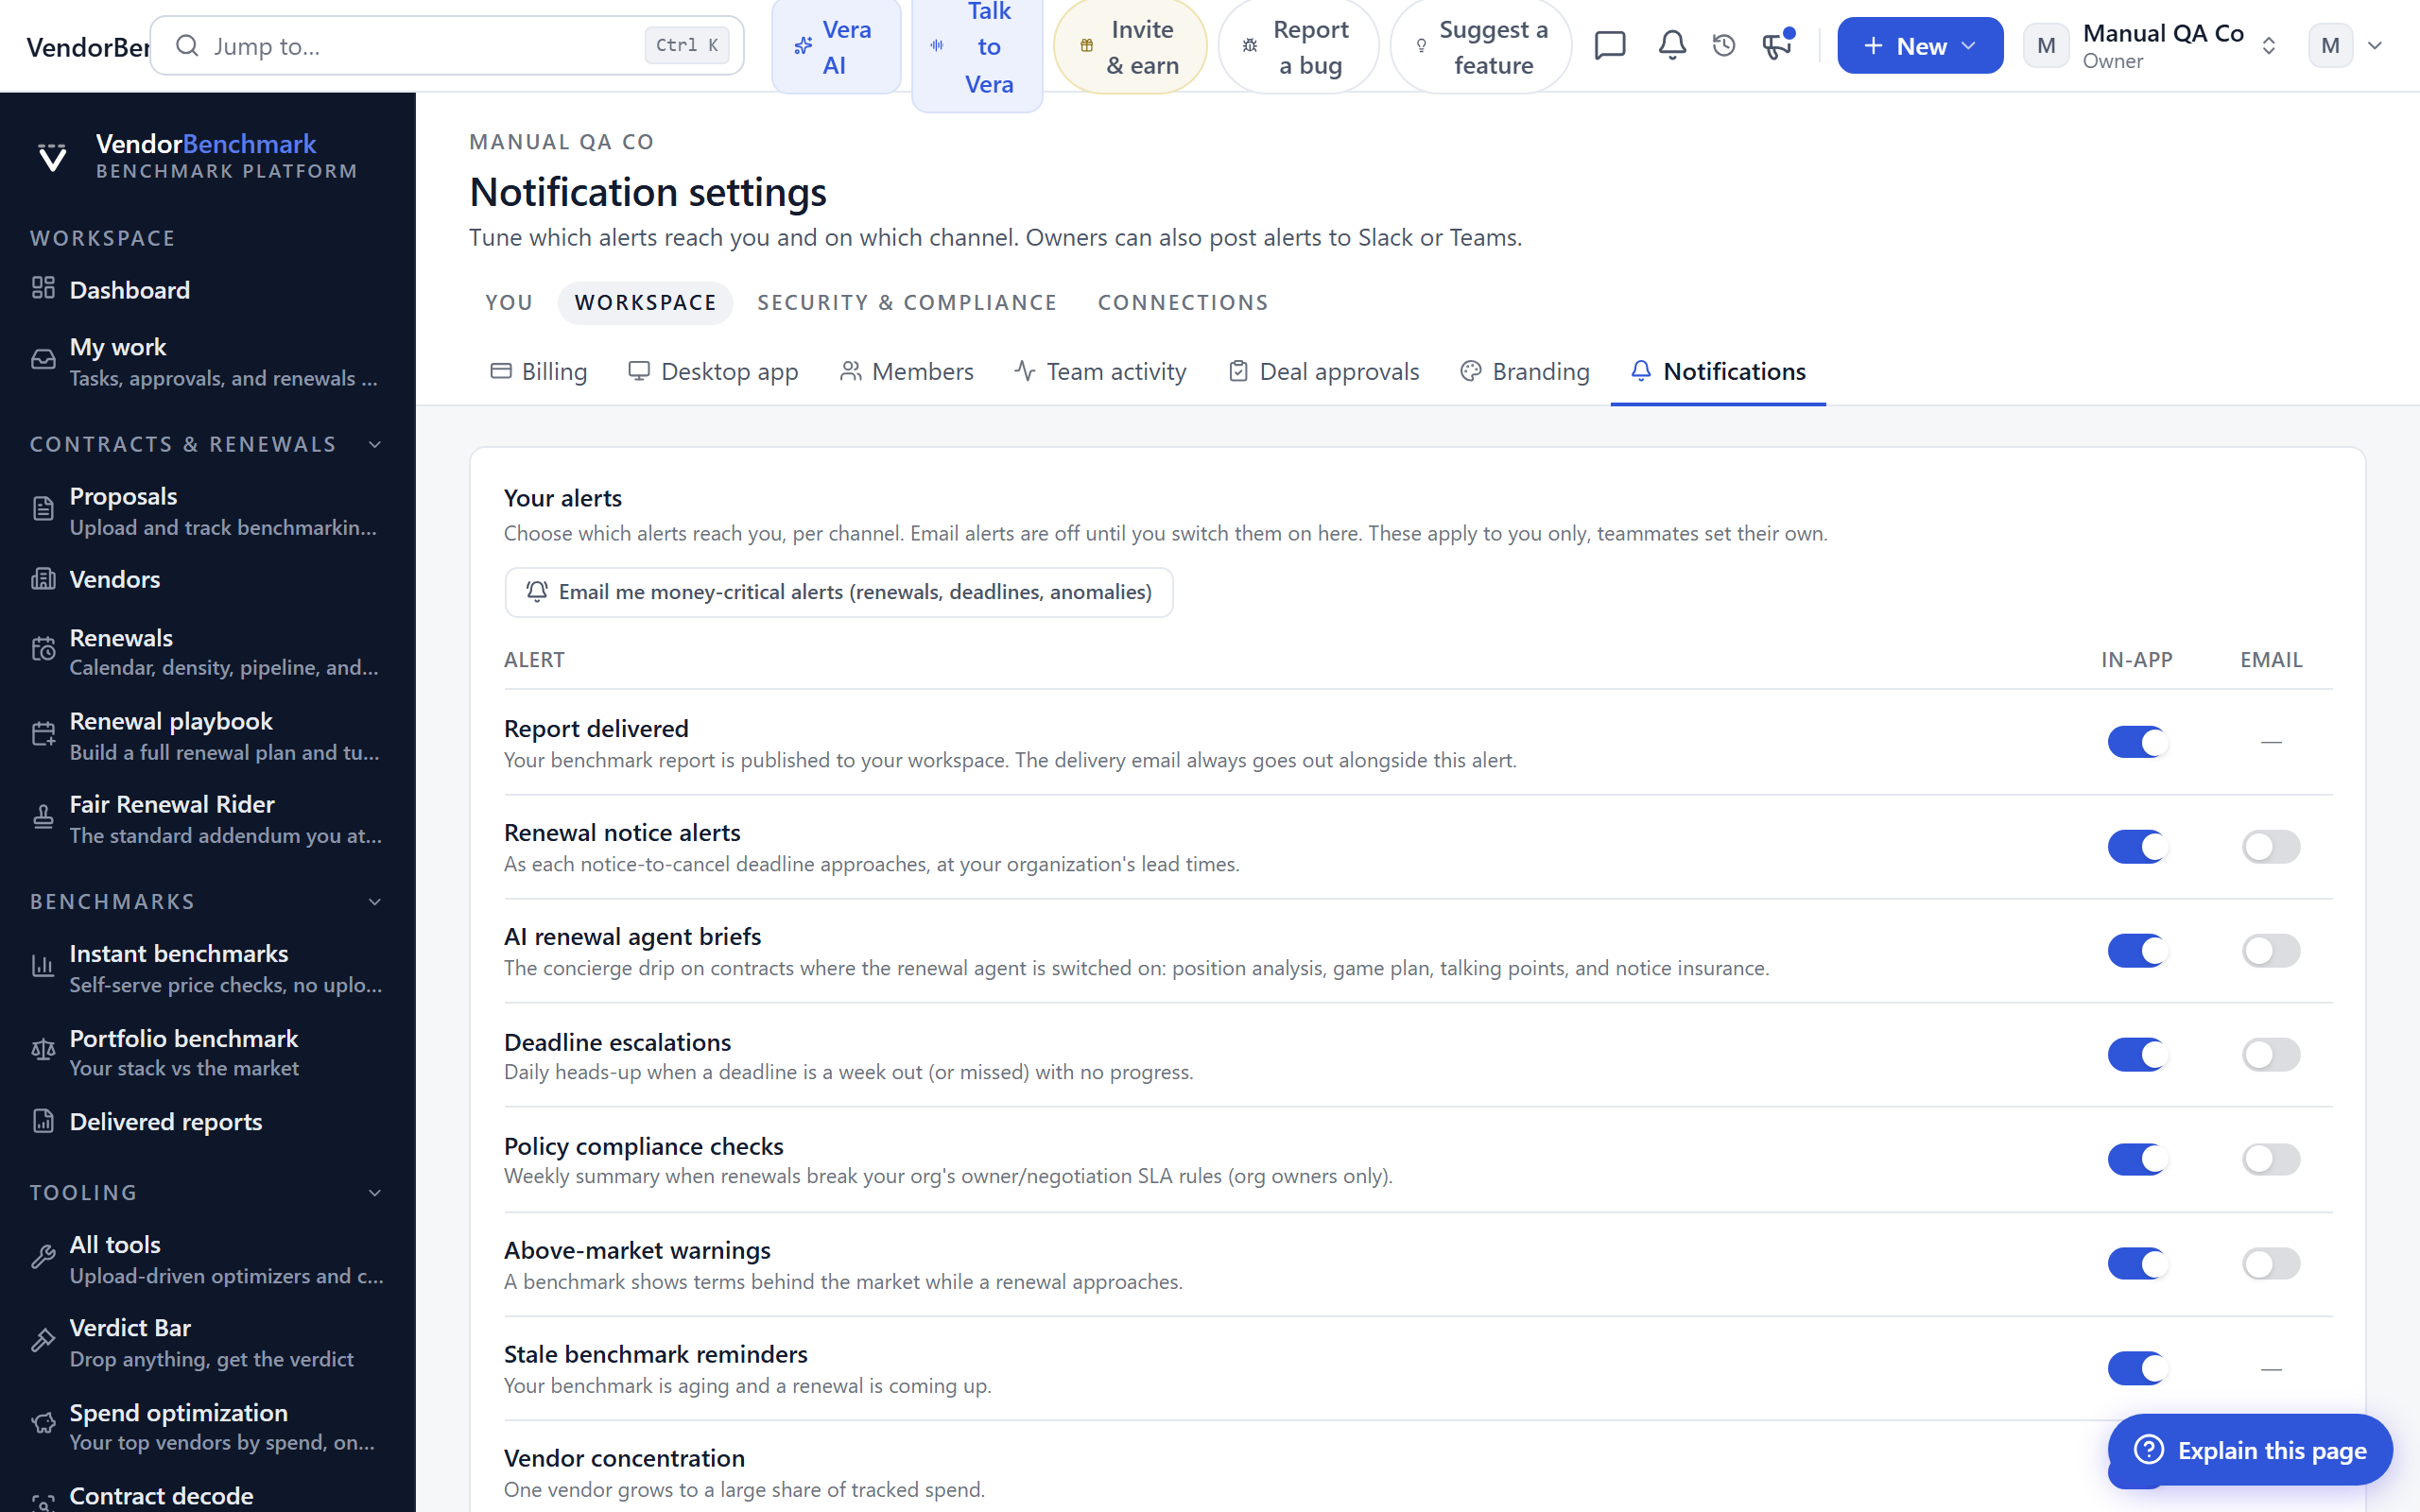
On the screen
- Alert preferences — for each kind of alert, choose in-app, email, both, or off.
- AI copilot preferences (owners) — the digest, anomaly watch, board report, community and outcome network sharing, and dispute alert thresholds.
- Webhooks (owners) — post alerts to a Slack or Teams channel.
How to use it
- Turn off any alert kind you do not want, or move it to a single channel.
- Owners: set the copilot alert rules and connect a chat channel if the team wants alerts there.
Security Center
Where: Settings › Security & compliance › Security Center · /security-center
Who: everyone (owners see and manage every control; members see the policies that apply to them and their own devices)
Your organization's live security posture on one page: two-factor coverage, single sign-on, retention, API credentials, the audit stream, recent security events, and your sign-in devices. Live state, not marketing.
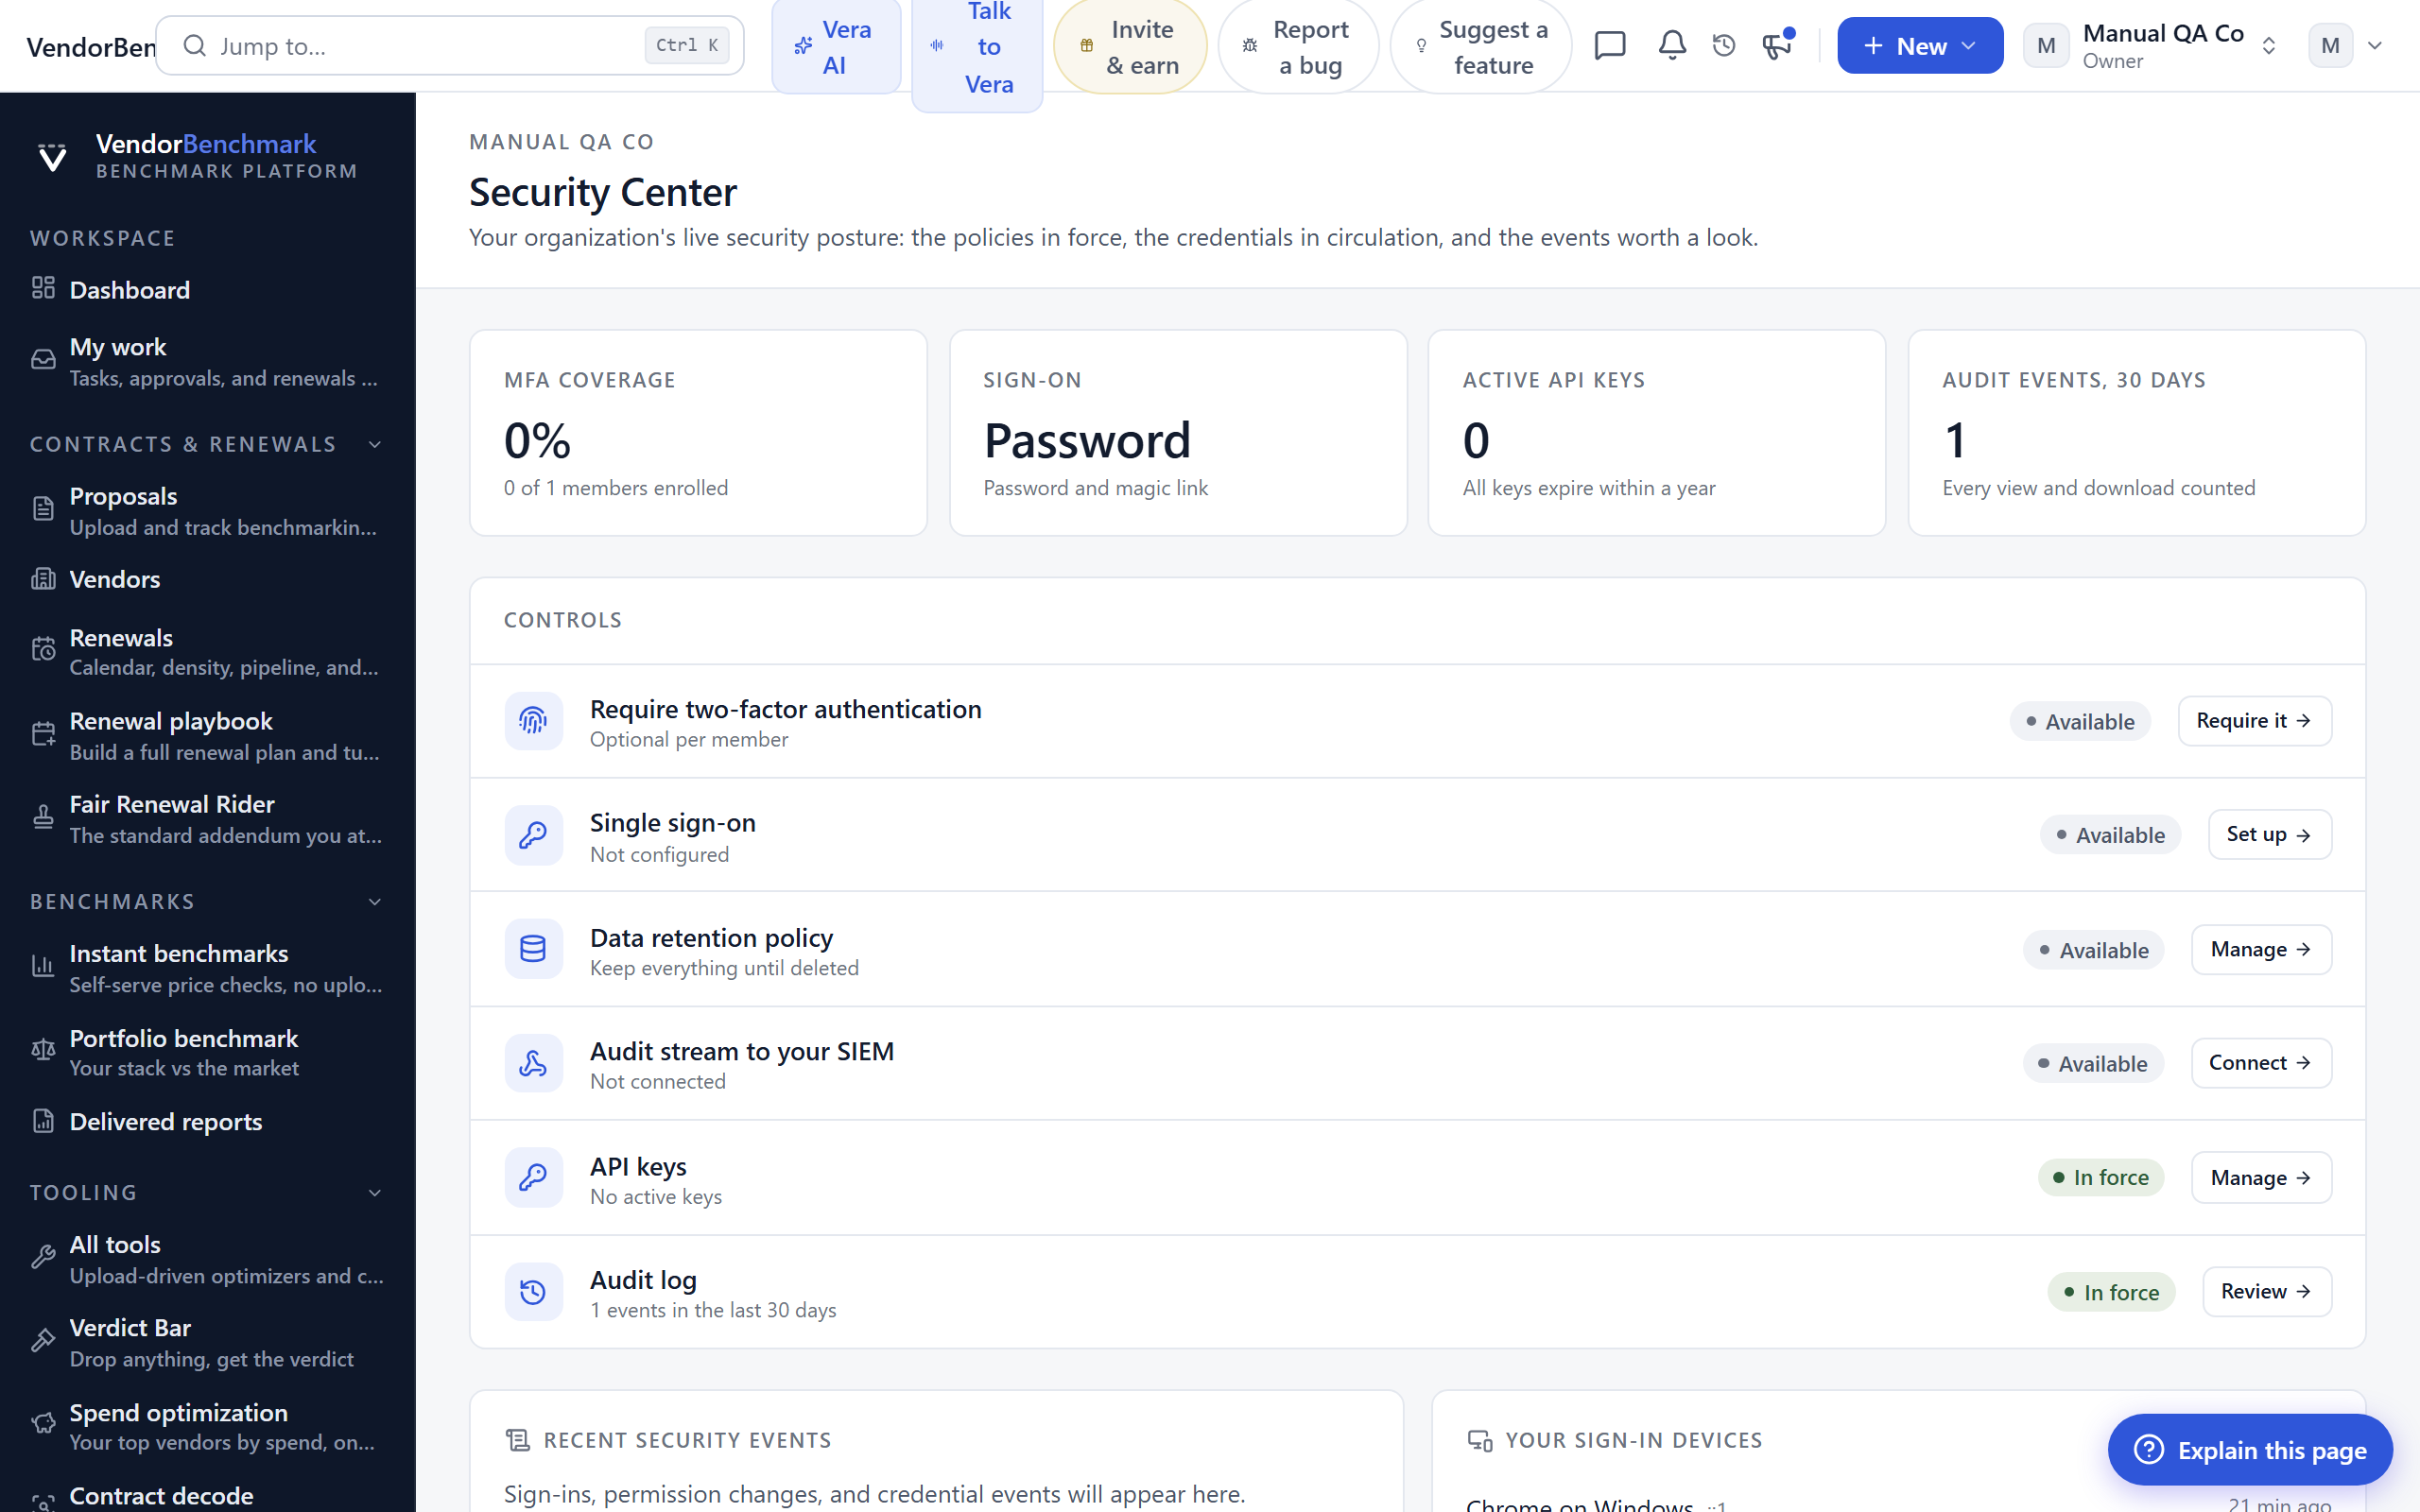
On the screen
- Posture tiles — two-factor coverage across members, sign-on method, active API keys, and audit events in the last 30 days.
- Controls — each security control with its current state and, for owners, a link to manage it.
- Recent security events — sign-ins, permission changes, and credential events.
- Your sign-in devices — the devices seen on your account, with a link to manage active sessions.
How to use it
- Read the posture tiles for a one-glance health check.
- Owners: work down the controls list and tighten anything that reads as merely "Available" rather than "In force."
- Check your devices and sign out anything unfamiliar from Settings › Security.
Related: Security · Trust center · Audit log
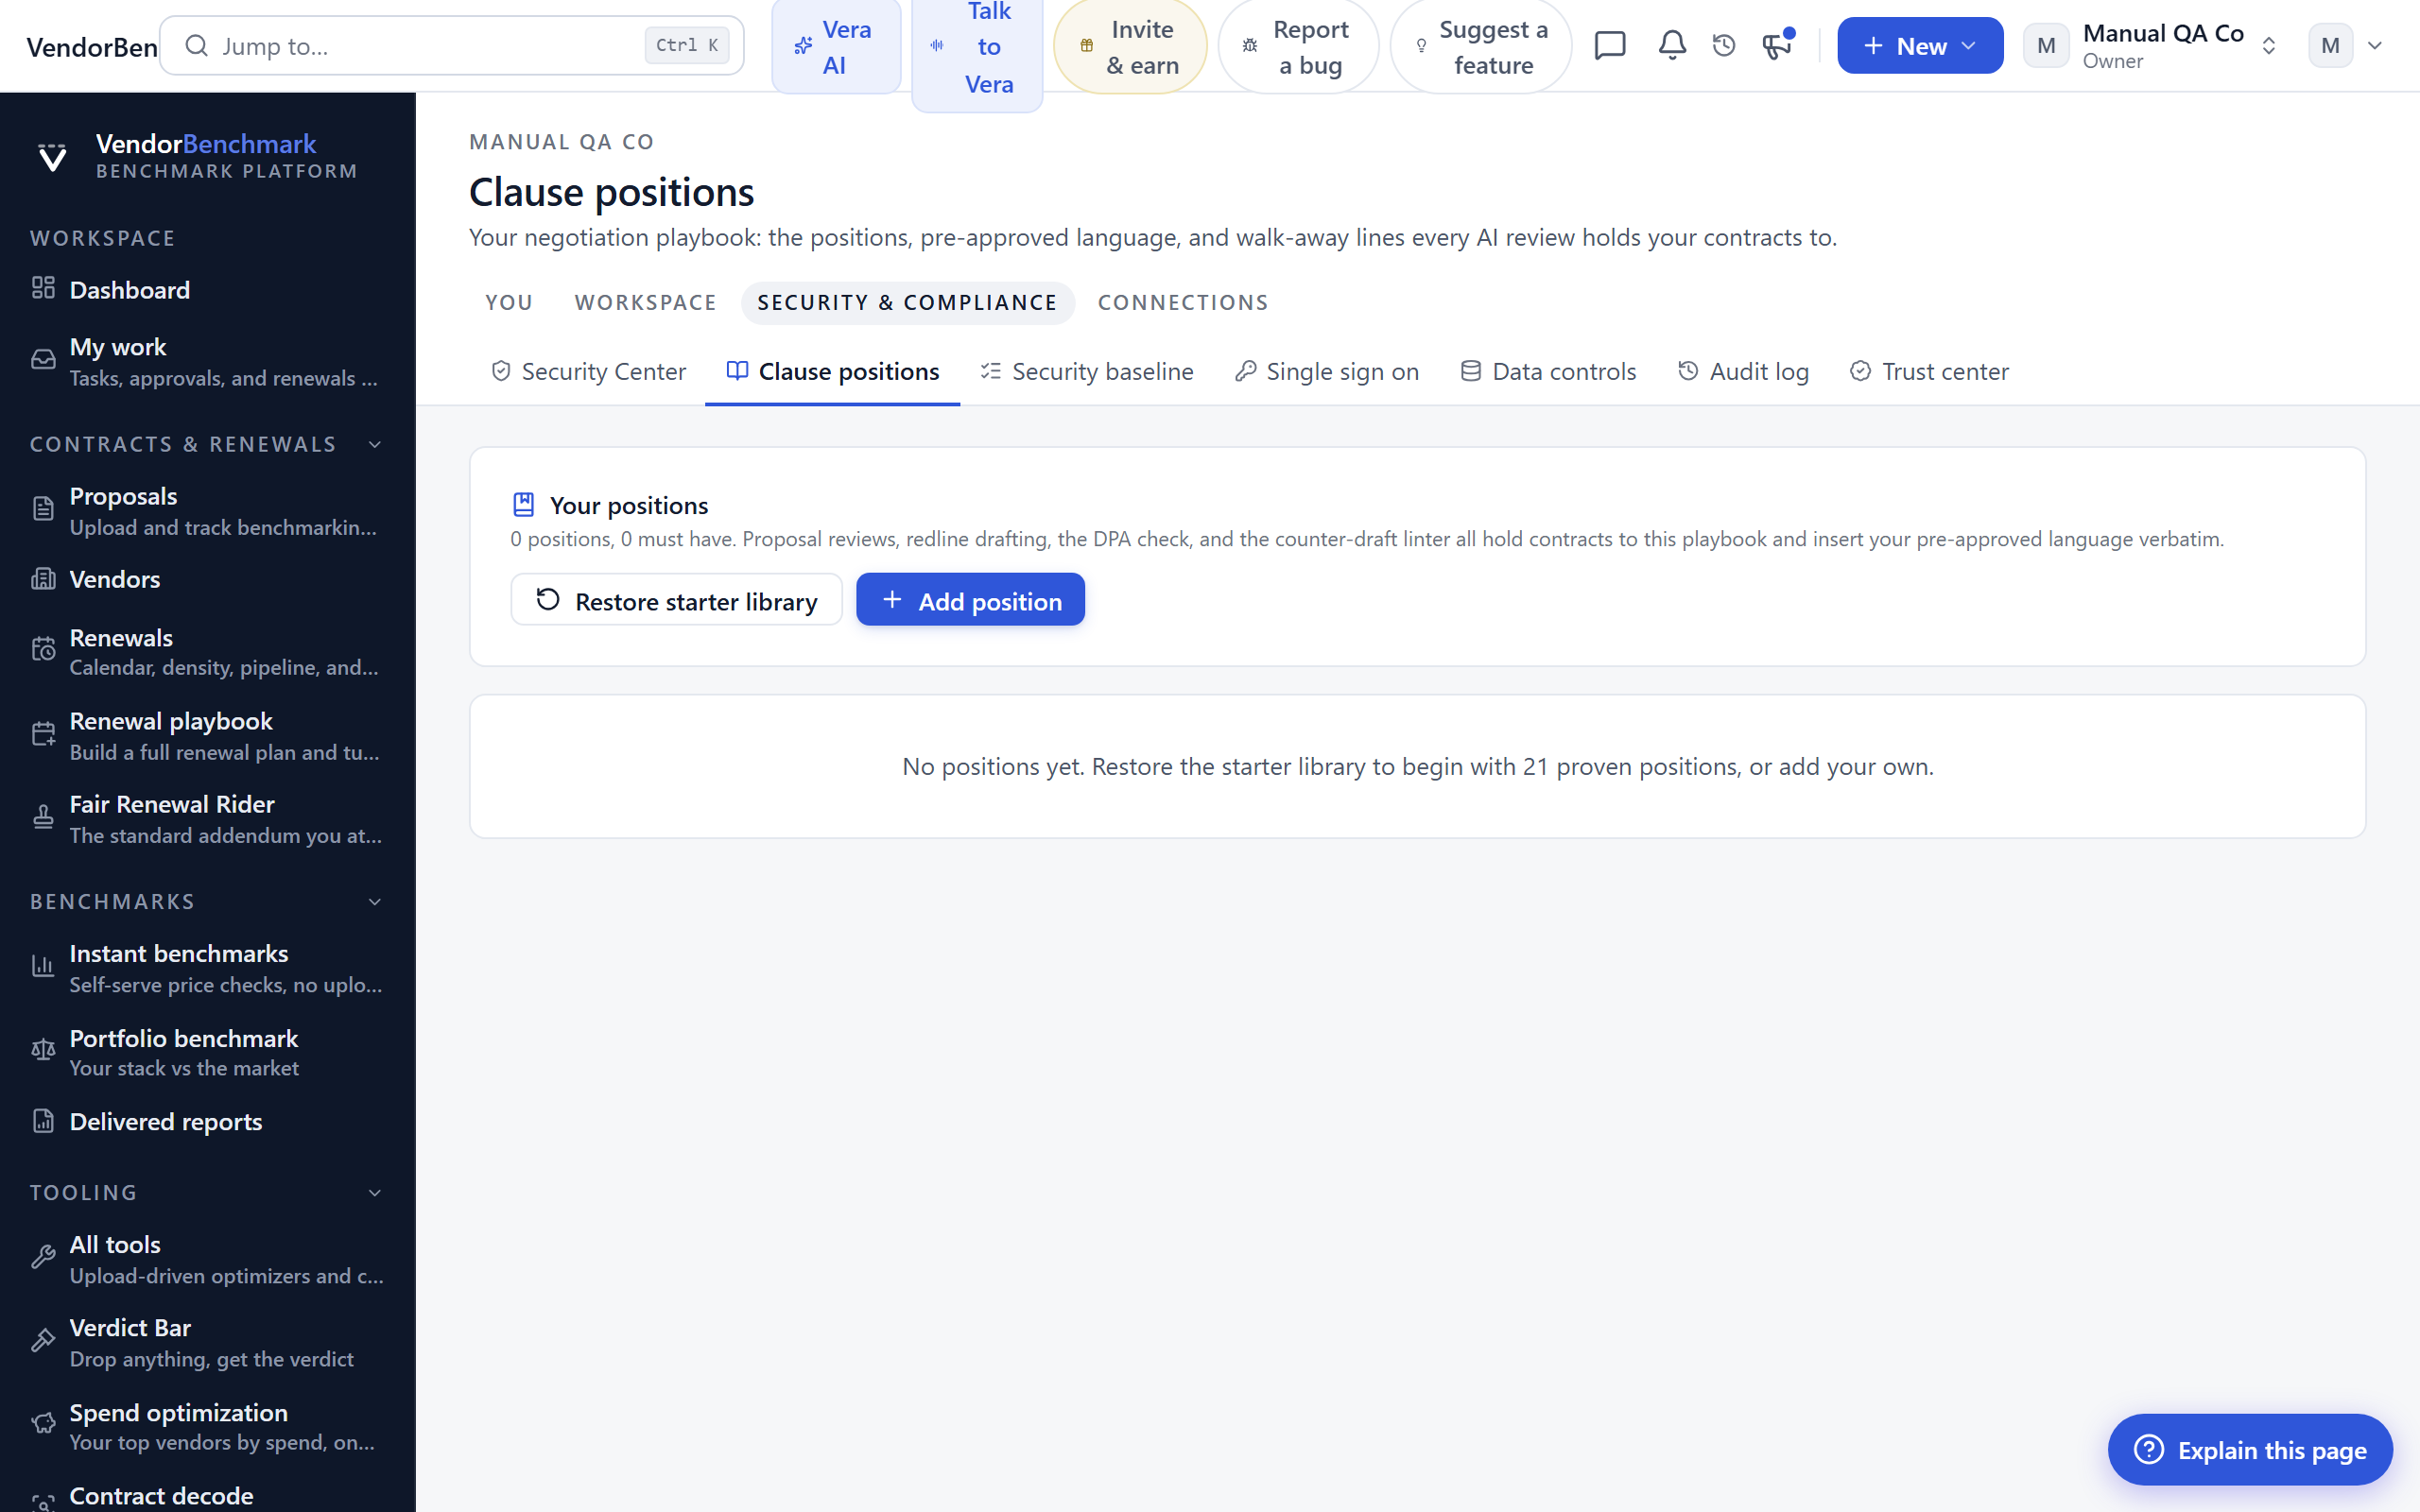
Clause positions
Where: Settings › Security & compliance › Clause positions · /settings/clause-library
Who: everyone
Your negotiation playbook as data: the positions, pre-approved language (ideal, fallback, and walk-away), and must-have clauses that every AI review holds your contracts to. This is the settings surface behind the workspace Clause library.
On the screen
- Positions — each clause position with its pre-approved language and walk-away line.
- Must-have flag — mark a position as required so the coverage check sweeps for it across every contract.
How to use it
- Add or edit a position and its ideal, fallback, and walk-away language.
- Mark the positions your organization will not sign without as must-have.
- AI reviews then insert your language verbatim wherever a contract deviates.
Related: Clause library · Security baseline
Security baseline
Where: Settings › Security & compliance › Security baseline · /settings/security-baseline
Who: everyone
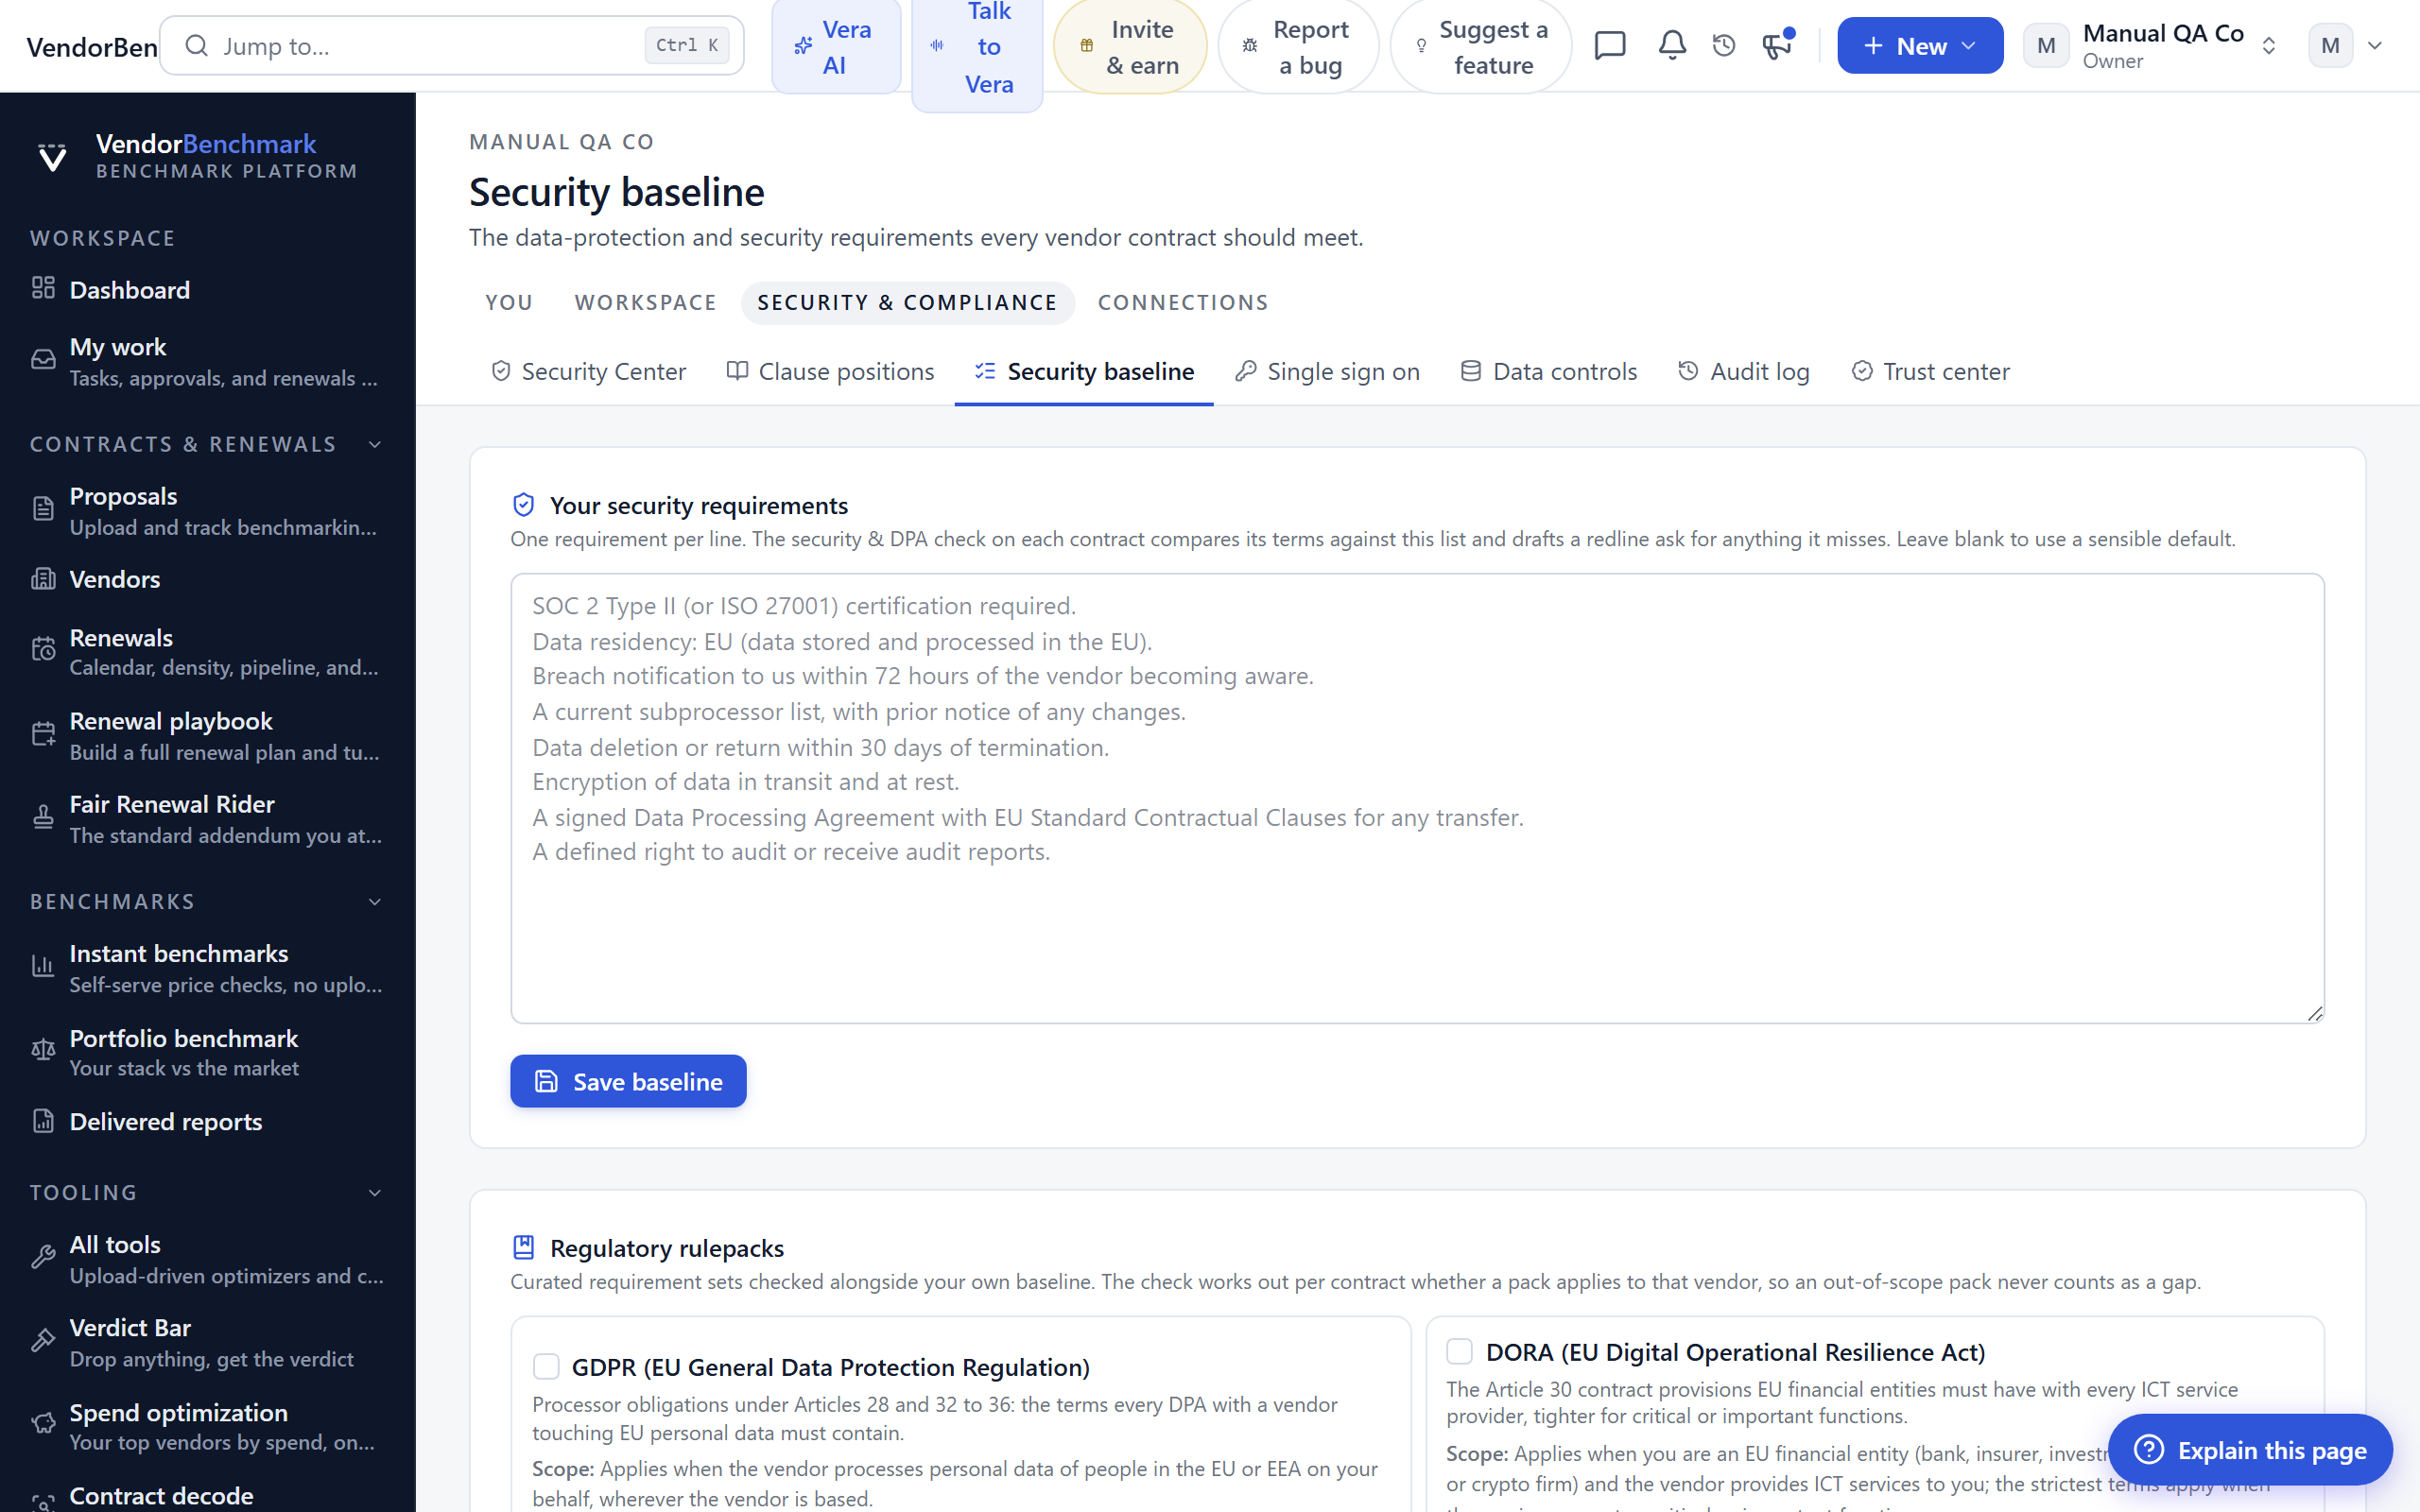
The data-protection and security requirements every vendor contract should meet. These are the rules the DPA check enforces when it reviews a contract.
On the screen
- Baseline requirements — your written data-protection and security requirements; a default is offered as a starting point.
- Rulepacks — pre-built requirement sets you can switch on.
How to use it
- Edit the baseline to match what your organization requires of vendors.
- Turn on any rulepacks that apply.
- The DPA check then measures each contract against this baseline.
Related: Clause positions
Single sign on
Where: Settings › Security & compliance › Single sign on · /settings/sso
Who: org owners only
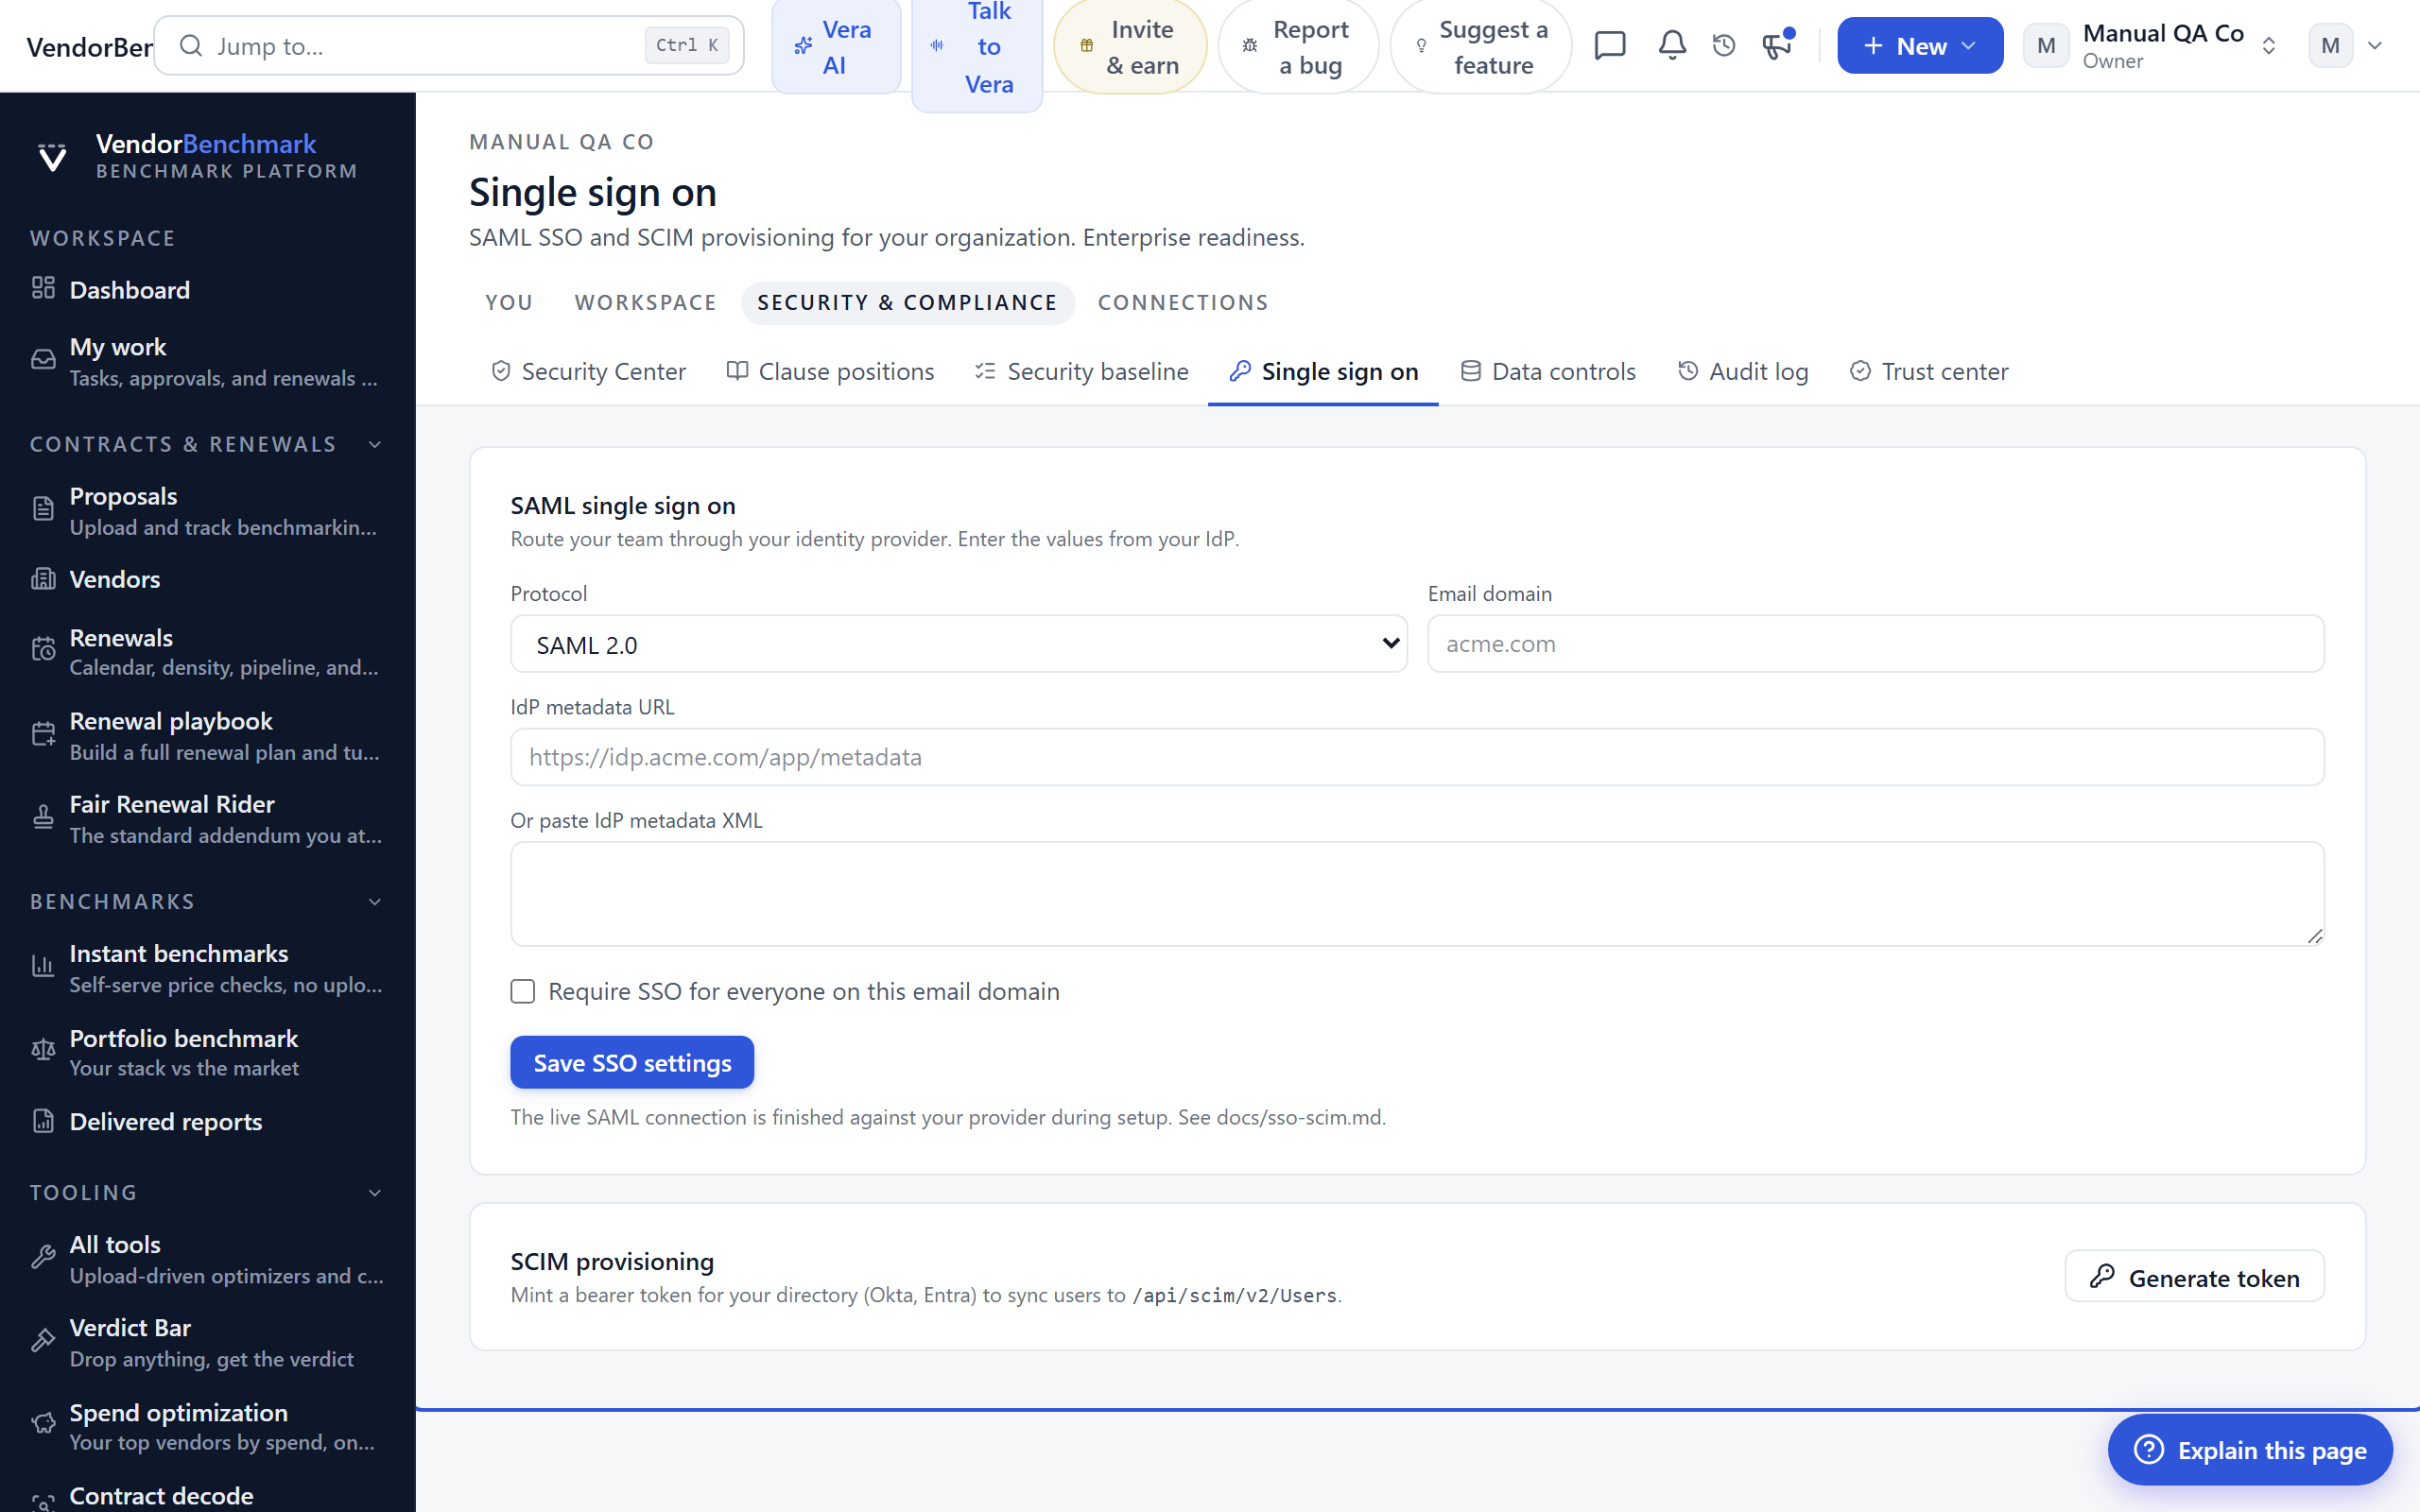
SAML single sign-on and SCIM provisioning for your organization, for teams that manage access through an identity provider.
On the screen
- SSO configuration — connect your SAML identity provider and choose whether sign-on is enforced for your domain.
- SCIM tokens — provisioning tokens so your identity provider can create and deactivate accounts automatically.
How to use it
- Enter your identity provider's SAML details.
- Decide whether to enforce single sign-on for everyone on your email domain.
- Issue a SCIM token if you want automatic user provisioning.
Related: Security Center
Data controls
Where: Settings › Security & compliance › Data controls · /settings/data
Who: org owners only
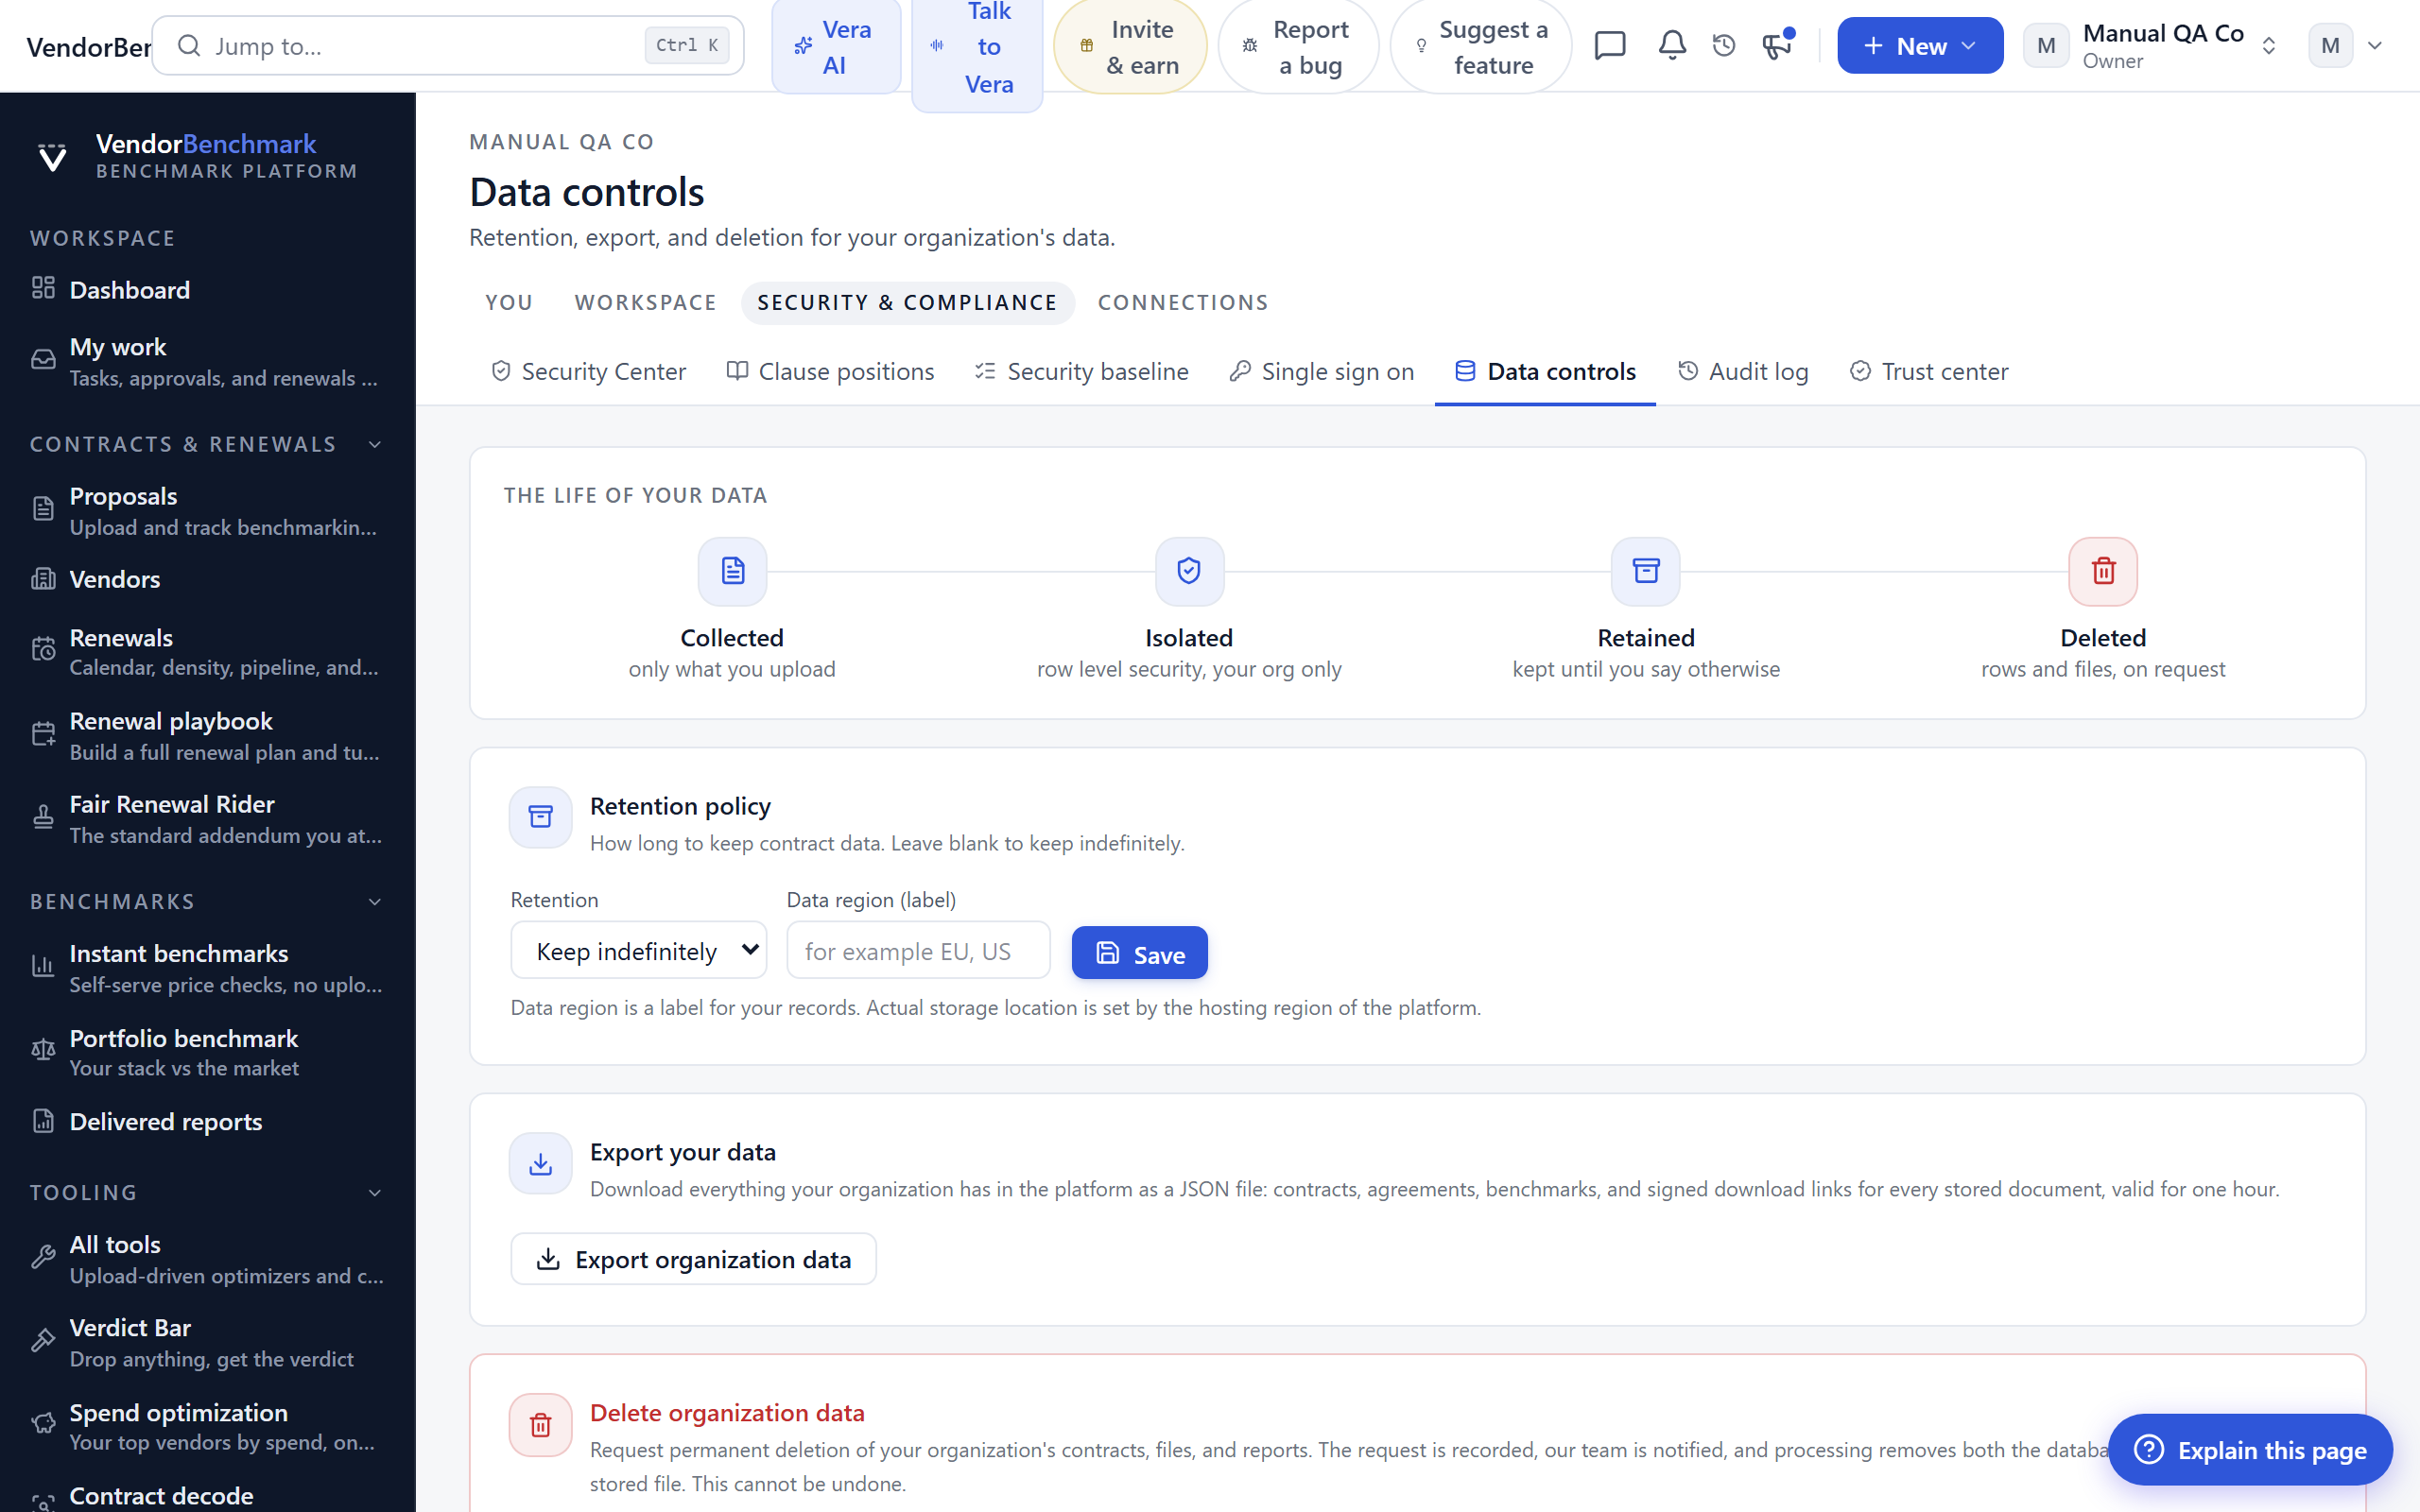
Retention, export, and deletion for your organization's data, plus your consent choices for the community and outcome network.
On the screen
- Retention — how long data is kept and, where offered, the data region.
- Community and outcome network consent — opt in or out of contributing anonymized data to the community benchmarks and outcome network.
- Reseller quotes — recent quotes shared for benchmarking.
- Export and deletion — request an export or a deletion of your organization's data.
How to use it
- Set a retention period if your policy requires one.
- Choose whether to contribute to the community and outcome network.
- Request an export or deletion when you need it; our team processes deletion requests and confirms by email.
Related: Trust center · Audit log
Audit log
Where: Settings › Security & compliance › Audit log · /settings/audit
Who: org owners only
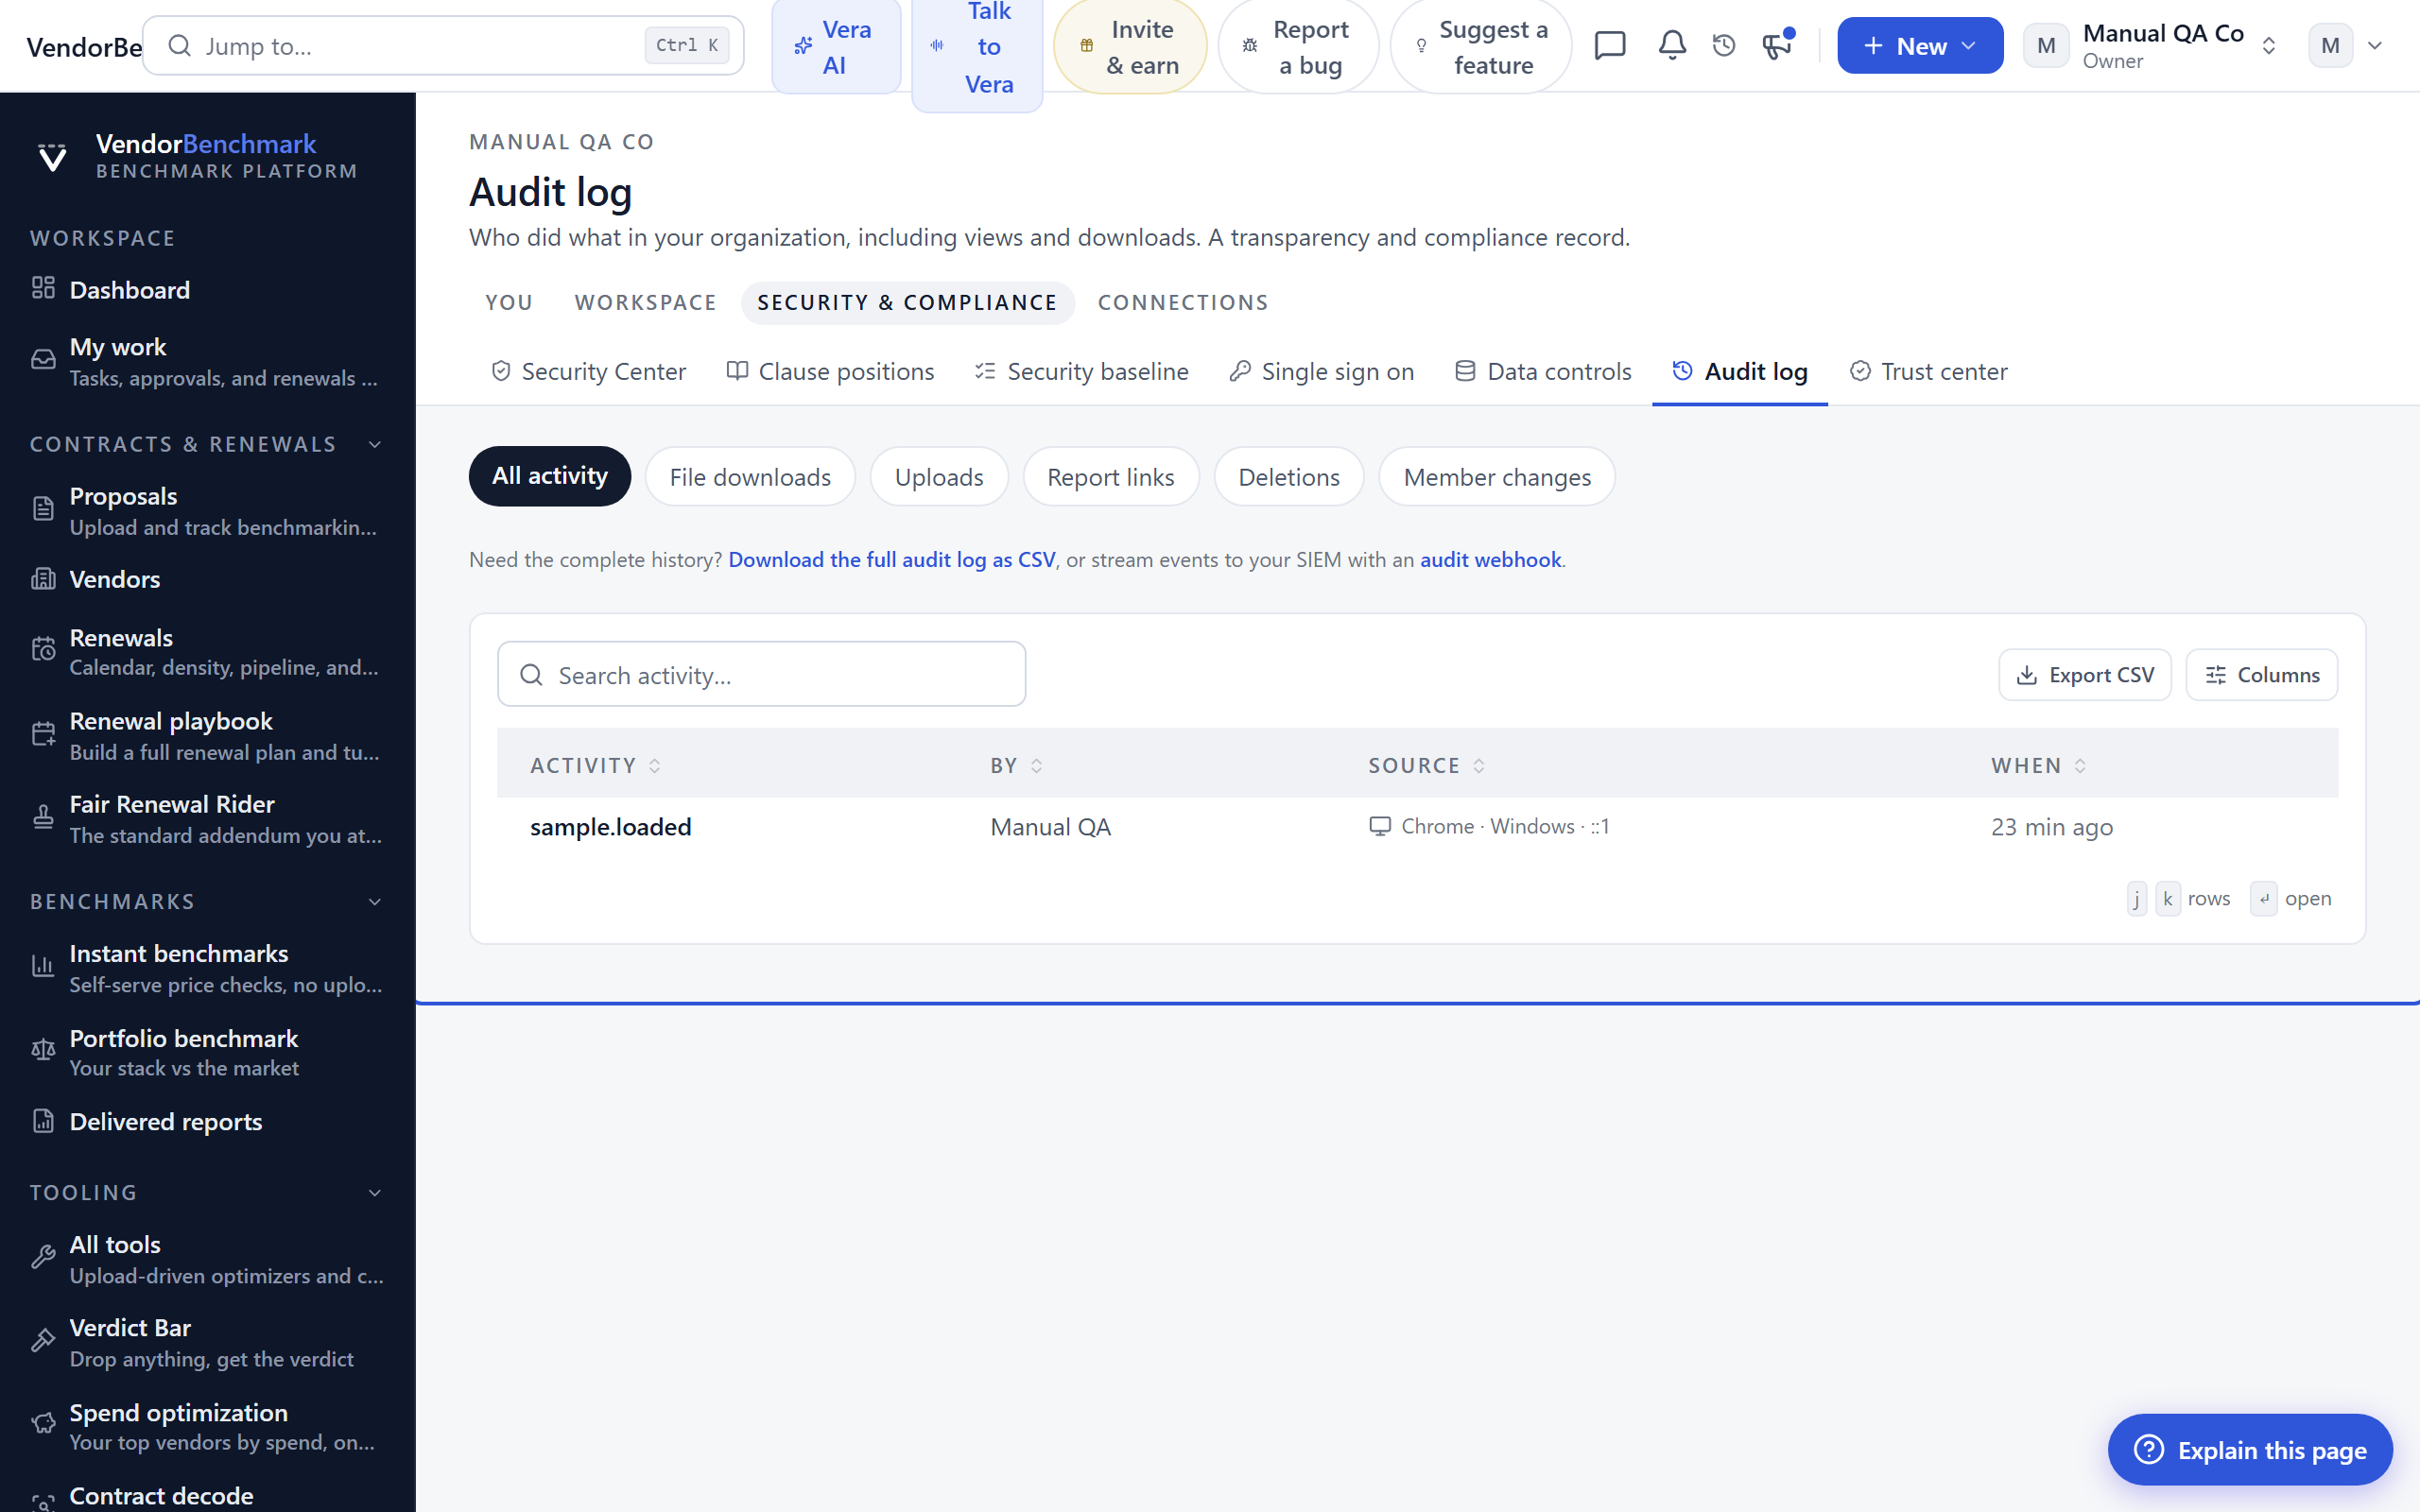
Who did what in your organization, including views and downloads of contract files. A transparency and compliance record you can filter, search, and export.
On the screen
- Filters — narrow to file downloads, uploads, report links, deletions, or member changes.
- Activity table — each event with the actor, the source device and IP, and when it happened.
- Saved views — save a filter you return to often.
- Export and stream — download the full log as CSV, or stream events to your SIEM with an audit webhook.
How to use it
- Pick a filter or search for an actor or activity.
- Save a view if you audit the same slice regularly.
- Export to CSV, or set up an audit webhook under Integrations for continuous streaming.
Related: Security Center · Integrations
Trust center
Where: Settings › Security & compliance › Trust center · /trust
Who: everyone
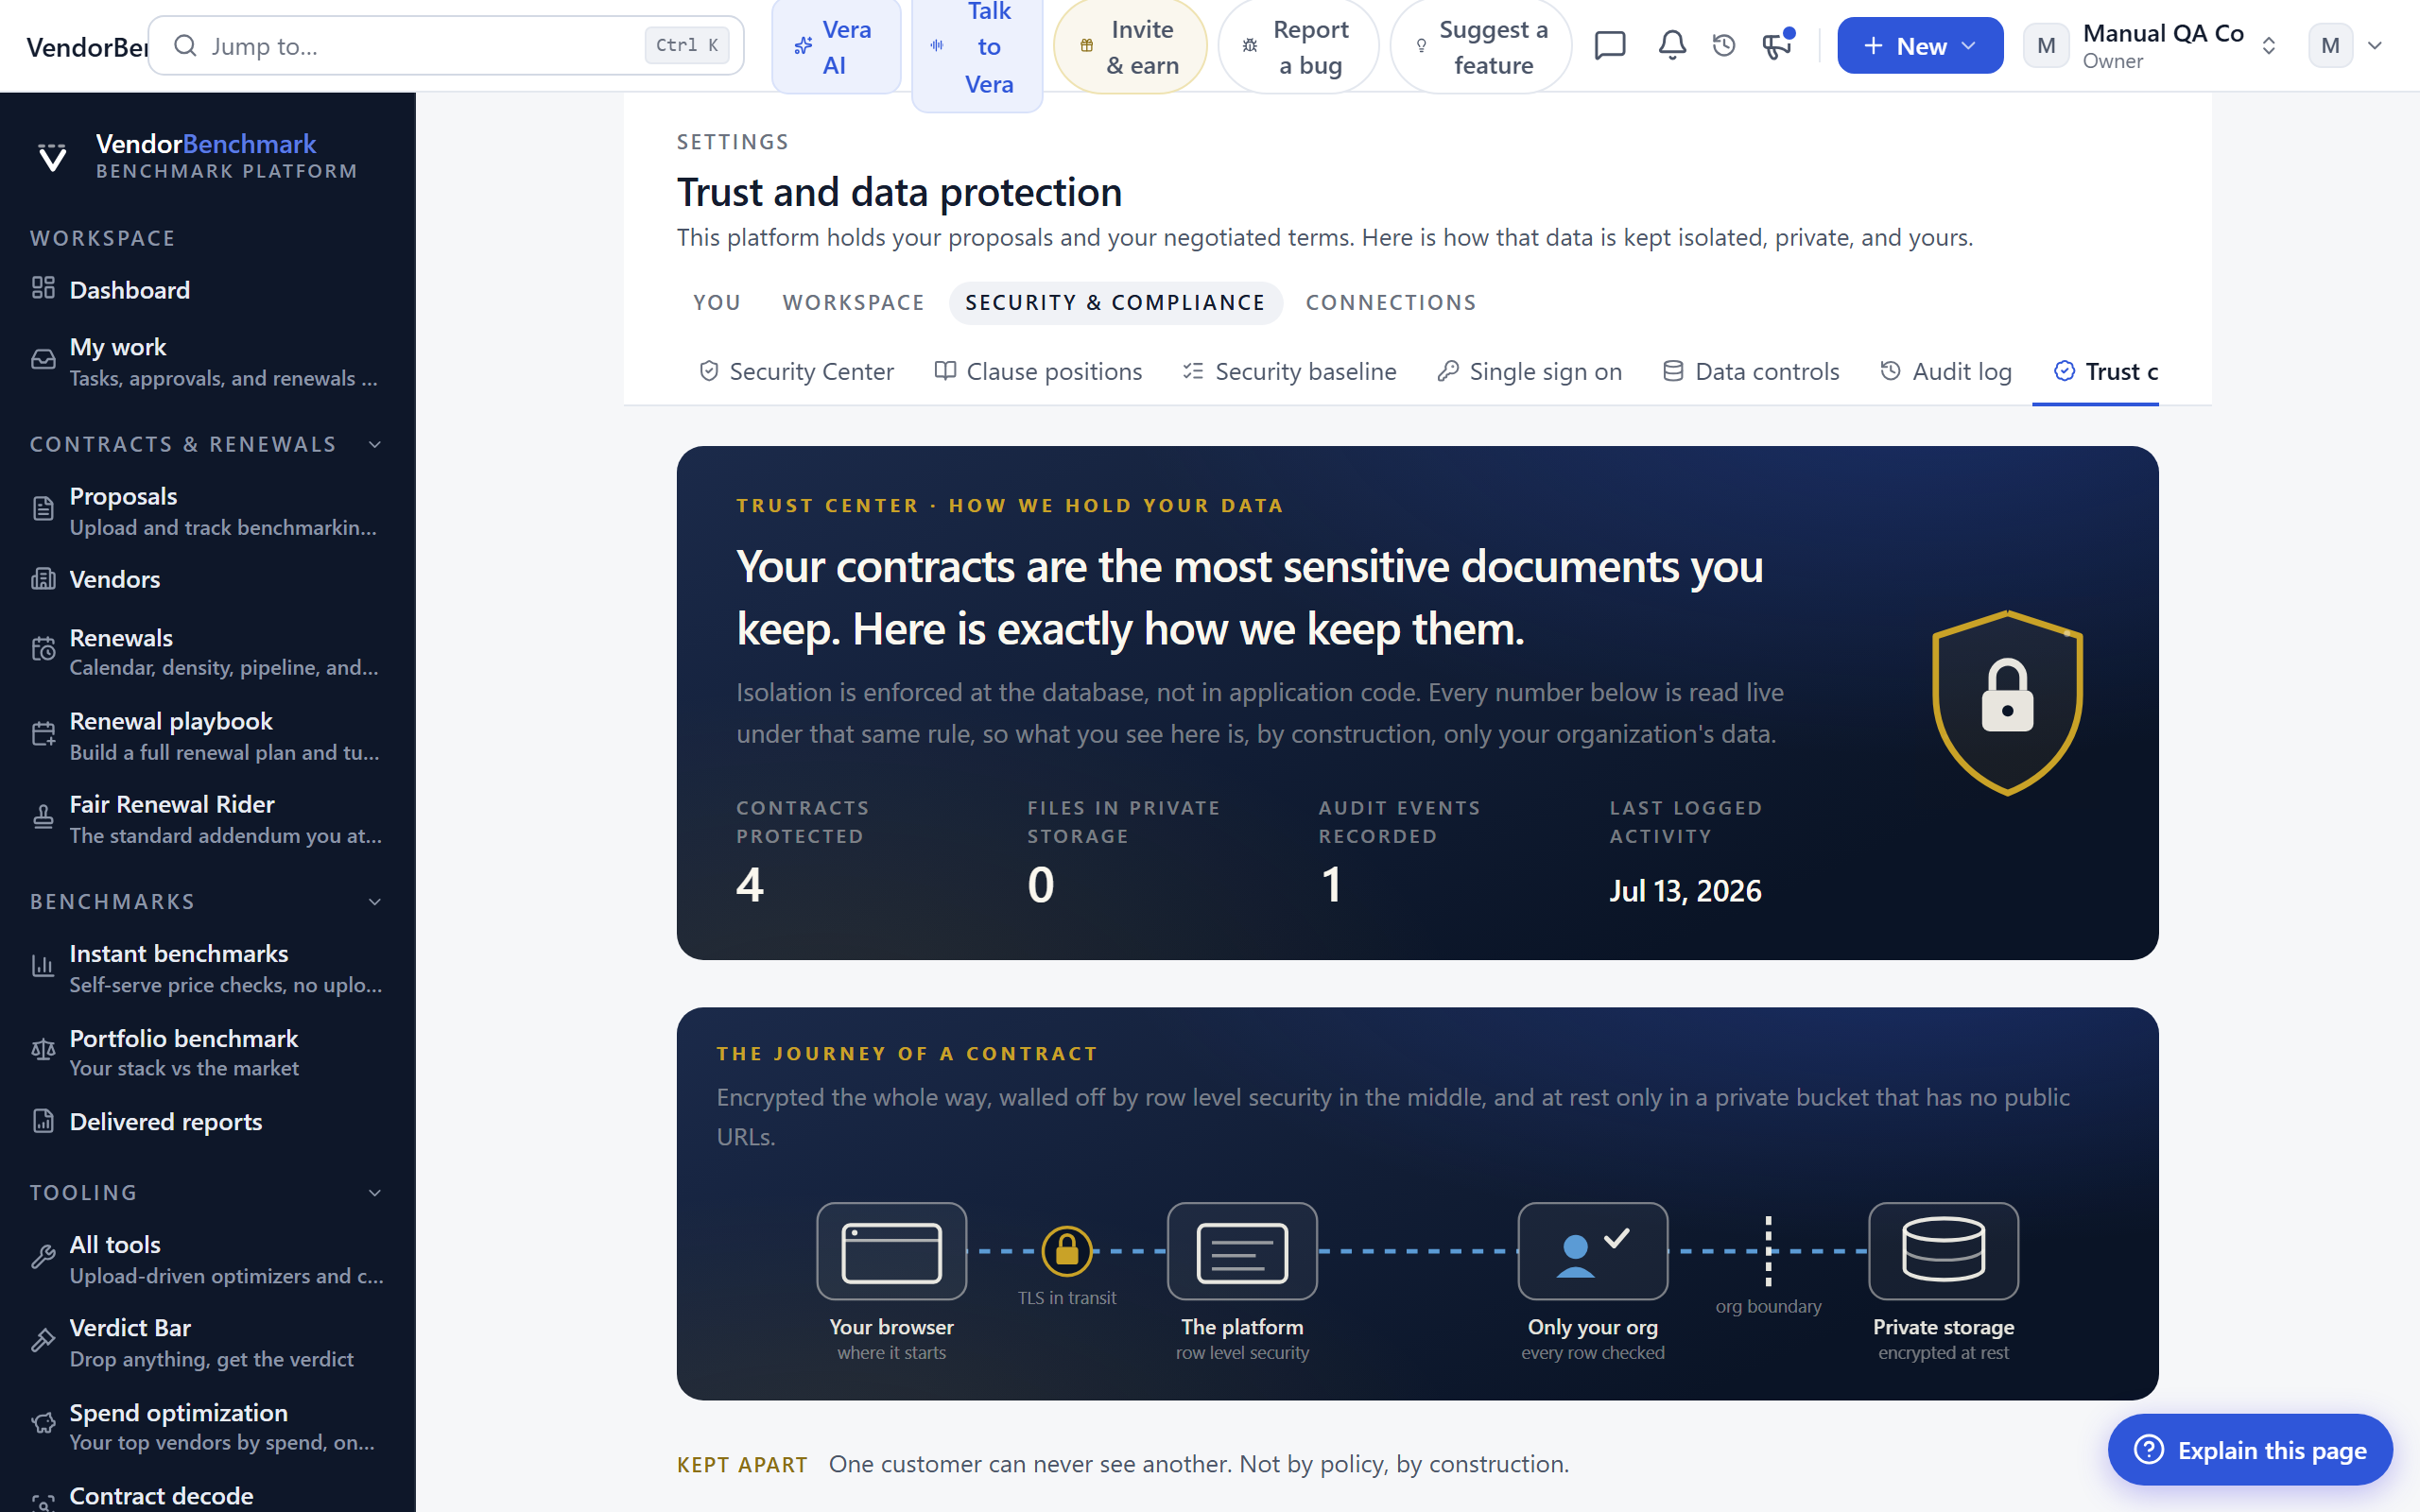
How your data is protected, told in three commitments: kept apart (tenant isolation), kept sealed (encryption and access), and kept yours (audit, deletion, and eyes-off AI). The masthead proves the isolation claim with live numbers.
On the screen
- Kept apart — tenant isolation at the database, least-privilege access, and roles matched to clearance.
- Kept sealed — private contract storage with short-lived signed links, encryption in transit and at rest, and multifactor authentication.
- Kept yours — the audit record, data deletion, and how the AI handles your data.
- Data journey — a diagram of the path a contract actually takes through the platform.
How to use it
- Read the three chapters to understand the controls applied to your data.
- Share this page with security reviewers who ask how the platform protects information.
Related: Security Center · Data controls
Integrations
Where: Settings › Connections › Integrations · /settings/integrations
Who: org owners only
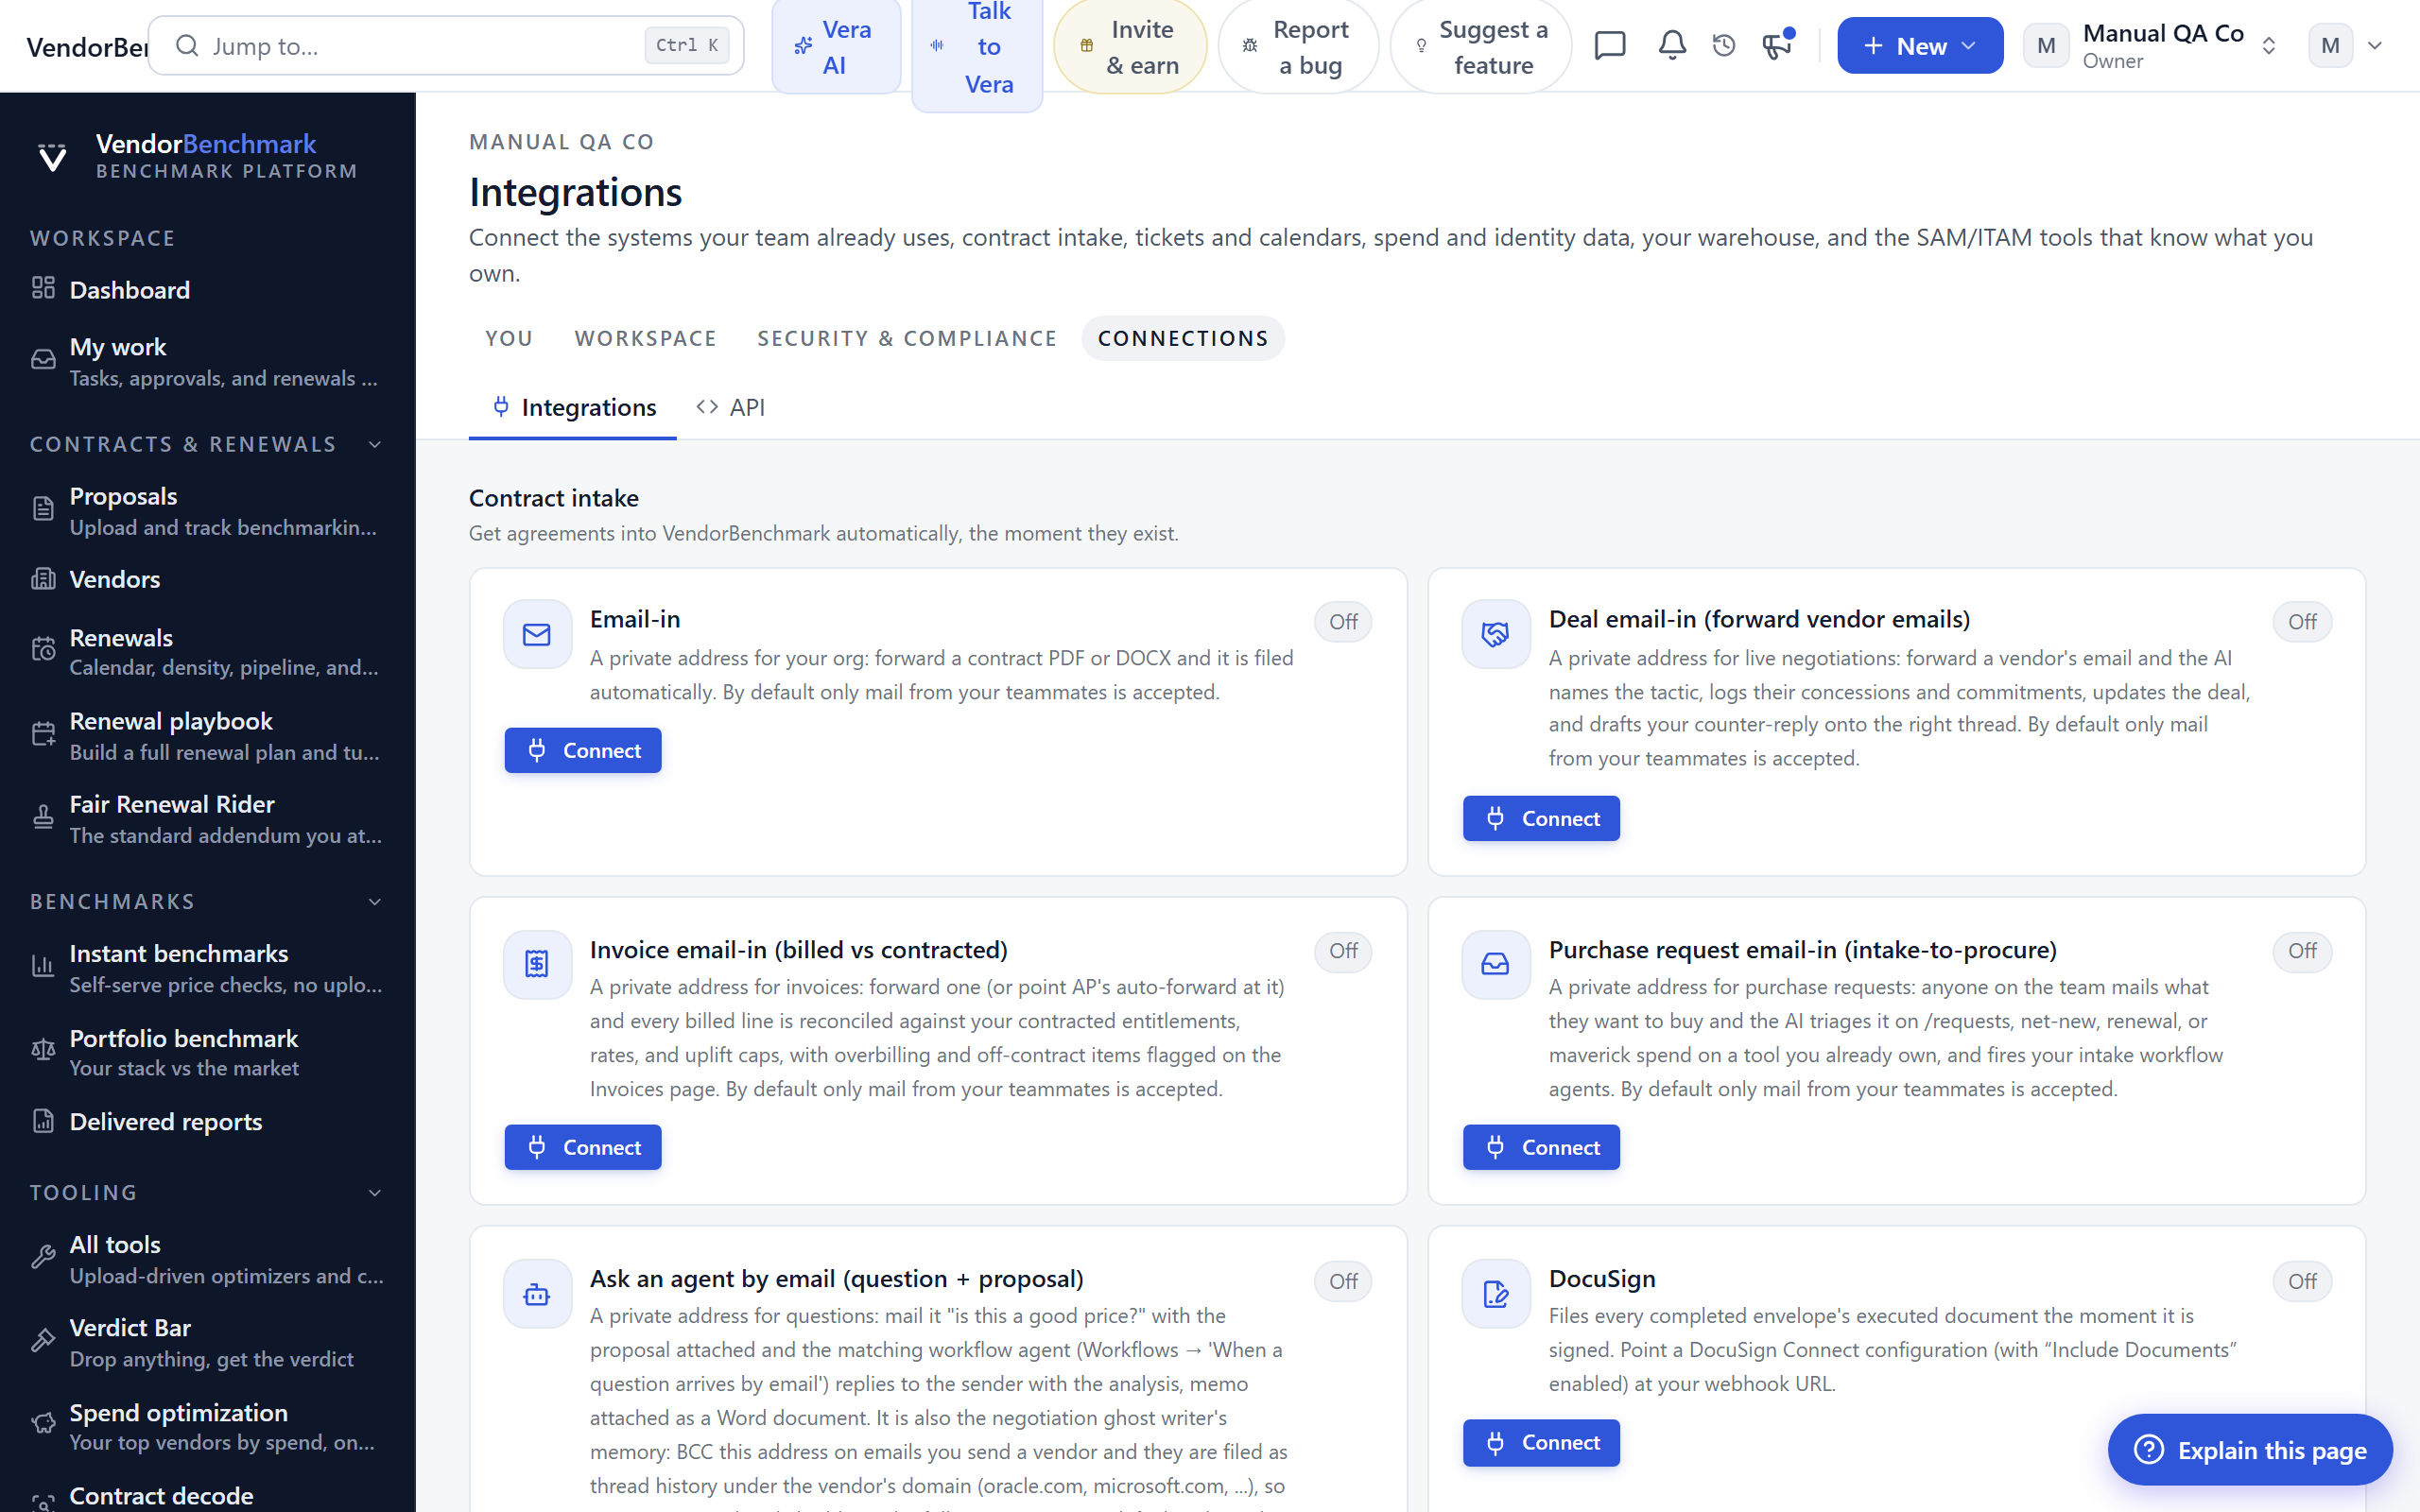
Connect the systems your team already uses: contract intake, tickets and calendars, spend and identity data, your warehouse, and the SAM and ITAM tools that know what you own and use.
On the screen
- Workflow hub — contract intake (email-in, DocuSign, Ironclad, Drive/SharePoint), renewal workflow (Jira, ServiceNow, calendar invites, Slack), spend and usage sources, warehouse export, and signed JSON event webhooks.
- Procurement and ERP (P2P) — purchase orders, requisitions, and supplier records from your procure-to-pay systems, with maverick spend flagged.
- License and deployment discovery (SAM / ITAM) — connect the systems that know your entitlements and deployments; the license intelligence table shows entitled vs deployed vs active per vendor, with estimated shelfware.
- Recent syncs — the latest sync results for each connected source.
How to use it
- Pick a system, enter its credentials or copy the intake address it needs, and connect.
- Let the first sync run, then review the license and procurement intelligence tables.
- Add an audit webhook if you want to stream events to your SIEM.
API
Where: Settings › Connections › API · /settings/api
Who: org owners only
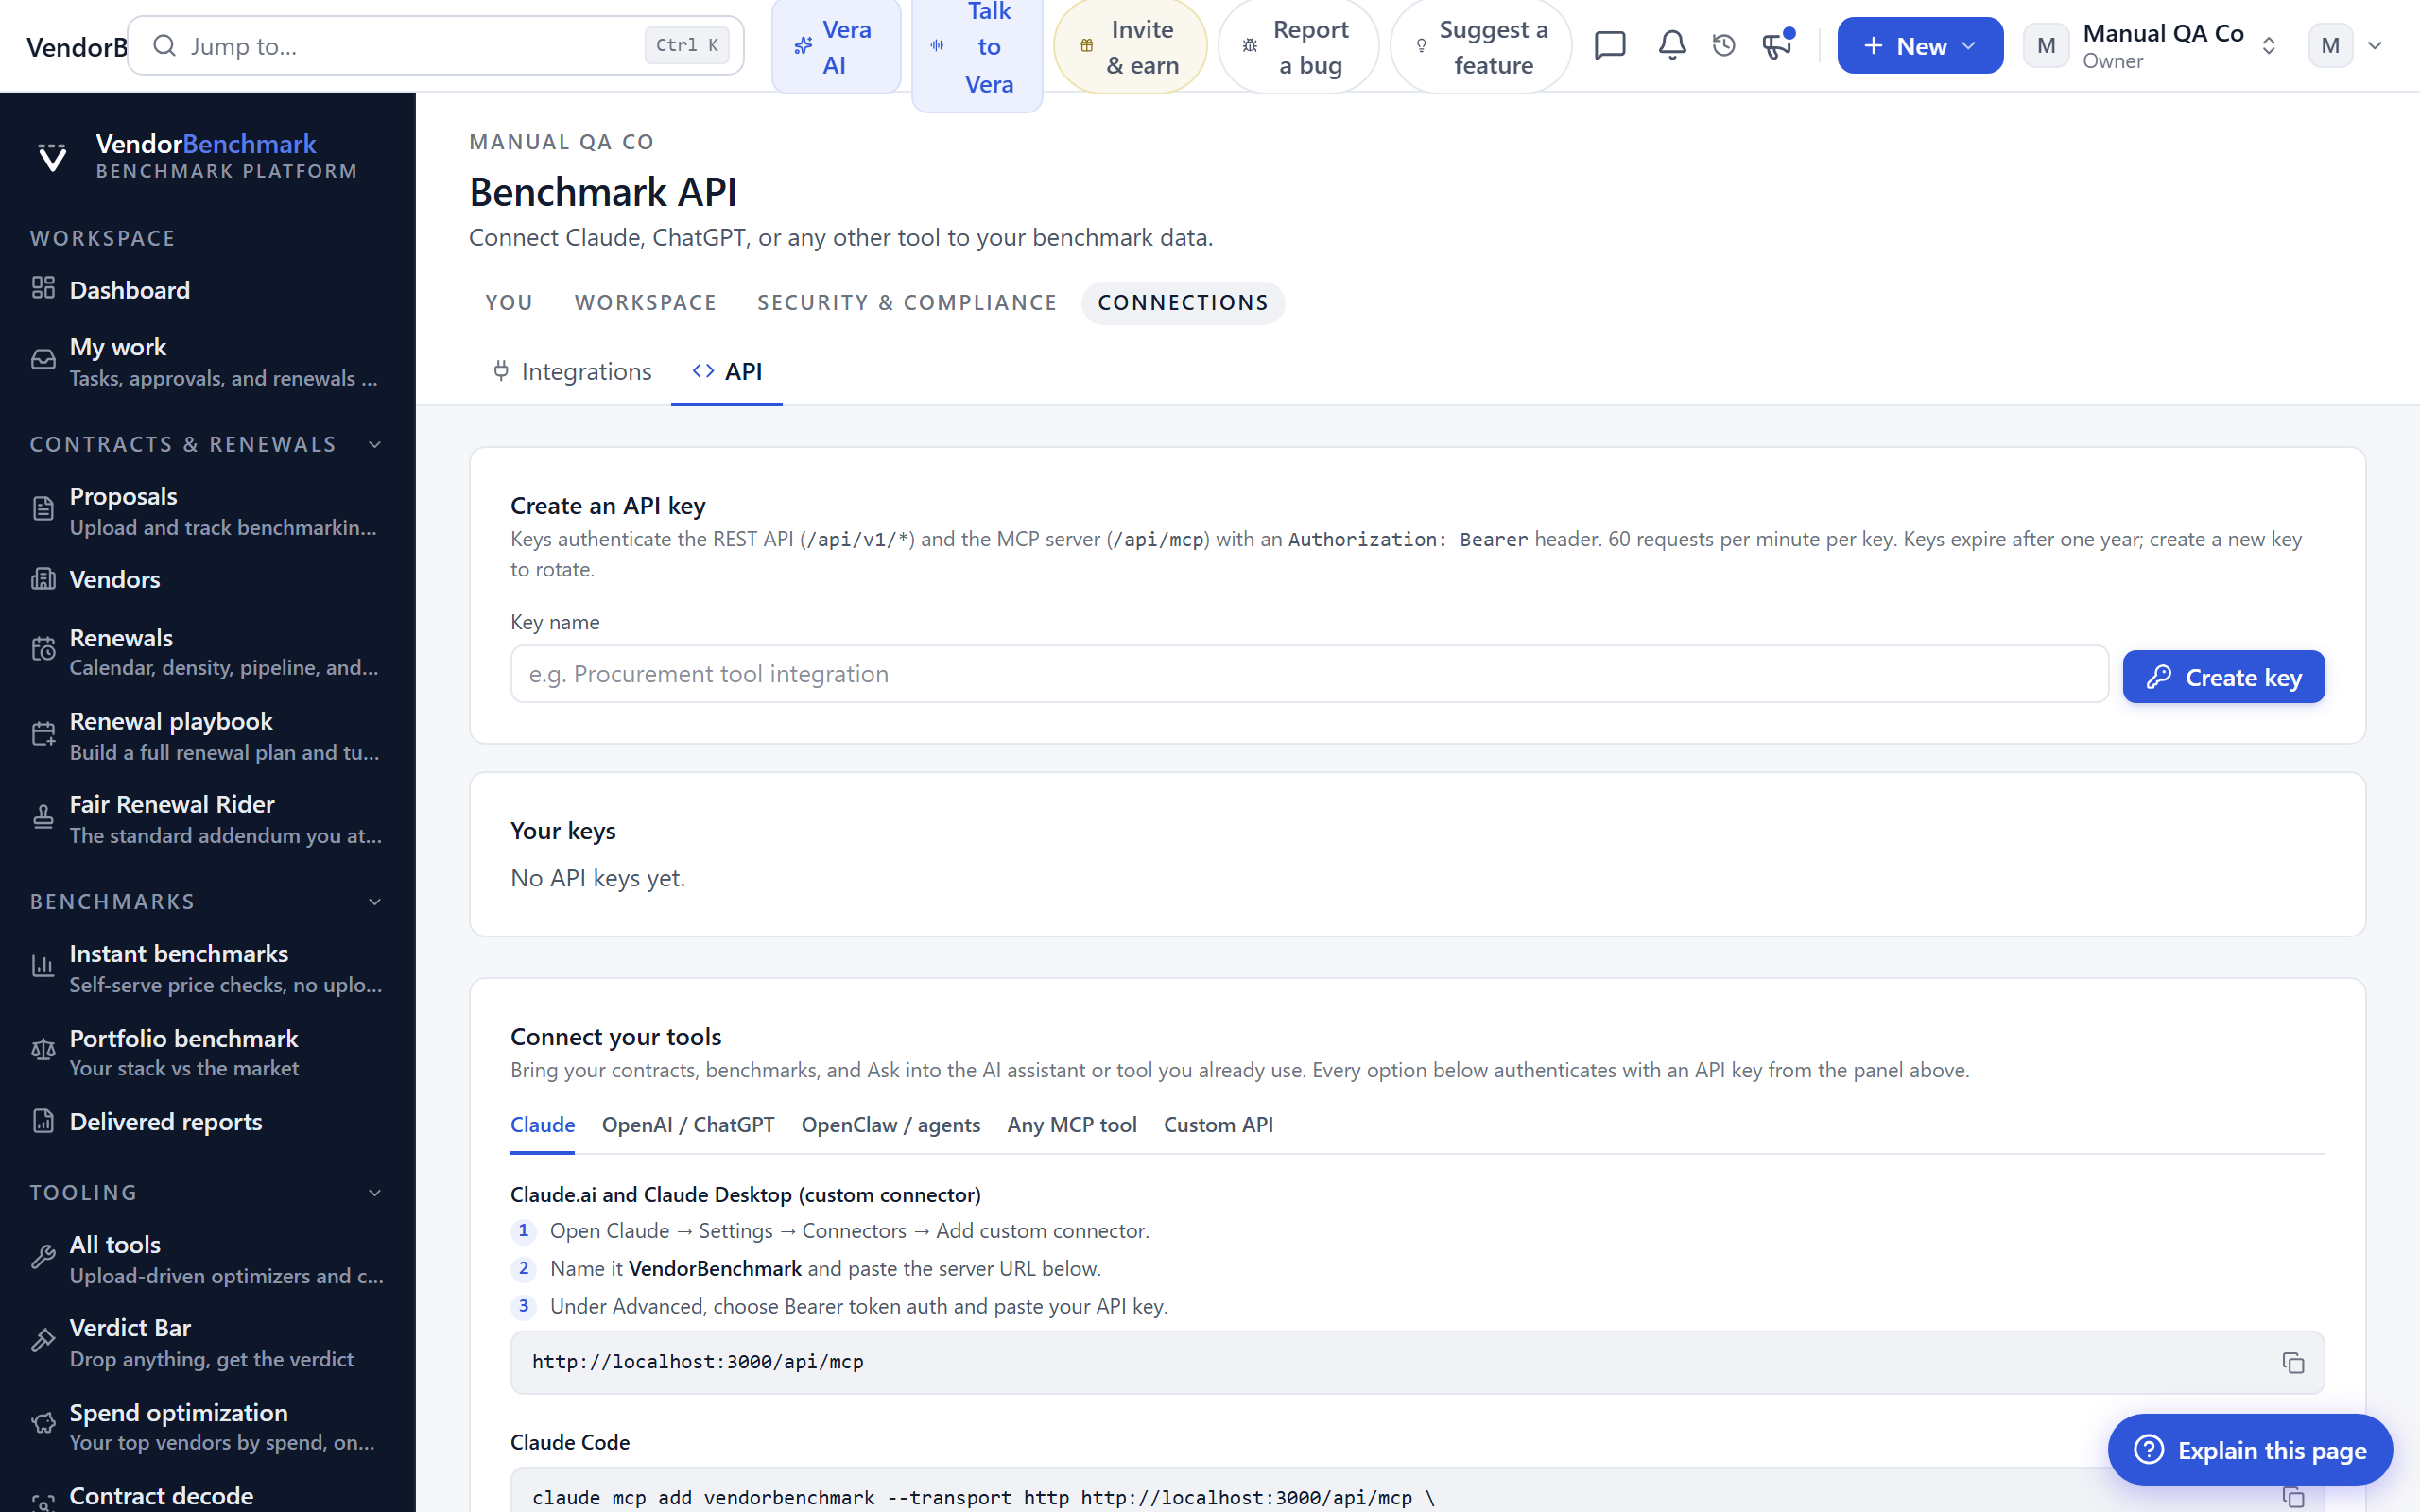
API keys, webhooks, and the MCP connector, so you can connect Claude, ChatGPT, or any other tool to your benchmark data.
On the screen
- API keys — create, view, and revoke keys; keys expire within a year.
- Connect — the base URL and details for connecting an external tool or the MCP connector.
How to use it
- Create an API key and store it securely; you see the full value only once.
- Point your tool or the MCP connector at the connection details shown.
- Revoke any key you no longer use.
Related: Integrations
That covers the settings. When you are not sure where a screen belongs, start from the manual index and follow the chapter that matches the rail group you are looking at.